ViewSonic Pro8200 PRO8200 User Guide (English) - Page 15
Remote Control - settings
 |
UPC - 766907496314
View all ViewSonic Pro8200 manuals
Add to My Manuals
Save this manual to your list of manuals |
Page 15 highlights
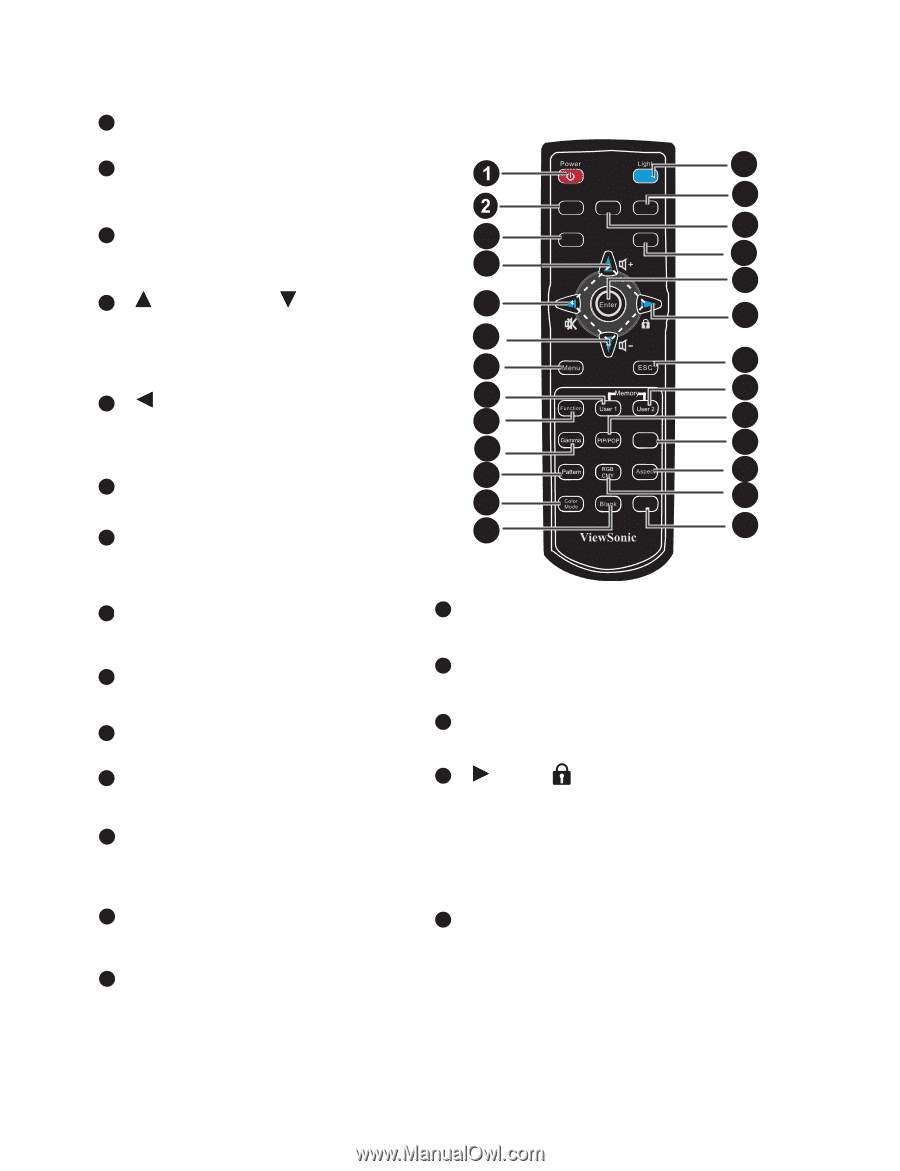
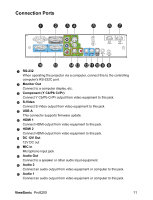
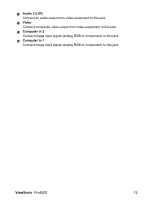
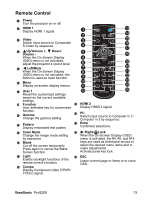
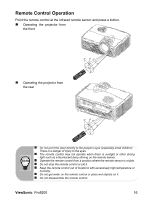
Remote Control 1 Power Turn the projector on or off. 2 HDMI 1 13 Display HDMI 1 signal. 14 HDMI1 HDMI2 Compo 3 Video 3 Video PC 15 Switch input source to Composite/ S-Video by sequence. 4 16 17 4 Up/Volume +, Down/ 5 Volume - When the On-Screen Display 4 (OSD) menu is not activated, adjust the projector's sound level. 6 5 Left/Mute 7 When the On-Screen Display 8 (OSD) menu is not activated, this button is used as mute function. 9 6 Menu 10 Display on-screen display menus. 11 18 19 20 21 Swap 22 23 Default 24 7 User 1 12 25 Recall the customized settings based on the current available settings. 8 Function 15 HDMI 2 User definable key for customized Display HDMI 2 signal. function. 9 Gamma Change the gamma setting. 16 PC Switch input source to Computer in 1/ Computer in 2 by sequence. 10 Pattern Display embedded test pattern. 17 Enter Confirmed selections. 11 Color Mode Change the image mode setting by sequence. 12 Blank Cut off the screen temporarily. Press again to cancel the Blank Screen function. 18 Right/ Lock When the On-Screen Display (OSD) menu is activated, the #4, #5, and #18 keys are used as directional arrows to select the desired menu items and to make adjustments. Activate panel key lock. 13 Light Enable backlight functions of the remote control's buttons. 19 ESC Leave current page or items or to close OSD. 14 Compo Display Component video (YPbPr/ YCbCr) signal. ViewSonic Pro8200 13
-
 1
1 -
2
-
3
-
4
-
5
-
6
-
7
-
8
-
9
-
 10
10 -
 11
11 -
 12
12 -
 13
13 -
 14
14 -
 15
15 -
 16
16 -
 17
17 -
 18
18 -
 19
19 -
 20
20 -
21
-
22
-
23
-
24
-
25
-
26
-
27
-
28
-
29
-
30
-
31
-
32
-
33
-
34
-
35
-
36
-
37
-
38
-
39
-
40
-
41
-
42
-
43
-
44
-
45
-
46
-
47
-
48
-
49
-
50
-
51
-
52
 |
 |