ViewSonic VT3745 VT3245, VT3745, VT4245 User Guide NT (Taiwan) Region (English - Page 13
Getting started
 |
UPC - 766907371819
View all ViewSonic VT3745 manuals
Add to My Manuals
Save this manual to your list of manuals |
Page 13 highlights
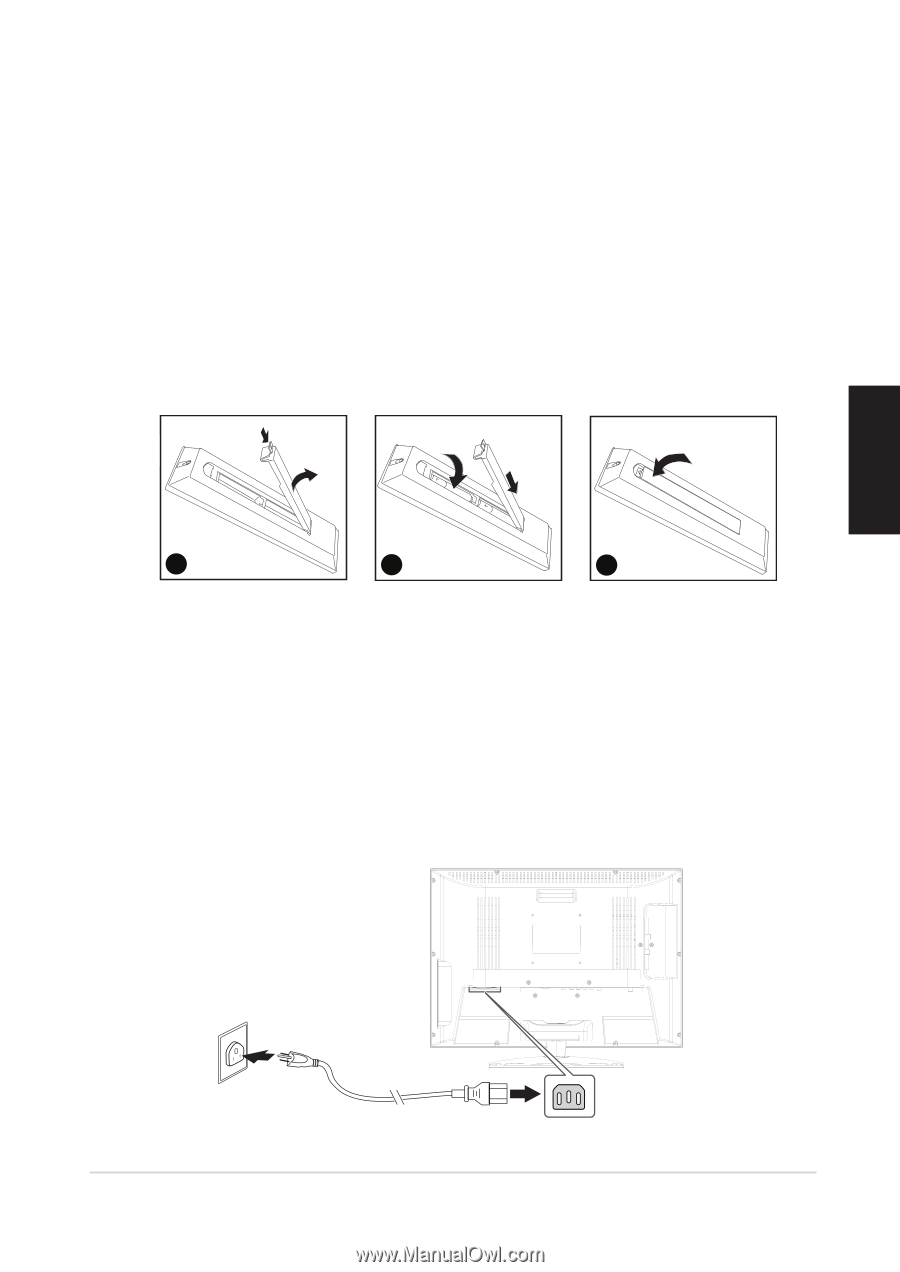
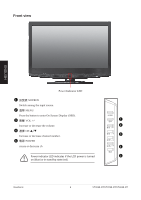
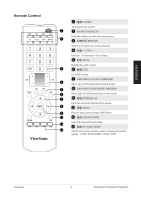
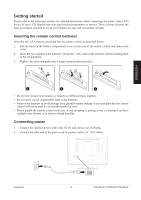
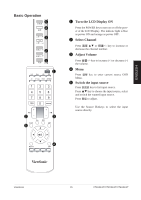
ENGLISH Getting started Please refer to the following sections for detailed instructions about connecting the audio/ video (AV) device of your LCD Display and view your favorite programmes or movies .These sections describe the basic procedures required to set up your Display for easy and convenient viewing. Inserting the remote control batteries Insert the two AAA batteries provided into the remote control as described below: 1. Pull the latch on the battery compartment cover on the rear of the remote control and remove the cover. 2. Insert the two supplied AAA batteries .Check the + and - ends of the batteries before inserting them in the compartment. 3. Replace the cover and make sure it snaps securely back into place. (A) (B) (A) (B) 1 2 3 • Do not mix old and new batteries or batteries of different types together. • Do not short -circuit ,disassemble ,heat or fire batteries. • Remove the batteries to avoid damage from possible battery leakage if you anticipate that the remote control will not be used for an extended period of time. • Please handle the remote control with care. Avoid dropping it ,getting it wet ,or placing it in direct sunlight, near a heater or in an area of high humidity. Connecting power 1. Connect the supplied power cord to the AC IN jack on the rear of Display. 2. Connect the other end of the power cord to a power outlet.(AC 110V 60Hz). ViewSonic 11 VT3245-NT/VT3745-NT/VT4245-NT
-
 1
1 -
2
-
3
-
4
-
5
-
6
-
7
-
 8
8 -
 9
9 -
 10
10 -
 11
11 -
 12
12 -
 13
13 -
 14
14 -
 15
15 -
 16
16 -
 17
17 -
 18
18 -
19
-
20
-
21
-
22
-
23
-
24
-
25
-
26
-
27
-
28
-
29
-
30
-
31
-
32
-
33
-
34
 |
 |