ViewSonic WUSB100 User Guide - Page 7
Installation - software
 |
View all ViewSonic WUSB100 manuals
Add to My Manuals
Save this manual to your list of manuals |
Page 7 highlights
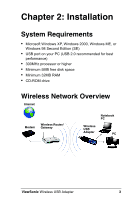
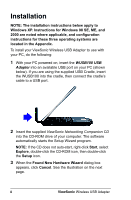
Installation NOTE: The installation instructions below apply to Windows XP. Instructions for Windows 98 SE, ME, and 2000 are noted where applicable, and configuration instructions for these three operating systems are located in the Appendix. To install your ViewSonic Wireless USB Adapter to use with your PC, do the following: 1 With your PC powered on, insert the WUSB100 USB Adapter into an available USB port on your PC (shown below). If you are using the supplied USB Cradle, insert the WUSB100 into the cradle, then connect the cradle's cable to a USB port. 2 Insert the supplied ViewSonic Networking Companion CD into the CD-ROM drive of your computer. The software automatically starts the Setup Wizard program. NOTE: If the CD does not auto-start, right-click Start, select Explore, double-click the CD-ROM icon, then double-click the Setup icon. 3 When the Found New Hardware Wizard dialog box appears, click Cancel. See the illustration on the next page. 4 ViewSonic Wireless USB Adapter
-
 1
1 -
 2
2 -
 3
3 -
 4
4 -
 5
5 -
 6
6 -
 7
7 -
 8
8 -
 9
9 -
 10
10 -
 11
11 -
 12
12 -
13
-
14
-
15
-
16
-
17
-
18
-
19
-
20
-
21
-
22
-
23
-
24
-
25
-
26
-
27
-
28
 |
 |
