Viking 18" Fully Integrated All Freezer with Custom Panel Installation Instruc - Page 19
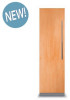
Flush Mount Side Trim
 |
View all Viking 18" Fully Integrated All Freezer with Custom Panel manuals
Add to My Manuals
Save this manual to your list of manuals |
Page 19 highlights
Flush Mount Side Trim After the unit has been placed in the cutout, leveled and all connections completed, the unit will need to be fastened to the cabinetry. Open the door. Using the flat wood screws, fasten the unit to the cabinetry on both sides. NOTE: Only use the screws provided and use caution when installing the fastening screws to prevent scratching the frame. Use a 3" Phillips driver to prevent damage. Flat wood screws Door Panel Adjustments On the side of each panel, at the top and bottom there is a vertical slot with a cam spacer for front to back adjustments. In the center, there is a horizontal adjustment for up and down. All hardware needs to be loosened before adjusting. Push decorative magnetic trim into affixed side trim on both sides of unit until the trim is all the way in and stops. Close the door. Vertical slot for front to back adjustment Horizontal slot for up and down adjustment 19
-
 1
1 -
2
-
3
-
4
-
5
-
6
-
7
-
8
-
9
-
10
-
11
-
12
-
13
-
 14
14 -
 15
15 -
 16
16 -
 17
17 -
 18
18 -
 19
19 -
 20
20 -
 21
21 -
 22
22 -
 23
23 -
 24
24
 |
 |
