Viking DFWB300R Installation Instructions - Page 11
Custom Wood Facings Dimensions, Door Panel Installation - Full Overlay Model
 |
View all Viking DFWB300R manuals
Add to My Manuals
Save this manual to your list of manuals |
Page 11 highlights
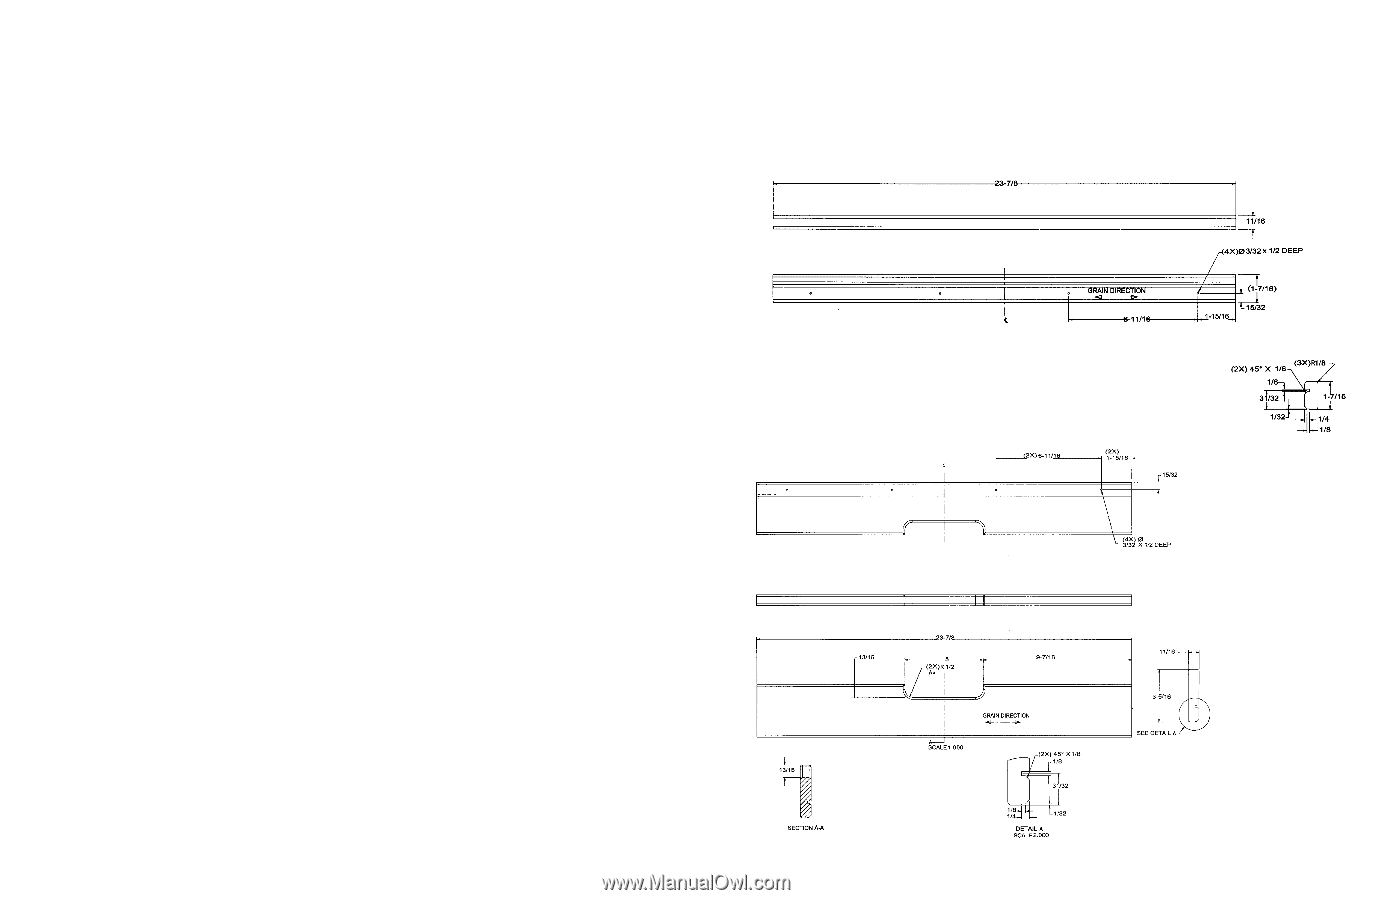
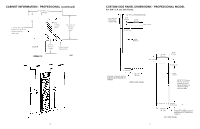
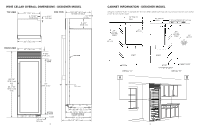
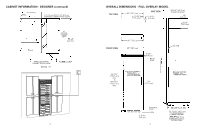
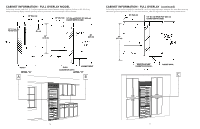
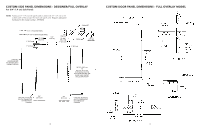
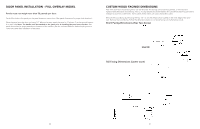
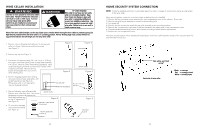
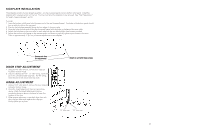
DOOR PANEL INSTALLATION - FULL OVERLAY MODEL Panels must not weigh more than 50 pounds per door. Pre-drill the holes in the panel per the panel dimension instructions. (See panel dimensions for proper hole locations.) Place the panel onto the door and using 1/2" #8 wood screws, attach the panel in 12 places. (2 at the top and bottom, 4 on each side) Note: The handle must be attached to the panel prior to installing the panel onto the door. See panel dimensions for proper attachment locations of the handles.) Use the enclosed adhesive backed mylar pieces to cover the screws after installation of the panel. CUSTOM WOOD FACINGS DIMENSIONS Each wine rack has a wood facing which can be removed. The facings can be stained, painted, or removed and replaced with alternative wood facings. NOTE: A scrap sample should be tested in the unit before attaching permanent changes to your wine cellar fronts. Some paints and/or stains can cause undesirable odors. Remove the wood facing by removing the four 1/4" (.6 cm) hex head screws located on the inner edge of the wine rack. Remove the wood facing. Follow the dimensions below to cut wood facing out of alternative woods. Short Facing Dimensions (Top Two Zones) SCALE 1.000 Tall Facing Dimensions (Lower zone) 20 21
-
 1
1 -
2
-
3
-
4
-
5
-
 6
6 -
 7
7 -
 8
8 -
 9
9 -
 10
10 -
 11
11 -
 12
12 -
 13
13 -
 14
14
 |
 |