Viking PDDP242SS Use and Care Manual - Page 8
Rack Adjustments
 |
View all Viking PDDP242SS manuals
Add to My Manuals
Save this manual to your list of manuals |
Page 8 highlights
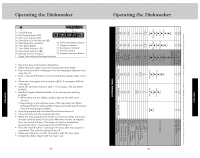
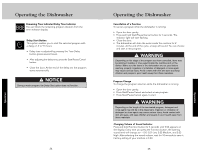
Operation Rack Adjustments Removable Third Rack The removable third rack is designed for small dishes, or long dishes that cannot fit into the cutlery basket. Thanks to the easy take-out feature, it allows removing the dishes from the machine together with the rack after washing operation. Since it can fit into all standard size drawers, there is no need to remove the dishes from the basket and place them separately into the kitchen drawers or shelves. If you don't want to use the removable third rack, pull it back to yourself to remove it from the machine, rotate the rail lids A towards outside and pull them towards yourself to take them out. After taking out the rack by lifting it up, remove the carrier part from the rails by pulling it towards yourself. Replace the rail lids and push them back to seat them into their places. Turn the rails inside the machine outwards B to seat them properly in their places. In order to put the removable third basket back into its place, repeat the same process in reverse order. 14 Rack Adjustments Lower Rack Use the lower rack for plates, bowls, pots, etc. • Fold the shelf upwards A. • Positioning at the desired height B. • Fold the shelf again downwards C. Adjustable Lower Rack Tines The six piece foldable tines (A) located in the lower rack of the machine are designed for an easier placement of large pieces such as pans, bowls, etc. You can create larger spaces by folding each tine individually or all of them at once. To bring the adjustable tines into horizontal position, grab the tines from mid position and push them in the directions of arrows (B) To bring the tines back to vertical position, just lift them up. Adjustable tines will click into the latch again. 3 4 5 6 NOTICE Bringing the tines to the horizontal position by holding them from the tips may cause them to bend. Therefore, adjust the tines by holding them by their stems and pushing in the direction of arrow. NOTICE When finished, test to ensure that the spray arm can still move freely. 15 Operation
-
 1
1 -
2
-
 3
3 -
 4
4 -
 5
5 -
 6
6 -
 7
7 -
 8
8 -
 9
9 -
 10
10 -
 11
11 -
 12
12 -
 13
13 -
14
-
15
-
16
-
17
-
18
-
19
-
20
-
21
-
22
-
23
-
24
 |
 |
