Viking RDMOR200SS Installation Instructions - Page 8
Viking RDMOR200SS Manual
 |
View all Viking RDMOR200SS manuals
Add to My Manuals
Save this manual to your list of manuals |
Page 8 highlights
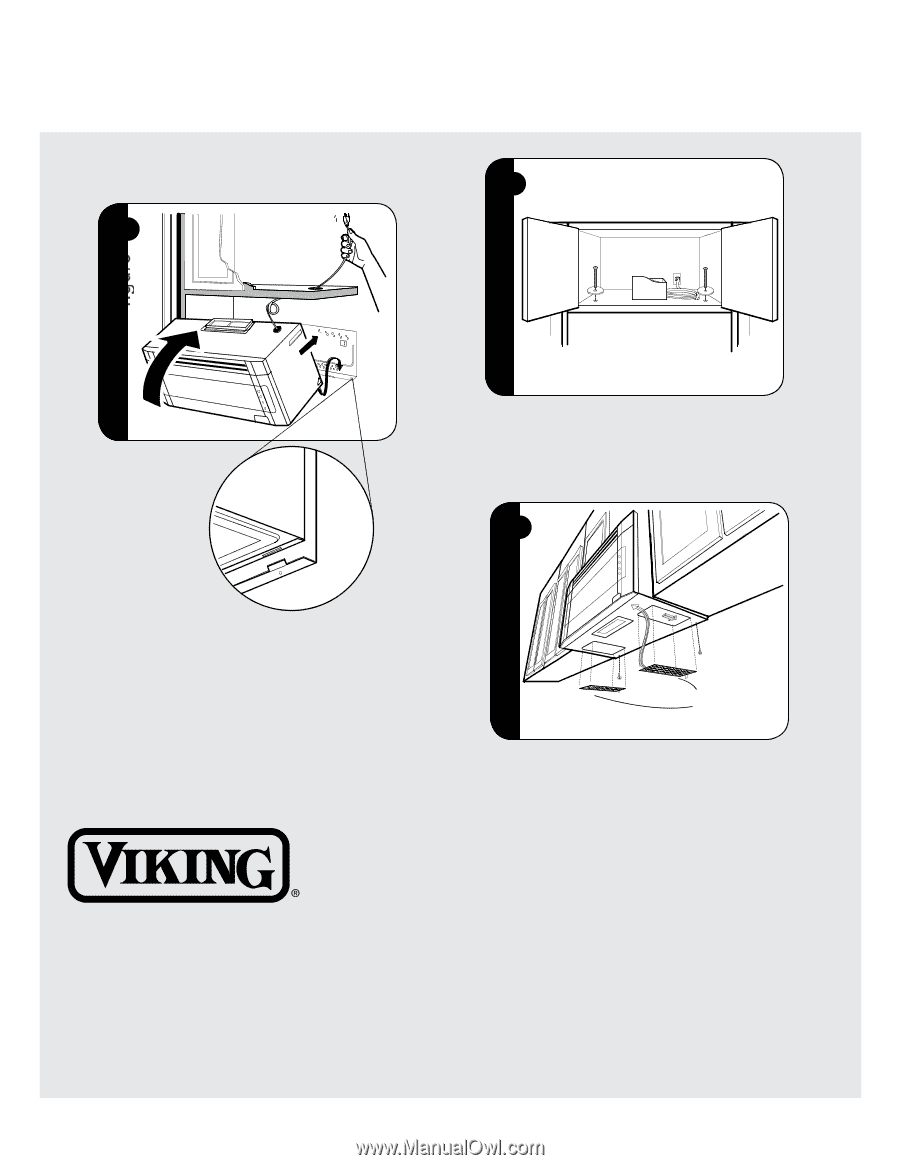
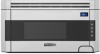
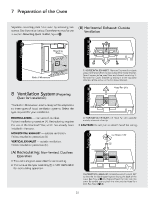
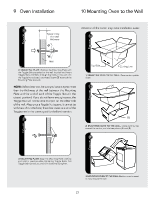
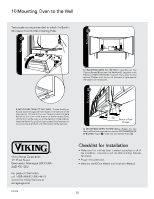
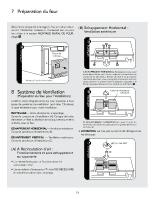
10 Mounting Oven to the Wall Two people are recommended to attach the Built-in Microwave Hood to the Mounting Plate. . figure figure 3 5 5) MOUNTING OVEN TO THE WALL: Use the two Top Cabinet Screws 3 and two Flat Washers 5, supplied in the INSTALLATION HARDWARE, to attach the unit to the top cabinet. Tighten until the top of the oven is right against the bottom of the cabinet. / figure 4) MOUNTING OVEN TO THE WALL: Thread the Power Supply Cord through the hole made in the bottom of the top cabinet. Lift and tilt the oven forward. Hook the back bottom of the oven to the bottom of the Mounting Plate. Lift the front of the oven up to the bottom of the cabinet. Keep the Power Supply Cord tight to avoid interference with mounting the oven flush with the bottom of the cabinet. 9 Bottom Plate Screws 6) MOUNTING OVEN TO THE WALL : Attach the two Bottom Plate Screws saved from section PREPARATION OF THE OVEN, Figure 4. Install the two Grease Filters 9. Checklist for Installation Viking Range Corporation 111 Front Street Greenwood, Mississippi 38930 USA (662) 455-1200 For product information, call 1-888-VIKING1 (845-4641) or visit the Viking Web site at vikingrange.com F20628 • Make sure the unit has been installed according to all of the Installation Instructions and the Wall and Top Cabinet Templates. • Plug in the power cord. • Keep the Use & Care Manual and Installation Manual. E8
-
 1
1 -
2
-
 3
3 -
 4
4 -
 5
5 -
 6
6 -
 7
7 -
 8
8 -
 9
9 -
 10
10 -
 11
11 -
 12
12 -
 13
13 -
14
-
15
-
16
-
17
-
18
-
19
-
20
-
21
-
22
-
23
-
24
 |
 |