Vizio D50f-F1 User Manual
Vizio D50f-F1 Manual
 |
View all Vizio D50f-F1 manuals
Add to My Manuals
Save this manual to your list of manuals |
Vizio D50f-F1 manual content summary:
- Vizio D50f-F1 | User Manual - Page 1
VIZIO USER MANUAL Model D32f-E1, D39f-E1, D43f-E1, D43f-E2, D48f-E0, D50f-E1, D55f-E0, & D55f-E2 - Vizio D50f-F1 | User Manual - Page 2
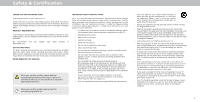
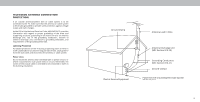
service plan, visit www.VIZIO.com. WHEN READING THIS MANUAL When you see this symbol, please read the accompanying important warning or notice. It is intended to alert you to the presence of important operating instructions. IMPORTANT SAFETY INSTRUCTIONS electrician for replacement of the obsolete - Vizio D50f-F1 | User Manual - Page 3
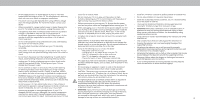
power cord must be replaced when using different voltage product. • Store the accessories remote, batteries, etc. in a frays. the television set to a suitable support. other voltage than the specified voltage may any servicing other than that contained in the operating instructions unless you - Vizio D50f-F1 | User Manual - Page 4
, provides information with regard to proper grounding of the mast and supporting structure, grounding of the lead-in wire to an antenna discharge unit , the screen of the coaxial cable is intended to be connected to earth in the building installation. Ground Clamp lectric Service quipment Antenna - Vizio D50f-F1 | User Manual - Page 5
or DTS patents, see http patents.dts.com. Manufactured under license from DTS icensing imited. DTS, the Symbol, DTS and the Symbol together are registered trademarks, and DTS Studio Sound is a trademark of DTS, Inc. DTS, Inc. All ights eserved. Manufactured under license from Dolby Laboratories. - Vizio D50f-F1 | User Manual - Page 6
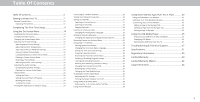
Remote Control Front 10 Replacing the Batteries 10 Completing The First-Time Setup 11 Using the On-Screen Menu 14 Navigating the On-Screen Menu 14 Changing the Input Source 14 Changing the Screen the Info Window 39 Using VIZIO Internet Apps Plus® (V.I.A. Troubleshooting & Technical Support 47 - Vizio D50f-F1 | User Manual - Page 7
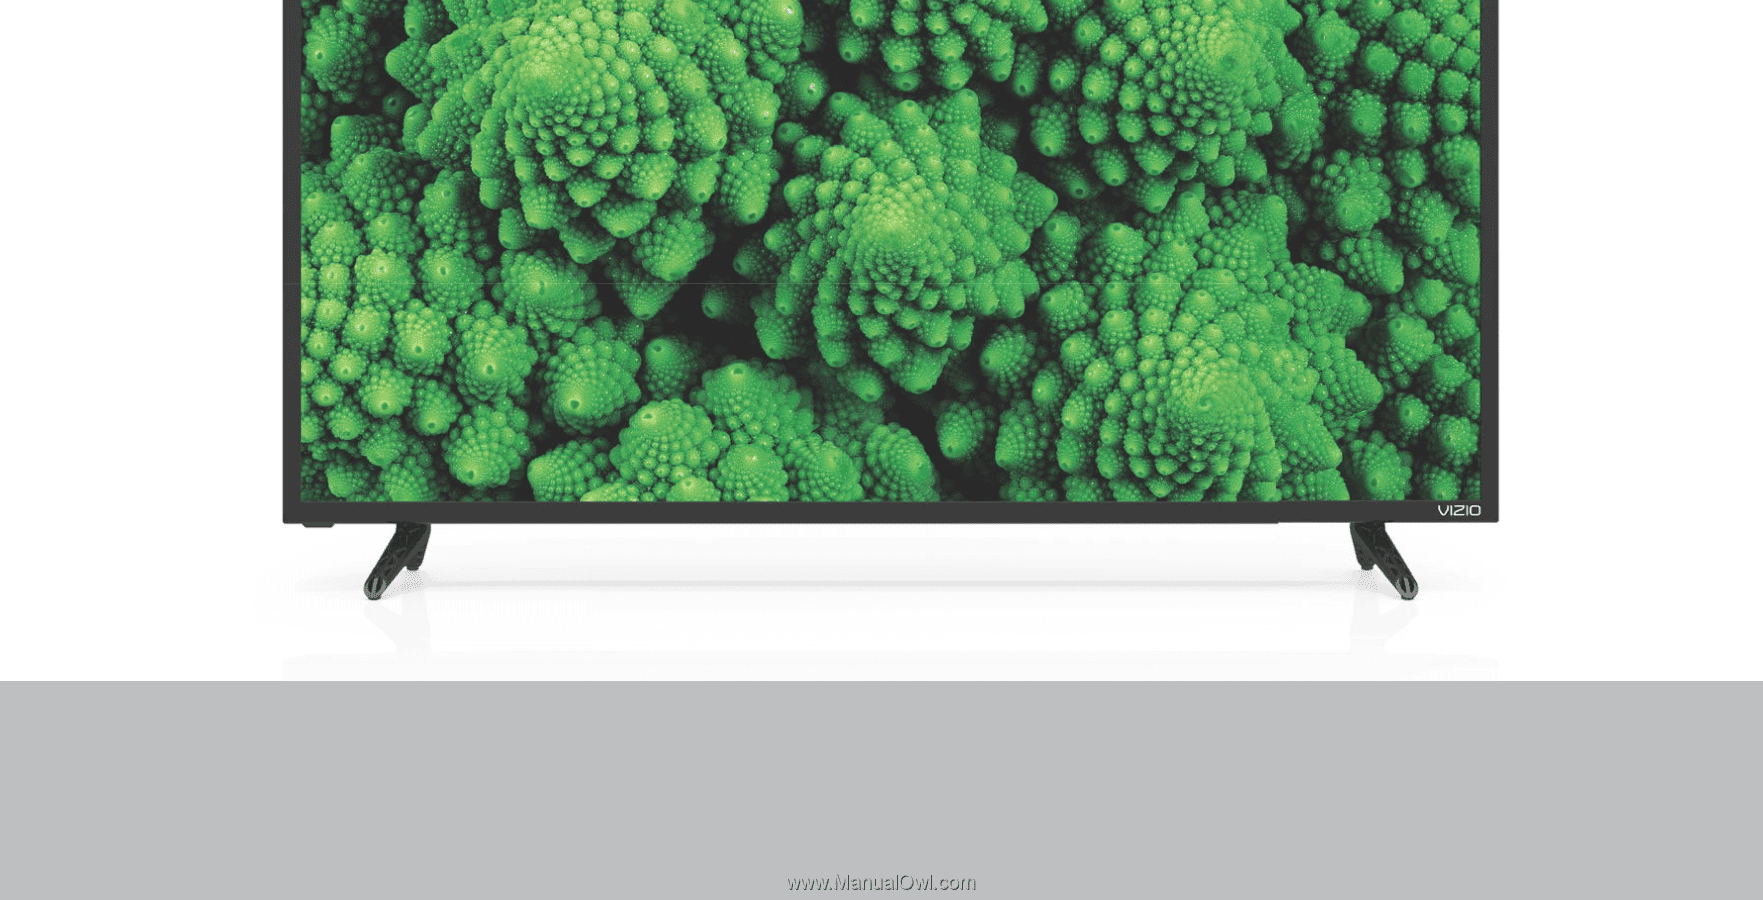
Getting to Know Your TV 1 REMOTE SENSOR & POWER INDICATOR When using the remote, aim it directly at this sensor. The power indicator ashes on when the TV turns on, then goes out after several seconds. To keep the - Vizio D50f-F1 | User Manual - Page 8
is for illustrative purposes only and may be sub ect to change. The actual number of ports and their locations may vary, depending on the model. 1 Ethernet - Connect an Ethernet cable to modem/ router. Coaxial - onnect a coaxial cable from cable, satellite, or antenna. Optical Audio Out - onnect an - Vizio D50f-F1 | User Manual - Page 9
sure the mount you choose is capable of supporting the weight of the TV. After you have wall mount to the wall, carefully following the instructions that came with your mount. Use only with lb . kg D48f-E0 M6 x L18 mm V x mm H 25.57 lb . kg D50f-E1 M6 mm V x mm H 26.68 lb . kg D55f-E0 M6 x L18 mm - Vizio D50f-F1 | User Manual - Page 10
10. Back - o to the previous on-screen menu. 11. Guide - Display the info window. 12. Volume viewed channel. 19. Number Pad - Manually enter a channel. 20. Enter - onfirm channel or passcode entered VIZIO recommends replacing the batteries that came with this remote with two, new Duracell 'AAA' alkaline - Vizio D50f-F1 | User Manual - Page 11
The first time you turn on the TV, the Setup App will guide you through each of the steps necessary to get your TV ready for mo en Magasin. Store Demo Home Use Use the Arrow buttons on the remote to highlight Home Use and press OK. To complete the first-time setup: 1 3 2 4 Use the - Vizio D50f-F1 | User Manual - Page 12
E-mail Address, First Name, Last Name, and Zip Code using the on-screen keyboard. Highlight Next and press OK. 9 Use the Arrow buttons on the remote to highlight your TV source and press OK. Use the Arrows buttons on the remote to highlight your TV source and press OK. If the TV Signal - Vizio D50f-F1 | User Manual - Page 13
- Enlarges a section of the screen by approximately 200%. To access the Closed Caption** menu: • Press the Menu button on the remote control. • Use the Arrow for Closed Caption or Video Description to appear in settings menu. VIZIO ACCESSIBILITY Talk Back Speech Rate Zoom Mode Off Normal Off Wide - Vizio D50f-F1 | User Manual - Page 14
screen menu. NAVIGATING THE ON-SCREEN MENU To open the on-screen menu, press the MENU button on the remote. From this menu, you can: • Adjust the Picture settings • Adjust the Audio settings VIZIO Manual System Input User Manual To open the on-screen menu, press the MENU button on the remote - Vizio D50f-F1 | User Manual - Page 15
or sides of the picture so that the picture keeps its original shape. Examples include wide-screen movies and older television programs. To change the screen aspect ratio: 1. Press the WIDE button on the remote. 2. Use the Arrow buttons to highlight the aspect ratio you wish to view and press OK - Vizio D50f-F1 | User Manual - Page 16
Press the MENU button on the remote. The on-screen menu is displayed. 2. Use the Arrow buttons on the remote to highlight Picture and press OK. VIZIO PICTURE Picture Mode Standard Auto Brightness Control Medium Backlight Brightness Contrast Color Tint Sharpness - + 85 -- + 50 - + 50 - - Vizio D50f-F1 | User Manual - Page 17
picture to ensure the image is centered and completely fills the screen. se the Left/Right Arrow buttons to adjust the horizontal PC monitor. VIZIO COLOR TEMPERATURE Cool Normal Computer 3. hen you have finished adjusting the color temperature, press the EXIT button on the remote. Wide Zoom - Vizio D50f-F1 | User Manual - Page 18
then press OK. The SAVE PICTURE MODE menu is displayed. 2. Use either the on-screen keyboard or keyboard on your remote control to enter a name for your custom picture mode. VIZIO SAVE PICTURE MODE Custom1_ abc def ghi j k l mn o p q r s t u v wx y z 0 123456789 .@# .cäoêmí Space 3. Highlight Save - Vizio D50f-F1 | User Manual - Page 19
button. Delete Cancel 2. Use the Left/Right Arrow buttons to highlight Delete and press OK. 3. Press the EXIT button to exit the menu screens. Resetting a Picture Mode A preset picture mode that has been edited can be restored to the factory default settings. To reset a customized preset - Vizio D50f-F1 | User Manual - Page 20
, 11 Point White Balance, and test patterns allow technicians to manually calibrate the TV. Calibration requires specialized training, an input with White Balance Red Green 0 0 Blue 0 2. Use the Arrow buttons on the remote to highlight the Gain and Color values you wish to adjust. Press the OK - Vizio D50f-F1 | User Manual - Page 21
is displayed. Ramp Test Pattern Off 2. Use the Arrow buttons on the remote to highlight . Use the Left/Right Arrow buttons to highlight On to show are finished, press the EXIT button. 2. Use the Arrow buttons on the remote to highlight . Use the Left/Right Arrow buttons to select the color for - Vizio D50f-F1 | User Manual - Page 22
to re ect the mode. 5. Press the EXIT button on the remote. To create, modify, or replace the single custom equalizer setting: 1. Press the MENU button on the remote. The on-screen menu is displayed. 2. Use the Arrow buttons on the remote to highlight Audio and press OK. The AUDIO menu is displayed - Vizio D50f-F1 | User Manual - Page 23
Custom Audio Mode To delete the custom audio mode that has been created: 1. Press the MENU button on the remote. The on-screen menu is displayed. 2. Use the Arrow buttons on the remote to highlight Audio and press OK. The AUDIO menu is displayed. 3. Use the Arrow buttons to highlight Delete Audio - Vizio D50f-F1 | User Manual - Page 24
of time. 1. Press the MENU button on the remote. The on-screen menu is displayed. 2. Use the Arrow buttons on the remote to highlight Timers and press OK. The TIMERS menu is displayed. VIZIO TIMERS Timer Auto Power Off Screen Saver Blank Screen Off 10 minutes Off 3. Use the Left/Right Arrow - Vizio D50f-F1 | User Manual - Page 25
the MENU button on the remote. The on-screen menu is displayed. 2. Use the Arrow buttons on the remote to highlight Network and press remote. VIZIO NETWORK Wired Connection Disconnected Wireless Access Points More Access Points WPS Manual Setup Hidden Network Test Connection Changing the Manual - Vizio D50f-F1 | User Manual - Page 26
, enter your network's name (SSID), then highlight Connect and press OK 3. Using the on-screen keyboard, enter your network's password, then highlight Connect and press OK. 4. Press the EXIT button on the remote. VIZIO ENTER ACCESS POINT NAME Enter your access point name. This is used to connect to - Vizio D50f-F1 | User Manual - Page 27
auto channel scan begins. 2. NeWtwaoirtk uSnetttiilngths e cHhelapnnel scan is complete. Highlight Done and press OK. 3. Press the EXIT button on the remote. VIZIO FIND CHANNELS Channels Found Digital: 0 Analog: 19 18% Complete Cancel If the channel scan is canceled, the channels that were already - Vizio D50f-F1 | User Manual - Page 28
channel you select. 3. When you have selected all of the channels you wish to remove, press the EXIT button on the remote. VIZIO SKIP CHANNEL 1 Test 0 1-1 Test 1 P 1-2 Test 2 P 2 Test 3 2-2 Test 4 P 2-3 Test 5 Wide Zoom Normal Panoramic Exit 2D 3D ABC Input Wide CC Sleep - Vizio D50f-F1 | User Manual - Page 29
Spanish/Video Description or French. Press OK. 3. Press the EXIT button on the remote. To use the Analog Audio feature: 1. From the CHANNELS menu, highlight Analog OK. 3. Press the EXIT button on the remote. VIZIO ANALOG AUDIO Stereo SAP Mono Wide Zoom Normal Panoramic Exit 2D 3D ABC Input - Vizio D50f-F1 | User Manual - Page 30
remote. The on-screen menu is displayed. 2. Use the Arrow buttons on the remote to highlight Closed Captions and press OK. The CLOSED CAPTIONS menu is displayed. VIZIO Choose As Broadcast to keep default settAinBCgs or Custom to manually change each Window Opacity Input settWinidge. CC • Text - Vizio D50f-F1 | User Manual - Page 31
example below, the closed caption text is green, the background is black, and the window is red. Text Background OS D A TIO T T SAM Window CLOSED CAPTIONS SCREEN LAYOUT 31 - Vizio D50f-F1 | User Manual - Page 32
1. Press the MENU button on the remote. The on-screen menu is displayed. 2. Use the Arrow buttons on the remote to highlight Devices and press OK. hen you have finished naming your input, press the EXIT button on the remote. Input Port VIZIO NAME INPUT HDMI-1 DVD DVD_ abc def ghi j k l mn o - Vizio D50f-F1 | User Manual - Page 33
menu in different languages. To change the on-screen menu language: 1. Press the MENU button on the remote. The on-screen menu is displayed. 2. Use the Arrow buttons on the remote to highlight System and press OK. The SYSTEM menu is displayed. VIZIO MENU LANGUAGE English Español Français 3. Use - Vizio D50f-F1 | User Manual - Page 34
button, set the TV's time zone: 1. Press the MENU button on the remote. The on-screen menu is displayed. 2. Use the Arrow buttons on the remote to highlight System and press OK. The SYSTEM menu is displayed. VIZIO June 11, 2015 11:48AM Time Zone Pacific (-8) Daylight Savings Time Auto Zip - Vizio D50f-F1 | User Manual - Page 35
block or unblock, use the Up/Down and Left/Right Arrow buttons on the remote to highlight the rating type and press OK. 3. When the rating type is save it in a secure location. 5. Press the EXIT button on the remote. Resetting the Content Locks To reset the content locks to the factory-default - Vizio D50f-F1 | User Manual - Page 36
. To change the view mode settings: 1. Press the MENU button on the remote. The on-screen menu is displayed. 2. Use the Arrow buttons on the remote to highlight System and press OK. The SYSTEM menu is displayed. VIZIO VIEW MODE Viewport Overlay Centered Overlay 3. Use the Arrow buttons on the - Vizio D50f-F1 | User Manual - Page 37
included remote, without any programming. Using CEC, your VIZIO TV remote can control: • ower On Off • Volume • Mute Not all HDMI devices support CEC 1. Press the MENU button on the remote. The on-screen menu is displayed. 2. Use the Arrow buttons on the remote to highlight System and press OK. The - Vizio D50f-F1 | User Manual - Page 38
menu. If you have trouble enabling or disabling Viewing Data, please contact VIZIO customer service by emailing [email protected] or calling -. For more information, see https://www.vizio.com/viewingdata and review VIZIO's privacy policy at https://www.vizio.com/privacy Network Settings Help - Vizio D50f-F1 | User Manual - Page 39
INFO WINDOW The Info Window can be displayed by pressing the INFO or GUIDE button on the remote: • Press the INFO or GUIDE button one time to display channel, input, and display information. • Press the INFO or GUIDE button two times to display the program title, program rating, audio information - Vizio D50f-F1 | User Manual - Page 40
Internet Apps Plus® (V.I.A. Plus) 3 VIZIO Internet Apps Plus® (V.I.A. Plus) delivers popular online content to remote launch the apps pictured on the buttons. Pressing the App Launcher Key will also turn the TV on if it is off . The specific apps on the App Launcher keys vary from model to model - Vizio D50f-F1 | User Manual - Page 41
launch the App. 4. To exit from an open App or to close the App Dock, press the Exit button on the remote. My Apps Tab Displays the apps installed on your TV. Installed Apps The Apps displayed here are also available in the V.I.A. Plus App Dock. Note: - Vizio D50f-F1 | User Manual - Page 42
FULLSCREEN V.I.A. PLUS WINDOW OVERVIEW The Fullscreen V.I.A. Plus Window allows you to add, delete and organize your Apps. The My Apps tab displays Apps that are already installed on your TV. The Apps on the first page are displayed in the V.I.A. Plus Dock. Apps with a small lock icon in the right- - Vizio D50f-F1 | User Manual - Page 43
Apps Tab To delete an app from your TV: 1. Use the Arrow buttons on the remote to highlight the App you wish to delete. 2. Press and hold the OK button. To move the Apps on your My Apps tab: 1. Use the Arrow buttons on the remote to highlight the app you wish to move. 2. Press and hold the OK button. - Vizio D50f-F1 | User Manual - Page 44
1. Use the Arrow buttons to move the app to the desired location and press OK to place the app. When you can move the app, it appears as shown below. Note: App location, appearance, and availability subject to change without notice. Cursor showing the location that the app will move to 3 44 - Vizio D50f-F1 | User Manual - Page 45
thumb drive • The S thumb drive must be formatted as AT . • iles on the S thumb drive must end in a supported file extension . pg or . peg . • The player is not designed to play media from external hard drives, M players, number of ports and their locations may vary, depending on the model. 45 - Vizio D50f-F1 | User Manual - Page 46
to the previous screen. Back Button Highlight and press OK to return to left column. Current Folder Displays the folder path. VIZIO Photo USB1: S thumb drive has more files than can be displayed on a single screen, the page information is displayed here. Folder Contents This area displays the - Vizio D50f-F1 | User Manual - Page 47
Troubleshooting & Technical Support Do You Have Questions? Find Answers At SUPPORT.VIZIO.COM Find help with: • New Product Setup • Connecting Your Devices • Technical Problems • Product Updates • And More Live Chat Support Available You can also contact our award-winning support team at: Phone: (877 - Vizio D50f-F1 | User Manual - Page 48
A Take A Moment To Register Your Product At VIZIO.COM/PRODUCT-REGISTRATION Why Register? Customized Support Get assistance quickly with your information on-hand. News & Offers Take advantage of the latest news and special offers from VIZIO. Safety & Satisfaction Stay up to date with important - Vizio D50f-F1 | User Manual - Page 49
Settings. VIZIO recommends selecting Calibrated. • Check all cables to ensure they are securely attached. The buttons on the remote aren't working. • Ensure you are only pressing one button at a time. • Point the remote directly at the TV when pressing a button. • Replace the remote batteries with - Vizio D50f-F1 | User Manual - Page 50
I see "noise" or static on the screen. • When your TV's digital capabilities exceed a digital broadcast signal, the signal is up-converted (improved) to match your TV's from the one on the input source you switch from, the difference may be noticeable. • See Changing the Screen Aspect Ratio.. A 50 - Vizio D50f-F1 | User Manual - Page 51
ie i A e D I I uts o o e t ideo I uts o osite I uts A te a I ut S ort ther et ort Audio ut uts SD a ua e A ie t i ht Se sor D32f-E1 32" 31.50" 28.77" x 18.83" x 7.87" (73.06 x 47.83 x 20 cm) 28.77" x 16.96" x 2.99" (73.06 x 43.08 x 7.6 cm) 11.68 lbs (5.3 kg - Vizio D50f-F1 | User Manual - Page 52
Scree Si e ie a e Area Di e sio s Sta d o Sta d Wei ht Sta d o Sta d D ac i ht efresh ate a i u eso utio D a ic o trast atio i e itch ie i A e D I I uts o o e t ideo I uts o osite I uts A te a I ut S ort ther et ort Audio ut uts SD a ua e A ie t i ht Se sor D39f-E1 39" 38.5" 34.96" x 22.48" x 8.27" - Vizio D50f-F1 | User Manual - Page 53
ie i A e D I I uts o o e t ideo I uts o osite I uts A te a I ut S ort ther et ort Audio ut uts SD a ua e A ie t i ht Se sor D43f-E1 43" 42.50" 38.44" x 24.59" x 8.27" (97.65 x 62.47 x 21.0 cm) 38.44" x 22.43" x 3.03" (97.65 x 56.97 x 7.7 cm) 20.17 lbs (9.15 - Vizio D50f-F1 | User Manual - Page 54
Scree Si e ie a e Area Di e sio s Sta d o Sta d Wei ht Sta d o Sta d D ac i ht efresh ate a i u eso utio D a ic o trast atio i e itch ie i A e D I I uts o o e t ideo I uts o osite I uts A te a I ut S ort ther et ort Audio ut uts SD a ua e A ie t i ht Se sor D43f-E2 43" 42.51" 38.39" x 24.54" x 8.23 - Vizio D50f-F1 | User Manual - Page 55
Scree Si e ie a e Area Di e sio s Sta d o Sta d Wei ht Sta d o Sta d D ac i ht efresh ate a i u eso utio D a ic o trast atio i e itch ie i A e D I I uts o o e t ideo I uts o osite I uts A te a I ut S ort ther et ort Audio ut uts SD a ua e A ie t i ht Se sor D48f-E0 48" 47.6" 42.83" x 27.22" x 10.59 - Vizio D50f-F1 | User Manual - Page 56
uts A te a I ut S ort ther et ort Audio ut uts SD a ua e A ie t i ht Se sor D50f-E1 50" 49.5" 44.40" x 27.97" x 10.04" (112.78 x 71.04 x 25.5 cm) 44.40" x 25 su tio Sta d o er ero ri ht i e uara tee Scre Si e o e atter D50f-E1 XRT122 C-US, CSA, FCC Class B, BETS-7/ICES-003 Class B, IC, HDMI (CEC, - Vizio D50f-F1 | User Manual - Page 57
" (124.4 x 77.95 x 26.91 cm) 48.98" x 28.30" x 2.91" (124.4 x 71.89 x 7.4 cm) 32.85 lbs (14.90 kg) 31.97 lbs (14.50 kg) Direct LED 60 Hz 1920 x 1080 (1080p) 200,000:1 0.21 mm (H) X 0.63 mm (V) 178° (H) / 178° (V) 3 1 1 (Shared with Component) 1 1 1 RCA Analog Stereo Output, Optical Digital - Vizio D50f-F1 | User Manual - Page 58
Scree Si e ie a e Area Di e sio s Sta d o Sta d Wei ht Sta d o Sta d D ac i ht efresh ate a i u eso utio D a ic o trast atio i e itch ie i A e D I I uts o o e t ideo I uts o osite I uts A te a I ut S ort ther et ort Audio ut uts SD a ua e A ie t i ht Se sor D55f-E2 55" 54.84" 49.09" x 30.75" x 9.51 - Vizio D50f-F1 | User Manual - Page 59
your body. Users must follow the specific operating instructions for Satisfying exposure compliance. For Canada The device for the band 5150-5250 MHz protection from other radio services operating in the same TV bands, a radio license is required. Please consult Industry Canada's document CPC-2-1-28 - Vizio D50f-F1 | User Manual - Page 60
that affords an equal What to Do If You Are Not Satisfied With Service Arbitration Agreement; Class Action Waiver (U.S. Residents Only)" degree of protection. VIZIO Technical Support will provide instructions for If you feel VIZIO has not met its obligations under this warranty, you may carefully - Vizio D50f-F1 | User Manual - Page 61
REPAIR NO ARBITRATION OR PROCEEDING WILL BE JOINED, CONSOLIDATED, OR REPLACE YOUR PRODUCT, OR REFUND ITS PURCHASE PRICE. AS OR COMBINED notify This warranty gives you specific legal rights, and you may also have other VIZIO in writing within sixty (60) days of the date that you purchased the - Vizio D50f-F1 | User Manual - Page 62
TERMS OF THIS WARRANTY. BEFORE USING YOUR VIZIO additional help and troubleshooting. To obtain warranty service, In-home service requires complete and easy access to the product PRODUCT, PLEASE READ THIS WARRANTY CAREFULLY. IF YOU DO contact VIZIO Technical Support via email at ApoyoTecnico.MX@ and - Vizio D50f-F1 | User Manual - Page 63
11560 Warranty Service Provider Warranty Support LATAM SA de C.V. Calle Nubes No. 412 Col. Jardines del Moral Leon Gto. Mexico, C.P. 37160 01-800-801-0096 or 001-855-472-7444 Date of purchase: Model: Brand: (b) When the product has not been operated according to the accompanying instructions for - Vizio D50f-F1 | User Manual - Page 64
Replace service marks other than its own. Mention of non-VIZIO products restrictions apply. Information in this Quick Start Guide is subject is for informational purposes only. to change without notice. To review the most updated version of this Quick Start Guide and the associated User Manual - Vizio D50f-F1 | User Manual - Page 65
© 2017 VIZIO INC. ALL RIGHTS RESERVED. 03162017DV-US-NC
-
 1
1 -
 2
2 -
 3
3 -
 4
4 -
 5
5 -
 6
6 -
 7
7 -
8
-
9
-
10
-
11
-
12
-
13
-
14
-
15
-
16
-
17
-
18
-
19
-
20
-
21
-
22
-
23
-
24
-
25
-
26
-
27
-
28
-
29
-
30
-
31
-
32
-
33
-
34
-
35
-
36
-
37
-
38
-
39
-
40
-
41
-
42
-
43
-
44
-
45
-
46
-
47
-
48
-
49
-
50
-
51
-
52
-
53
-
54
-
55
-
56
-
57
-
58
-
59
-
60
-
61
-
62
-
63
-
64
-
65
 |
 |
Model D32f-E1, D39f-E1, D43f-E1, D43f-E2, D48f-E0, D50f-E1, D55f-E0, & D55f-E2
USER MANUAL
VIZIO