Vizio VL260M VL260M User Manual - Page 28
Fine Tuning the picture, Setting the Time Zone
 |
UPC - 845226002526
View all Vizio VL260M manuals
Add to My Manuals
Save this manual to your list of manuals |
Page 28 highlights
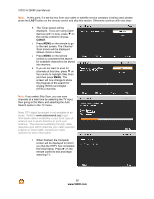
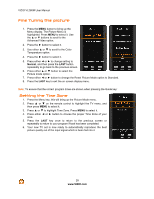
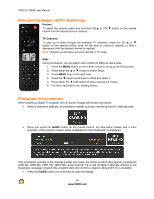
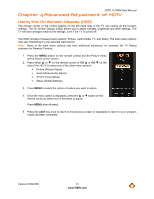
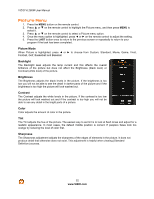
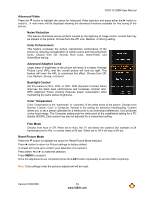
VIZIO VL260M User Manual Fine Tuning the picture 1. Press the MENU button to bring up the Menu display. The Picture Menu is highlighted. Press MENU to select it. Use the ! or ! buttons to scroll to the Advanced Video option. 2. Press the # button to select it. 3. Use either ! or " to scroll to the Color Temperature option. 4. Press the # button to select it. 5. Press either $ or # to change setting to Normal, and then press the LAST button repeatedly to go back to the previous screen. 6. Press either ! or " button to select the Picture mode option. 7. Press either $ or # button to change the Reset Picture Mode option to Standard. 8. Press the LAST key to exit the on screen display menu. Note: To ensure that the correct program times are shown when pressing the Guide key: Setting the Time Zone 1. Press the Menu key, this will bring up the Picture Mode menu. 2. Press ! or " on the remote control to highlight the TV menu, and then press MENU to select it. 3. Press ! or " to highlight Time Zone. Press MENU to select it. 4. Press either $ or # button to choose the proper Time Zone of your area. 5. Press the LAST key once to return to the previous screen or repeatedly to return to your program if task has been completed. 6. Your new TV set is now ready to automatically reproduce the best picture quality out of the input signal which is been fed into it. 28 www.VIZIO.com
-
 1
1 -
2
-
3
-
4
-
5
-
6
-
7
-
8
-
9
-
10
-
11
-
12
-
13
-
14
-
15
-
16
-
17
-
18
-
19
-
20
-
21
-
22
-
 23
23 -
 24
24 -
 25
25 -
 26
26 -
 27
27 -
 28
28 -
 29
29 -
 30
30 -
 31
31 -
 32
32 -
 33
33 -
34
-
35
-
36
-
37
-
38
-
39
-
40
-
41
-
42
-
43
-
44
-
45
-
46
-
47
-
48
-
49
-
50
-
51
-
52
 |
 |
