Weider 140 User Manual - Page 6
Note: Do
 |
View all Weider 140 manuals
Add to My Manuals
Save this manual to your list of manuals |
Page 6 highlights
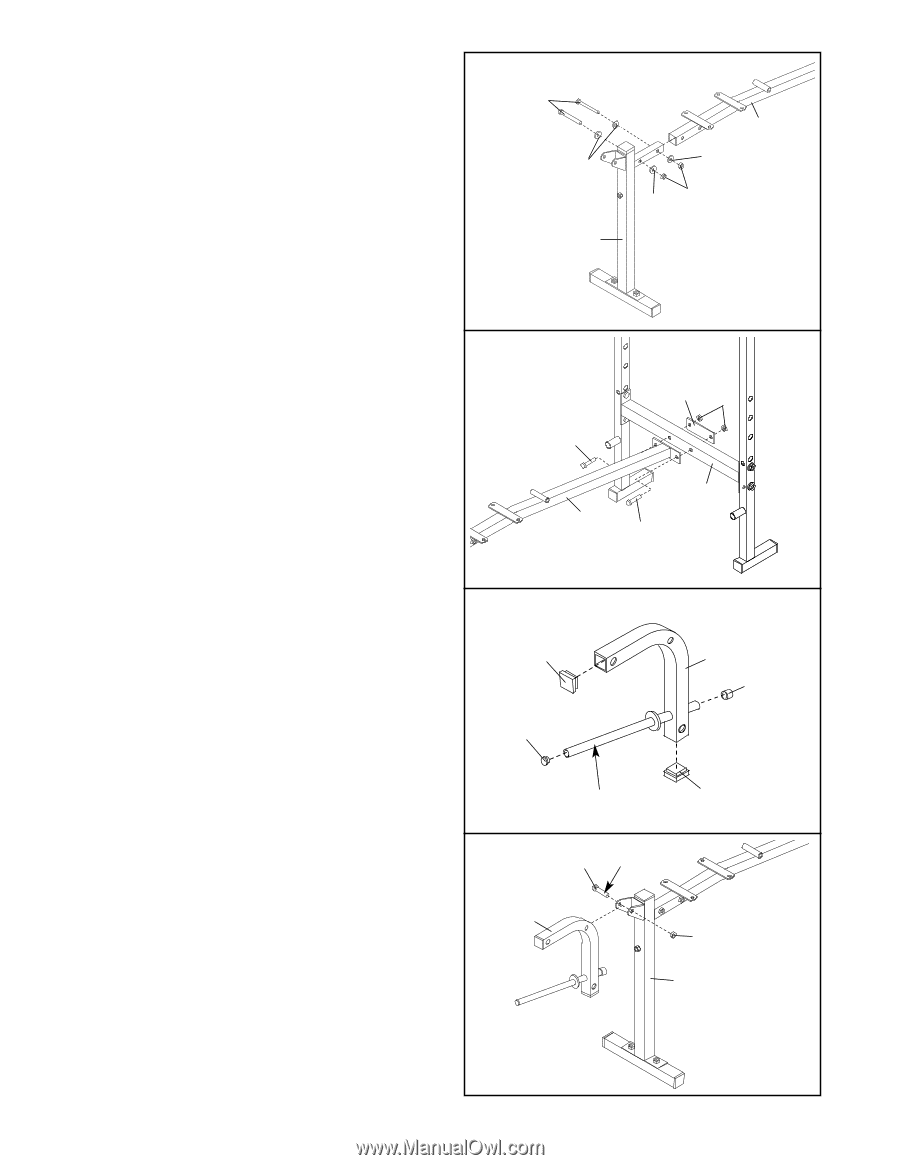
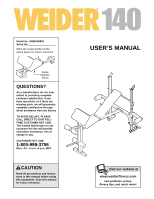
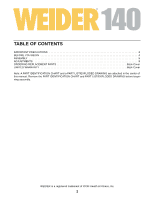
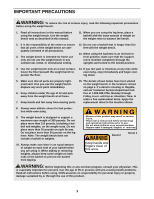
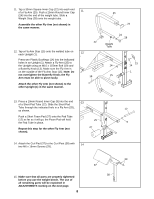
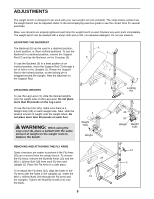
3. Attach the Front Leg (8) to the Frame (2) with two 3 M8 x 40mm Bolts (39), four M8 Washers (16), and two M8 Nylon Locknuts (17). Note: Do not tighten the Nylon Locknuts yet. 39 16 2 16 16 17 8 4. Attach the Frame (2) to the Crossbar (3) with two 4 M8 x 55mm Bolts (18), the Support Plate (40), and two M8 Nylon Locknuts (17). Note: Do not tighten the Nylon Locknuts yet. 18 2 40 17 3 18 5. Tap two 30mm Square Inner Caps (22) into the ends of the Leg Lever (4). Tap a 25mm Round Inner Cap (24) into the indicated end of the weight tube on the Leg Lever (4). Tap the 25mm Round Angled Cap (20) onto the other end of the weight tube. 5 22 24 4 20 Weight Tube 22 6. Lubricate the M10 x 60mm Bolt (32). Attach the 6 Leg Lever (4) to the bracket on the Front Leg (8) with the Bolt and an M10 Nylon Locknut (33). 32 Lubricate Note: Do not overtighten the Locknut; the Leg Lever must be able to pivot easily. 4 33 8 6
-
 1
1 -
 2
2 -
 3
3 -
 4
4 -
 5
5 -
 6
6 -
 7
7 -
 8
8 -
 9
9 -
 10
10 -
 11
11 -
 12
12 -
13
-
14
-
15
-
16
 |
 |