Weider 140 User Manual - Page 8
of a Fly Arm 25. Push a 25mm Round Inner Cap - bench press
 |
View all Weider 140 manuals
Add to My Manuals
Save this manual to your list of manuals |
Page 8 highlights
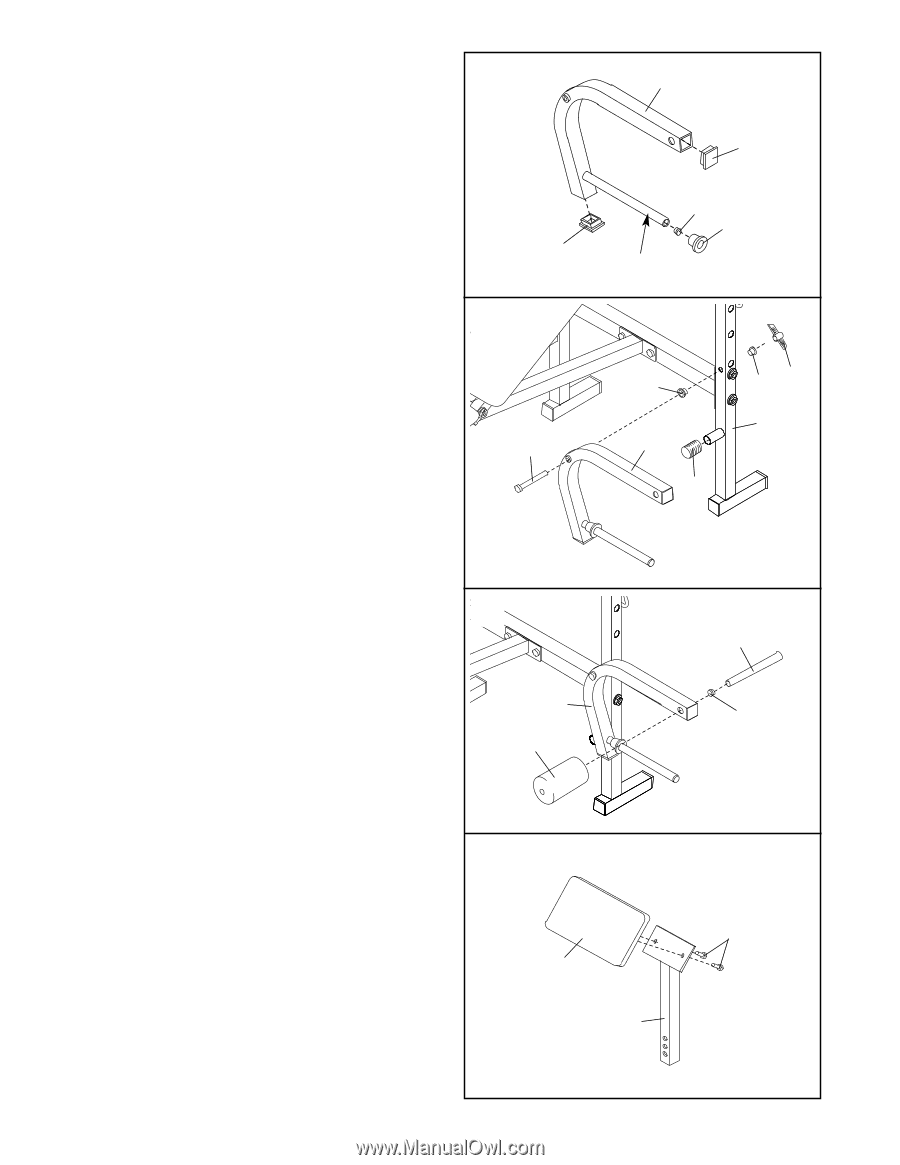
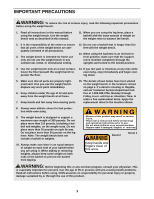
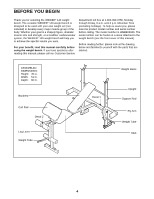
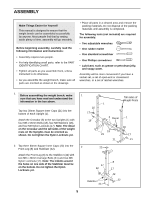
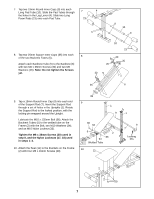
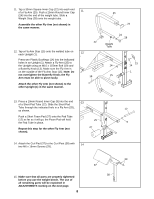
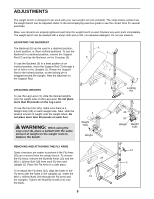
11. Tap a 30mm Square Inner Cap (22) into each end 11 of a Fly Arm (25). Push a 25mm Round Inner Cap (24) into the end of the weight tube. Slide a Weight Stop (28) onto the weight tube. Assemble the other Fly Arm (not shown) in the same manner. 22 12. Tap a Fly Arm Stop (15) onto the welded tube on each Upright (1). Press two Plastic Bushings (14) into the indicated holes in an Upright (1). Attach a Fly Arm (25) to the Upright using an M10 x 115mm Bolt (19) and a Butterfly Knob (13). Make sure the Fly Arm is on the outside of the Fly Arm Stop (15). Note: Do not overtighten the Butterfly Knob; the Fly Arm must be able to pivot easily. Attach the other Fly Arm (not shown) to the other Upright (1) in the same manner. 12 19 25 22 Weight Tube 24 28 14 25 15 13 14 1 13. Press a 19mm Round Inner Cap (9) into the end 13 of a Short Pad Tube (12). Slide the Short Pad Tube through the indicated hole in a Fly Arm (25), 12 as shown. Push a Short Foam Pad (27) onto the Pad Tube (12) as far as it will go; the Foam Pad will hold 25 the Pad Tube in place. 9 27 Repeat this step for the other Fly Arm (not shown). 14. Attach the Curl Pad (37) to the Curl Post (38) with 14 two M6 x 16mm Screws (29). 15. Make sure that all parts are properly tightened before you use the weight bench. The use of all remaining parts will be explained in ADJUSTMENTS starting on the next page. 8 29 37 38
-
 1
1 -
2
-
 3
3 -
 4
4 -
 5
5 -
 6
6 -
 7
7 -
 8
8 -
 9
9 -
 10
10 -
 11
11 -
 12
12 -
 13
13 -
14
-
15
-
16
 |
 |