Weider Club C 725 English Manual - Page 19
into the Top Frame 17. Next, press a Top Frame
 |
View all Weider Club C 725 manuals
Add to My Manuals
Save this manual to your list of manuals |
Page 19 highlights
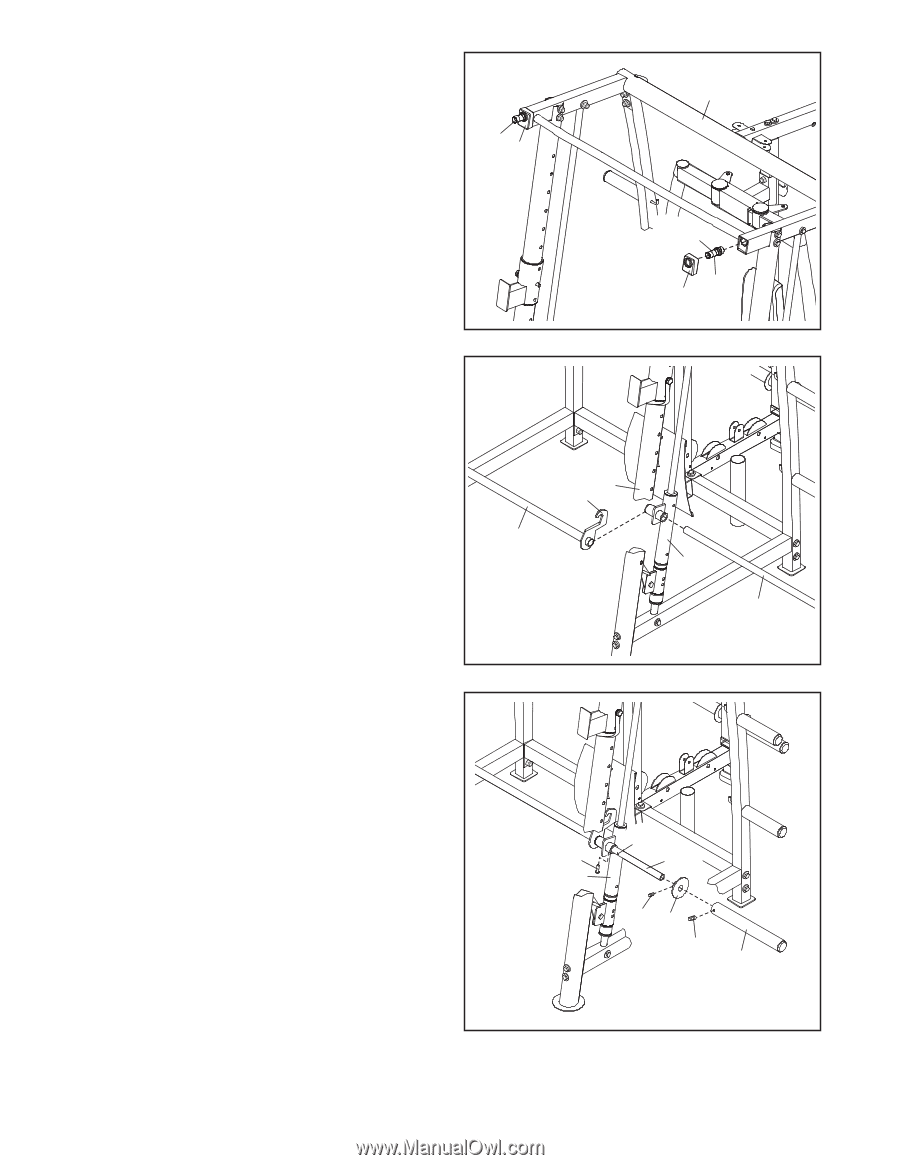
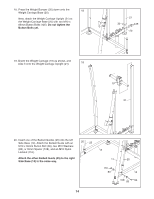
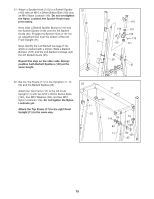
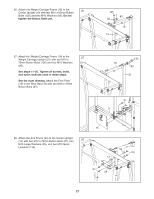
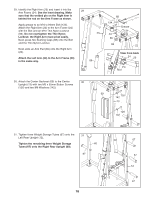
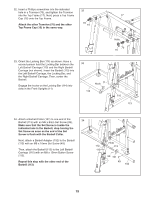
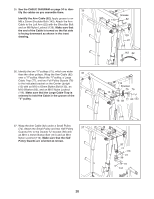
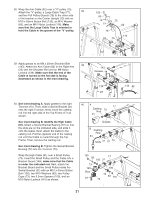
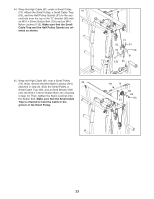
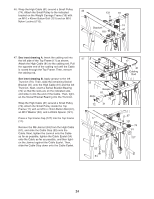
32. Insert a Phillips screwdriver into the indicated 32 hole in a Trunnion (70), and tighten the Trunnion into the Top Frame (17). Next, press a Top Frame 17 Cap (16) onto the Top Frame. Attach the other Trunnion (70) and the other Top Frame Cap (16) in the same way. 70 16 Hole 70 16 33. Orient the Locking Bar (114) as shown. Have a second person hold the Locking Bar between the Left Barbell Carriage (110) and the Right Barbell Carriage (not shown). Insert the Barbell (113) into the Left Barbell Carriage, the Locking Bar, and the Right Barbell Carriage. Then, center the Barbell. Engage the hooks on the Locking Bar (114) into slots in the Front Uprights (11). 33 Hook 11 114 110 113 34. Attach a Barbell Collar (101) to one end of the 34 Barbell (113) with an M6 x 8mm Set Screw (99). Make sure that the Set Screw is inside the indicated hole in the Barbell; stop turning the Set Screw as soon as the end of the Set Screw is flush with the Barbell Collar. Next, attach a Barbell Adapter (102) to the Barbell (113) with an M8 x 10mm Set Screw (49). Then, attach the Barbell (113) to the Left Barbell Carriage (110) with an M8 x 15mm Button Screw (112). Repeat this step with the other end of the Barbell (113). Hole 112 113 110 99 101 49 102 19
-
 1
1 -
2
-
3
-
4
-
5
-
6
-
7
-
8
-
9
-
10
-
11
-
12
-
13
-
 14
14 -
 15
15 -
 16
16 -
 17
17 -
 18
18 -
 19
19 -
 20
20 -
 21
21 -
 22
22 -
 23
23 -
 24
24 -
25
-
26
-
27
-
28
-
29
-
30
-
31
-
32
-
33
-
34
-
35
-
36
-
37
-
38
-
39
-
40
-
41
-
42
-
43
-
44
 |
 |