Weider Flex 225 Owners Manual - Page 10
Attachment, Press, Handle
 |
View all Weider Flex 225 manuals
Add to My Manuals
Save this manual to your list of manuals |
Page 10 highlights
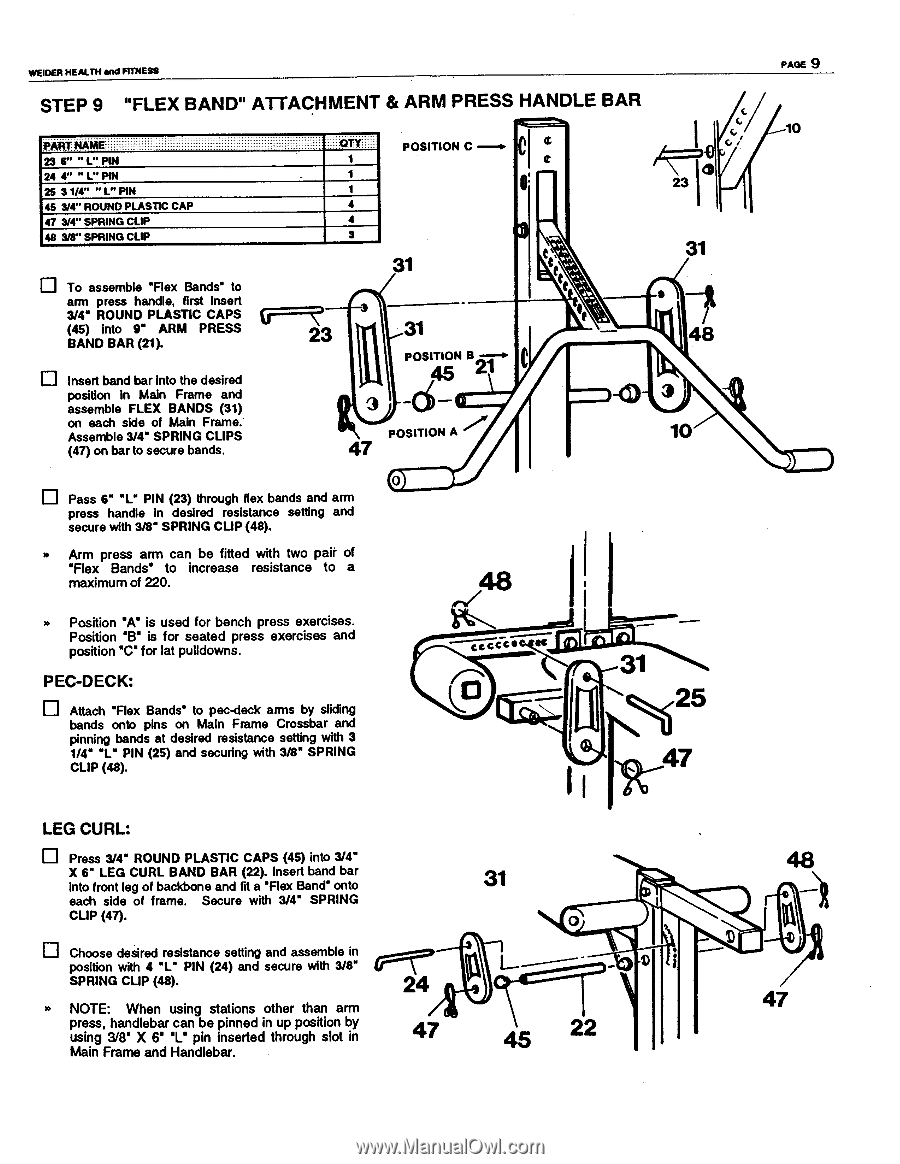
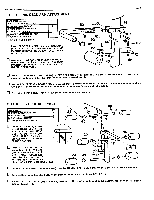
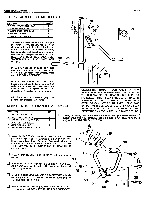
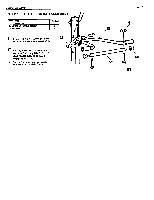
WEIDER HEALTH and FITNESS STEP 9 "FLEX BAND" ATTACHMENT & ARM PRESS HANDLE BAR PART NAME 23 6" " 1" PIN 24 4" " L" PIN 25 31/4" "t" PIN 45 3/4" ROUND PLASTIC CAP 47 3/4" SPRING CLIP 48 3/8" SPRING CLIP POSITION C 1 4 4 3 31 MVY u To assemble 'Flex Bands" to arm press handle, first Insert 3/4' ROUND PLASTIC CAPS (45) into 9" ARM PRESS BAND BAR (21). Insert band bar into the desired position in Main Frame and assemble FLEX BANDS (31) on each side of Main Frame. Assemble 3/4" SPRING CLIPS (47) on bar to secure bands. 3 23 31 POSITION B2; 45 3 47 POSITION A 0 Pass 6" "L" PIN (23) through flex bands and arm press handle in desired resistance setting and secure with 3/8" SPRING CUP (48). • Arm press arm can be fitted with two pair of "Flex Bands' to increase resistance to a maximum of 220. • Position "A' is used for bench press exercises. Position "B" is for seated press exercises and position "C" for lat pulldowns. PEC-DECK: 0 Attach 'Flex Bands' to pec-deck arms by sliding bands onto pins on Main Frame Crossbar and pinning bands at desired resistance setting with 3 1/4' "L" PIN (25) and securing with 3/8" SPRING CLIP (48). 1 ce,cc-ca 46 23 31 48 3 10 25 47 PAGE 9 10 LEG CURL: El Press 3/4" ROUND PLASTIC CAPS (45) into 3/4" X 6" LEG CURL BAND BAR (22). Insert band bar into front leg of backbone and fit a 'Flex Band' onto each side of frame. Secure with 3/4" SPRING CLIP (47). Choose desired resistance setting and assemble in (Fr position with 4 'L" PIN (24) and secure with 3/8" SPRING CLIP (48). 24 • NOTE: When using stations other than arm press, handlebar can be pinned in up position by using 3/8' X 6' 1" pin inserted through slot in Main Frame and Handlebar. 47 31 O 45 22 la\ 47
-
 1
1 -
2
-
3
-
4
-
 5
5 -
 6
6 -
 7
7 -
 8
8 -
 9
9 -
 10
10 -
 11
11 -
 12
12
 |
 |