Weider Platinum Xp800 Canadian English Manual - Page 19
Troubleshooting - transformer
 |
View all Weider Platinum Xp800 manuals
Add to My Manuals
Save this manual to your list of manuals |
Page 19 highlights
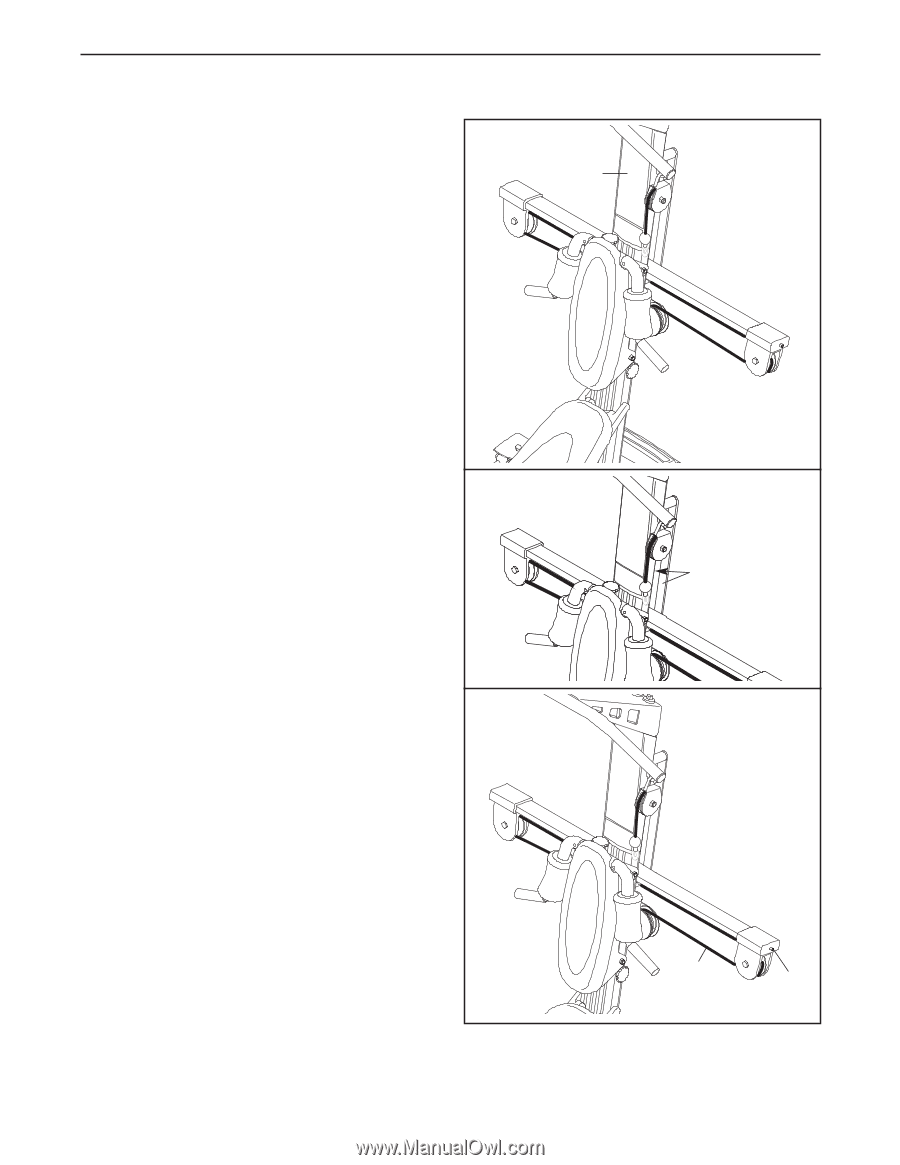
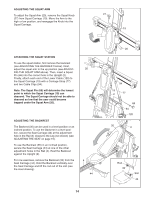
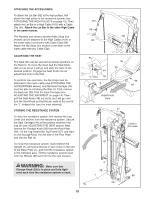
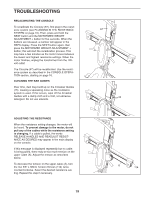
TROUBLESHOOTING RECALIBRATING THE CONSOLE To recalibrate the Console (67), first plug in the resistance system (see PLUGGING IN THE RESISTANCE SYSTEM on page 16). Then, press and hold the NEXT button and the MOTORIZED WEIGHT ADJUSTMENT + button for five seconds. When the buttons are released, a number will appear in the REPS display. Press the NEXT button again, then press the MOTORIZED WEIGHT ADJUSTMENT + button; this will start the recalibration process. This may take a few minutes as the motor moves between the lowest and highest resistance settings. When the motor finishes, unplug the transformer from the 120volt outlet. The Console (67) will be recalibrated. Use the resistance system as described in the CONSOLE OPERATION section, starting on page 16. CLEANING THE BAR GUIDES Over time, dust may build up on the Crossbar Guides (15), causing a squeaking noise as the resistance system is used. If this occurs, wipe off the Crossbar Guides with a damp cloth and a mild, non-abrasive detergent. Do not use solvents. ADJUSTING THE RESISTANCE When the resistance setting changes, the motor will be heard. To prevent damage to the motor, do not pull any of the cables while the resistance setting is changing. If a cable is pulled, the words RELEASE HANDLES AND READJUST RESISTANCE AS DESIRED may appear in the main display on the console. If this message is displayed repeatedly but no cable is being pulled, there may be too much tension on the upper cable (A). Adjust the tension as described below. To decrease the tension on the upper cable (A), turn the two 3/8" x 38mm Tension Screws (114) twice, counterclockwise. Select the desired resistance setting. Repeat this step if necessary. 19 67 15 A 114
-
 1
1 -
2
-
3
-
4
-
5
-
6
-
7
-
8
-
9
-
10
-
11
-
12
-
13
-
 14
14 -
 15
15 -
 16
16 -
 17
17 -
 18
18 -
 19
19 -
 20
20 -
 21
21 -
 22
22 -
 23
23 -
 24
24 -
25
-
26
-
27
 |
 |