Weider Pro 395 B Bench English Manual - Page 10
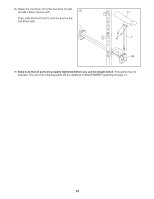
Post Frame 4, insert the Leg Lever Post 5 into
 |
View all Weider Pro 395 B Bench manuals
Add to My Manuals
Save this manual to your list of manuals |
Page 10 highlights
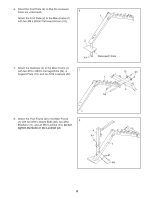
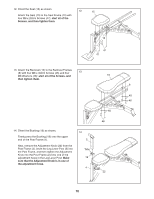
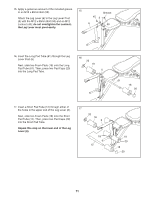
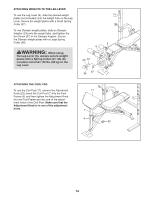
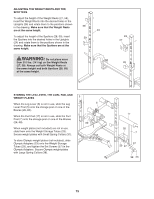
12. Orient the Seat (15) as shown. 12 15 Attach the Seat (15) to the Seat Frame (10) with four M8 x 20mm Screws (47); start all of the Screws, and then tighten them. 10 47 47 13. Attach the Backrest (16) to the Backrest Frames (8) with four M8 x 40mm Screws (46) and four 13 M8 Washers (40); start all of the Screws, and then tighten them. 16 8 40 46 40 46 14. Orient the Bushing (19) as shown. Firmly press the Bushing (19) onto the upper end of the Post Frame (4). 14 5 Next, remove the Adjustment Knob (22) from the Post Frame (4), insert the Leg Lever Post (5) into the Post Frame, and then tighten the Adjustment Knob into the Post Frame and into one of the adjustment holes in the Leg Lever Post. Make sure that the Adjustment Knob is in one of the adjustment holes. Tabs 19 4 22 10
-
 1
1 -
2
-
3
-
4
-
 5
5 -
 6
6 -
 7
7 -
 8
8 -
 9
9 -
 10
10 -
 11
11 -
 12
12 -
 13
13 -
 14
14 -
 15
15 -
16
-
17
-
18
-
19
-
20
 |
 |
