Weider Pro 395 B Bench English Manual - Page 13
Adjustment
 |
View all Weider Pro 395 B Bench manuals
Add to My Manuals
Save this manual to your list of manuals |
Page 13 highlights
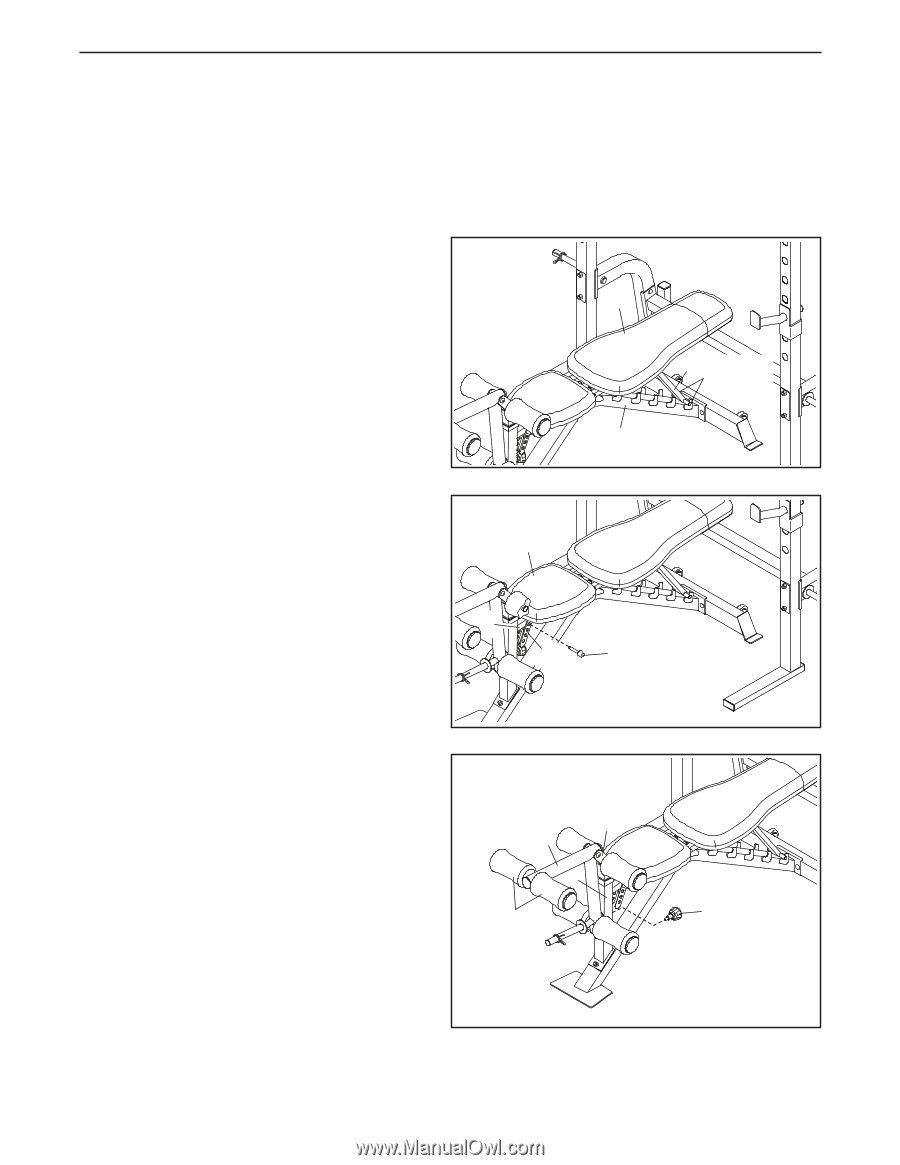
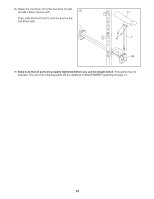
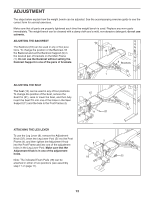
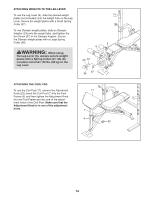
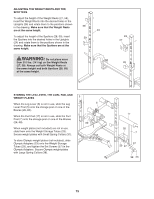
ADJUSTMENT The steps below explain how the weight bench can be adjusted. See the accompanying exercise guide to see the correct form for several exercises. Make sure that all parts are properly tightened each time the weight bench is used. Replace any worn parts immediately. The weight bench can be cleaned with a damp cloth and a mild, non-abrasive detergent; do not use solvents. ADJUSTING THE BACKREST The Backrest (16) can be used in any of five positions. To change the position of the Backrest, lift the Backrest and set the Backrest Support (9) in the desired pair of brackets on the Main Frame (1). Do not use the Backrest without setting the Backrest Support in one of the pairs of brackets. 16 9 Brackets 1 ADJUSTING THE SEAT The Seat (15) can be used in any of four positions. To change the position of the Seat, remove the Seat Pin (21), raise or lower the Seat, and then fully insert the Seat Pin into one of the holes in the Seat Support (11) and the hole in the Post Frame (4). 15 4 11 21 ATTACHING THE LEG LEVER To use the Leg Lever (6), remove the Adjustment Knob (22), insert the Leg Lever Post (5) into the Post Frame (4), and then tighten the Adjustment Knob into the Post Frame and into one of the adjustment 6 5 holes in the Leg Lever Post. Make sure that the Adjustment Knob is in one of the adjustment 4 holes. 18 22 Note: The indicated Foam Pads (18) can be attached in either of two positions (see assembly step 17 on page 11). 13
-
 1
1 -
2
-
3
-
4
-
5
-
6
-
7
-
 8
8 -
 9
9 -
 10
10 -
 11
11 -
 12
12 -
 13
13 -
 14
14 -
 15
15 -
 16
16 -
 17
17 -
 18
18 -
19
-
20
 |
 |