Weslo Cadence 36 English Manual - Page 8
Press the Lock Knob Sleeve 55 into the left Upright 61.
 |
View all Weslo Cadence 36 manuals
Add to My Manuals
Save this manual to your list of manuals |
Page 8 highlights
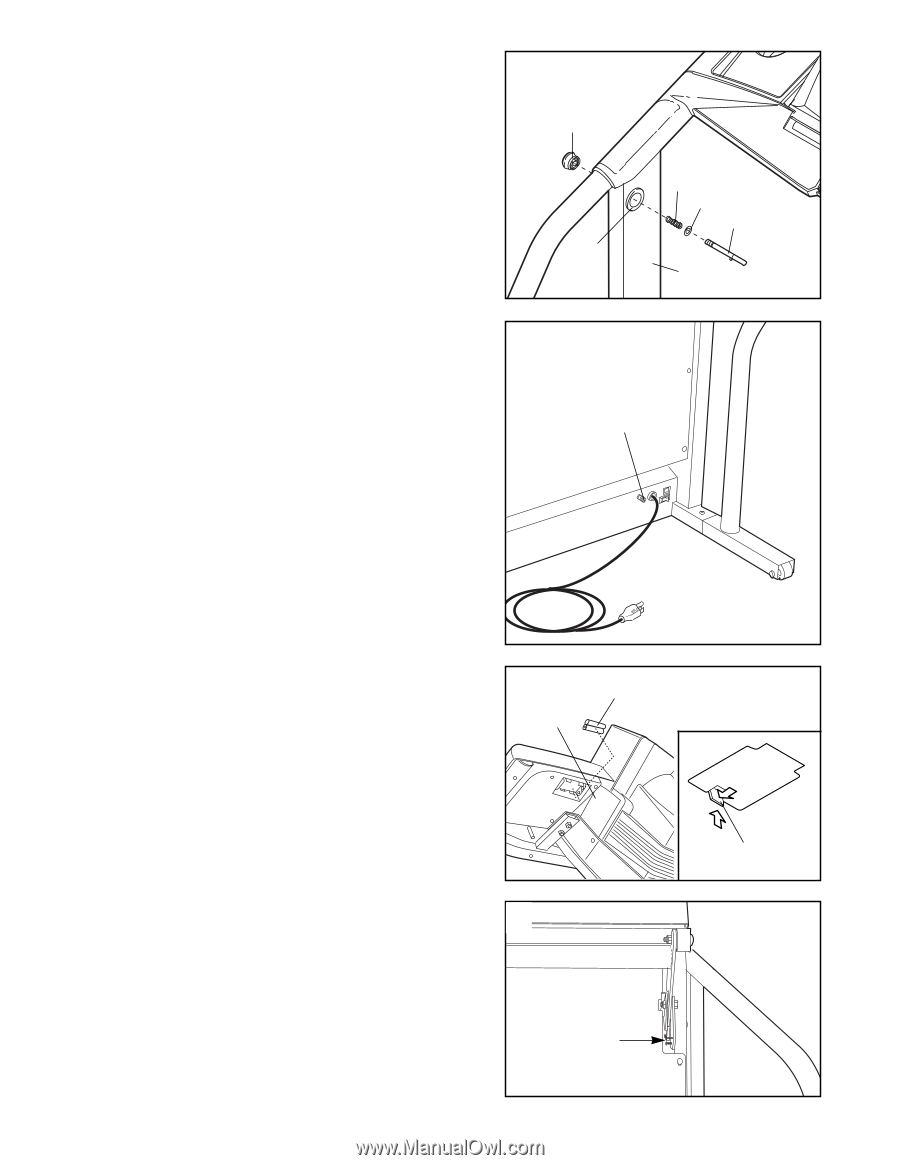
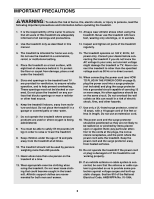
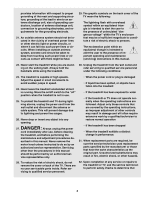
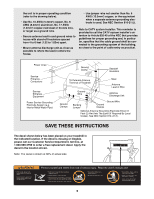
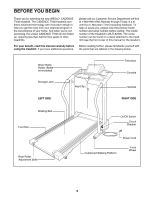
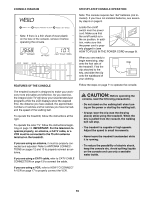
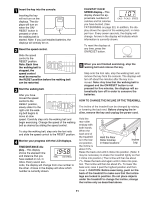
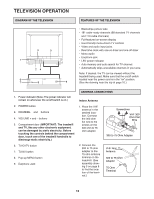
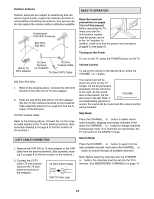
4. Remove the Lock Knob (54) from the Lock Pin (59). 4 Press the Lock Knob Sleeve (55) into the left Upright (61). Make sure that the Lock Pin Collar (57) and the Spring 54 (56) are on the Lock Pin. Insert the Lock Pin into the left Upright (61) and tighten the Lock Knob onto the Lock Pin. 55 56 57 59 61 5. Note the location of the 75 ohm antenna terminal on the treadmill (for clarity, the treadmill is shown in the storage position). For the television to operate properly, an antenna, a CATV cable, or a VCR must be connected to the 75 ohm antenna terminal. If you are using an antenna, it must be properly connected and adjusted for optimal reception. Refer to ANTENNA CONNECTIONS on pages 12 and 13 to properly connect an antenna. If you are using a CATV cable, refer to CATV CABLE CONNECTION on page 13 to properly connect the cable. If you are using a VCR, refer to HOW TO CONNECT A VCR on page 17 to properly connect the VCR. The VCR must be turned on, a videocassette must be properly inserted, and the VCR must be playing. Refer to your VCR userÕs manual for operating instructions. 6. The console requires two "AA" batteries (not included). Alkaline batteries are recommended. To install batteries, first open the Battery Cover (98) as shown. Press two batteries into the battery compartment, with the negative ends of the batteries (marked ÒÐÓ) touching the springs. Close the battery cover, push up on the battery cover tab, and then push the tab forward as shown. Be sure that the tab locks into place. 5 75 Ohm Antenna Terminal 6 98 Batteries 7. Make sure that all parts are tightened before you use the treadmill. Note: The ratchet screws on the adjustable 7 rear incline are factory set and should not be adjusted. Keep the included allen wrench in a secure place. The allen wrench is used to adjust the walking belt (see page 20). To protect the floor or carpet from damage, place a mat under the treadmill. Ratchet Screws Battery Cover Tab 8
-
 1
1 -
2
-
 3
3 -
 4
4 -
 5
5 -
 6
6 -
 7
7 -
 8
8 -
 9
9 -
 10
10 -
 11
11 -
 12
12 -
 13
13 -
14
-
15
-
16
-
17
-
18
-
19
-
20
-
21
-
22
-
23
-
24
-
25
-
26
 |
 |