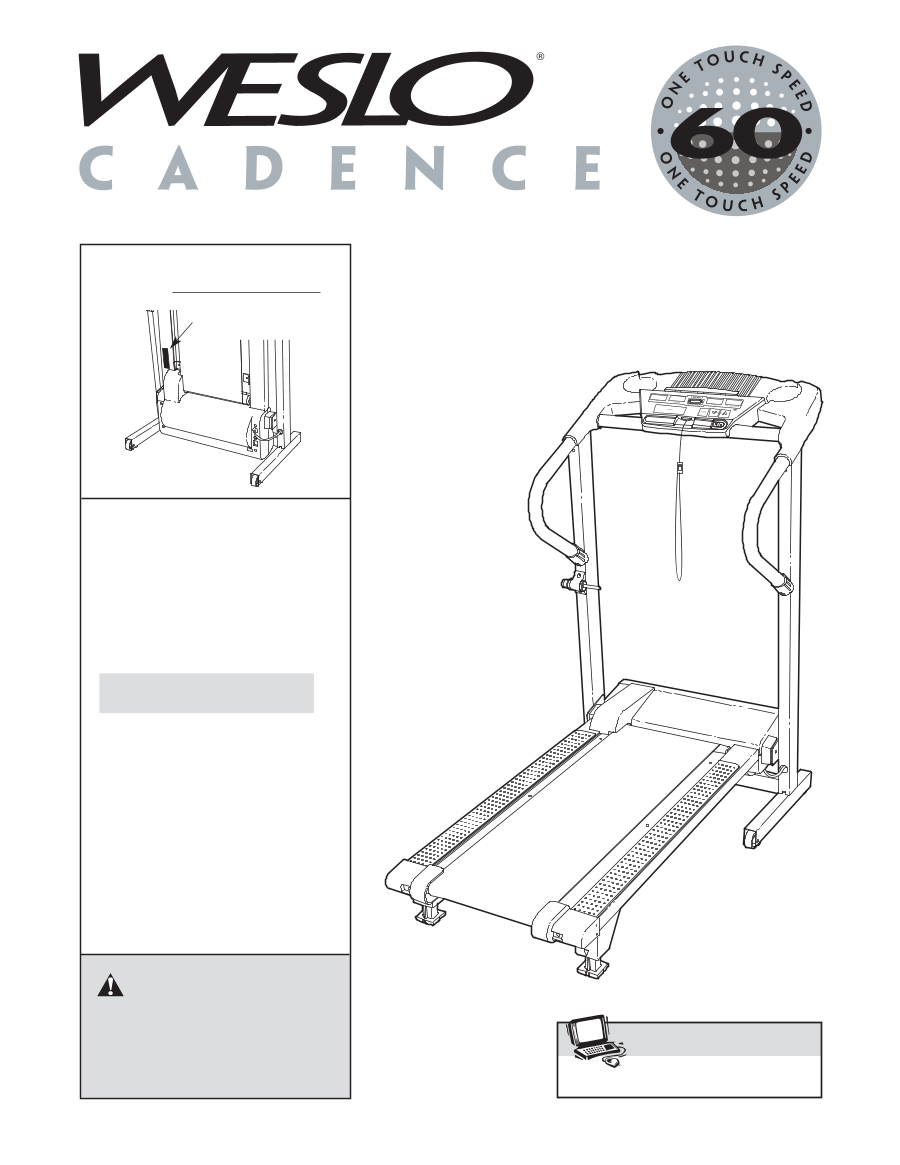
Weslo Cadence 6.0 Treadmill Uk Manual
Weslo Cadence 6.0 Treadmill Manual
 |
View all Weslo Cadence 6.0 Treadmill manuals
Add to My Manuals
Save this manual to your list of manuals |
Weslo Cadence 6.0 Treadmill manual content summary:
- Weslo Cadence 6.0 Treadmill | Uk Manual - Page 1
if there are missing or damaged parts, please call: 08457 089 009 Or write: ICON Health & Fitness, Ltd. Unit 4 Revie Road Industrial Estate Revie Road, Beeston Leeds, LS11 8JG UK [email protected] CAUTION Read all precautions and instructions in this manual before using this equipment. Save this - Weslo Cadence 6.0 Treadmill | Uk Manual - Page 2
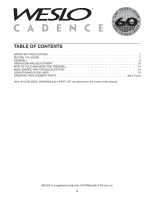
ADJUSTMENT 10 HOW TO FOLD AND MOVE THE TREADMILL 14 MAINTENANCE AND TROUBLESHOOTING 16 CONDITIONING GUIDELINES 18 ORDERING REPLACEMENT PARTS Back Cover Note: An EXPLODED DRAWING and a PART LIST are attached in the centre of this manual. WESLO is a registered trademark of ICON Health & Fitness - Weslo Cadence 6.0 Treadmill | Uk Manual - Page 3
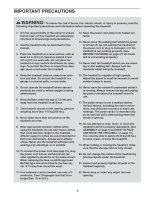
this treadmill are adequately informed of all warnings and precautions. 2. Use the treadmill only as described in this manual. 3. Place the treadmill on the incline of the treadmill by placing objects under the treadmill. 21. Inspect and properly tighten all parts of the treadmill regularly. 11. If - Weslo Cadence 6.0 Treadmill | Uk Manual - Page 4
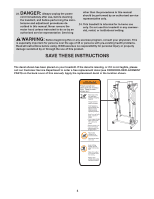
. SAVE THESE INSTRUCTIONS The decal shown has been placed on your treadmill. If the decal is missing, or if it is not legible, please call our Customer Service Department to order a free replacement decal (see ORDERING REPLACEMENT PARTS on the back cover of this manual). Apply the replacement - Weslo Cadence 6.0 Treadmill | Uk Manual - Page 5
, the unique CADENCE 60 treadmill can be folded up, requiring less than half the floor space of other treadmills. For your benefit, read this manual carefully before using the treadmill. If you have questions after read- ing this manual, please call our Customer Service Department at 08457 - Weslo Cadence 6.0 Treadmill | Uk Manual - Page 6
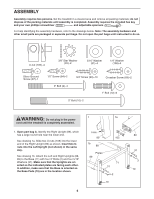
assembly hardware and other small parts are packaged in separate part bags. Do not open the part bags until instructed to do so. U-nut (12)-6 WARNING: Do not plug in the power cord until the treadmill is completely assembled. 1. Open part bag A. Identify the Right Upright (89), which has a large - Weslo Cadence 6.0 Treadmill | Uk Manual - Page 7
this step on the left side of the treadmill. See drawing 2a. With the help of a second person, carefully tip the treadmill onto its left side as shown. Feed the . 2 High side Plate 13 55 2a 89 22 45 89 10 22 3. Open part bag C. With the help of a second person, raise the Left and Right Uprights - Weslo Cadence 6.0 Treadmill | Uk Manual - Page 8
small hole in the side of the Right Handrail (6) with a Silver Ground Screw (87). Small Bracket 75 22 69 87 Small Bracket 6 69 69 5. Open part bag D. Place the Console Base (100) on the 5 Right Handrail (6) and the Left Handrail (not shown). Attach the Console Base with four 3/4" Screws (90 - Weslo Cadence 6.0 Treadmill | Uk Manual - Page 9
8. Then, lower the frame to the floor. 9 41 95 90 88 Large Hole 94 93 91 10.Make sure that all parts are properly tightened before you use the treadmill. Note: Extra hardware may be included. Keep the included hex keyes in a secure place. The large hex key is used to adjust - Weslo Cadence 6.0 Treadmill | Uk Manual - Page 10
-equipped outlets. Socket on treadmill Ferrite Box Plastic Tie Tab Outlet If the power cord is damaged, it must be replaced with a manufacturer-recommended power cord. DANGER: Improper connection of the equipment-earthing conductor can result in an in- creased risk of electric shock. Check with - Weslo Cadence 6.0 Treadmill | Uk Manual - Page 11
see the drawing above) while operating the treadmill. • Adjust the speed in small increments to avoid sudden jumps in speed. • To reduce the possibility of electric shock, keep the console dry. Avoid see SPEED DISPLAY on page 12). For simplicity, all instructions in this section refer to miles. 11 - Weslo Cadence 6.0 Treadmill | Uk Manual - Page 12
in the Time display. Note: During the first few minutes that the treadmill is used, inspect the alignment of the walking belt and align it if pulse sensor as described above. Remember to stand still while measuring your heart rate. 5 When you are finished exercising, remove the key. Step onto the - Weslo Cadence 6.0 Treadmill | Uk Manual - Page 13
. Position 1 is the lowest incline level, and position 4 is the highest. Adjust the other incline leg in the same way. CAUTION: Before using the treadmill, make sure that both in- Housing Incline Leg Button cline legs are in the same position. After you have adjusted the incline legs, lower the - Weslo Cadence 6.0 Treadmill | Uk Manual - Page 14
STORAGE Unplug the power cord. CAUTION: You must be able to safely lift 20 kg (45 lbs.) to raise, lower, or move the treadmill. 1. Hold the treadmill with your hands in the locations shown at the right. CAUTION: To decrease the possibility of injury, bend your legs and keep your back straight - Weslo Cadence 6.0 Treadmill | Uk Manual - Page 15
left hand, pull the latch knob to the left and hold it. Pivot the treadmill down until the frame is past the latch pin. Slowly release the latch knob. 2. Hold the treadmill firmly with both hands, and lower the treadmill to the floor. To decrease the possibility of injury, bend your legs and - Weslo Cadence 6.0 Treadmill | Uk Manual - Page 16
MAINTENANCE AND TROUBLESHOOTING Most treadmill problems can be solved by following the steps below. Find the symptom that applies, and follow the steps listed. If further assistance is needed, please call our Customer Service Department. PROBLEM: The power does not turn on SOLUTION: a. Make sure - Weslo Cadence 6.0 Treadmill | Uk Manual - Page 17
cord, insert the key and run the treadmill for a few minutes. Repeat until the walking belt is properly tightened. b 5-7 cm Rear Roller Adjustment Bolts c. If the walking belt still slows when walked on, please call our Customer Service Department. PROBLEM: The walking belt is off-centre or - Weslo Cadence 6.0 Treadmill | Uk Manual - Page 18
rate as a guide. The chart below shows recommended heart rates treadmill until your heart rate is near the highest number in your training zone. WORKOUT GUIDELINES Each workout should include the following three parts: A Warm-up-Start each workout training zone for 20 to 60 minutes. (During the first - Weslo Cadence 6.0 Treadmill | Uk Manual - Page 19
SUGGESTED STRETCHES The correct form for several basic stretches is shown at the right. Move slowly as you stretch-never bounce. 1. Toe Touch Stretch Stand with your knees bent slightly and slowly bend forward from your hips. Allow your back and shoulders to relax as you reach down toward your - Weslo Cadence 6.0 Treadmill | Uk Manual - Page 20
information: • the MODEL NUMBER of the product (WETL15131) • the NAME of the product (WESLO CADENCE® 60 treadmill) • the SERIAL NUMBER of the product (see the front cover of this manual) • the KEY NUMBER and DESCRIPTION of the part(s) (see the PART LIST and the EXPLODED DRAWING in the centre of this - Weslo Cadence 6.0 Treadmill | Uk Manual - Page 21
REMOVE THIS PART LIST/EXPLODED REMDORVAE WTHIINS GEXFPLROODEMDTDHRAEWMINAGNANUDAPLA!RT LIST FROM THE MANUAL. Save this page for future reference. Note: Specifications are subject to change without notice. For information about ordering replacement parts, see the back cover of the User's Manual. 34 - Weslo Cadence 6.0 Treadmill | Uk Manual - Page 22
1 54 1 55 1 56 1 57 1 58 8 59 1 60 1 Description Console 3" Bolt Key/Clip Left Frame Spacer Electronics Screw Right Small Screw Belt Guide Roller Spacer Receptacle Green/Yellow Wire, F/Ring # 1 4" Black Wire, 2F # 1 User's Manual * Includes all parts shown in the box # These - Weslo Cadence 6.0 Treadmill | Uk Manual - Page 23
10 4 12 89 55 51 72 11 105 16 45 13 66 67 64 63 65 80 51 66 67 68 64 65 63 59 60 61 47 105 24 71 14 31 18 19 45 11 10 25 104 15 19 73 42 2 73 22 76 77 105 16 29
-
 1
1 -
 2
2 -
 3
3 -
 4
4 -
 5
5 -
 6
6 -
 7
7 -
8
-
9
-
10
-
11
-
12
-
13
-
14
-
15
-
16
-
17
-
18
-
19
-
20
-
21
-
22
-
23
 |
 |
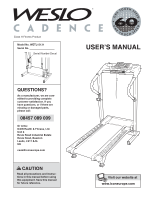
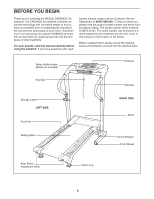
USER’S MANUAL
Serial Number Decal
Model No. WETL15131
Serial No.
QUESTIONS?
As a manufacturer, we are com-
mitted to providing complete
customer satisfaction. If you
have questions, or if there are
missing or damaged parts,
please call:
Or write:
ICON Health & Fitness, Ltd.
Unit 4
Revie Road Industrial Estate
Revie Road, Beeston
Leeds, LS11 8JG
UK
CAUTION
Read all precautions and instruc-
tions in this manual before using
this equipment. Save this manual
for future reference.
www.iconeurope.com
Visit our website at
08457 089 009
Class H Fitness Product