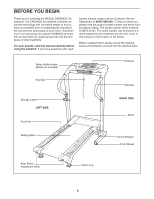
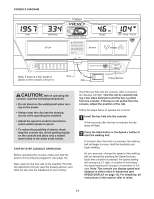
Weslo Cadence 6.0 Treadmill Uk Manual - Page 7
Press the Right Frame Spacer 13
 |
View all Weslo Cadence 6.0 Treadmill manuals
Add to My Manuals
Save this manual to your list of manuals |
Page 7 highlights
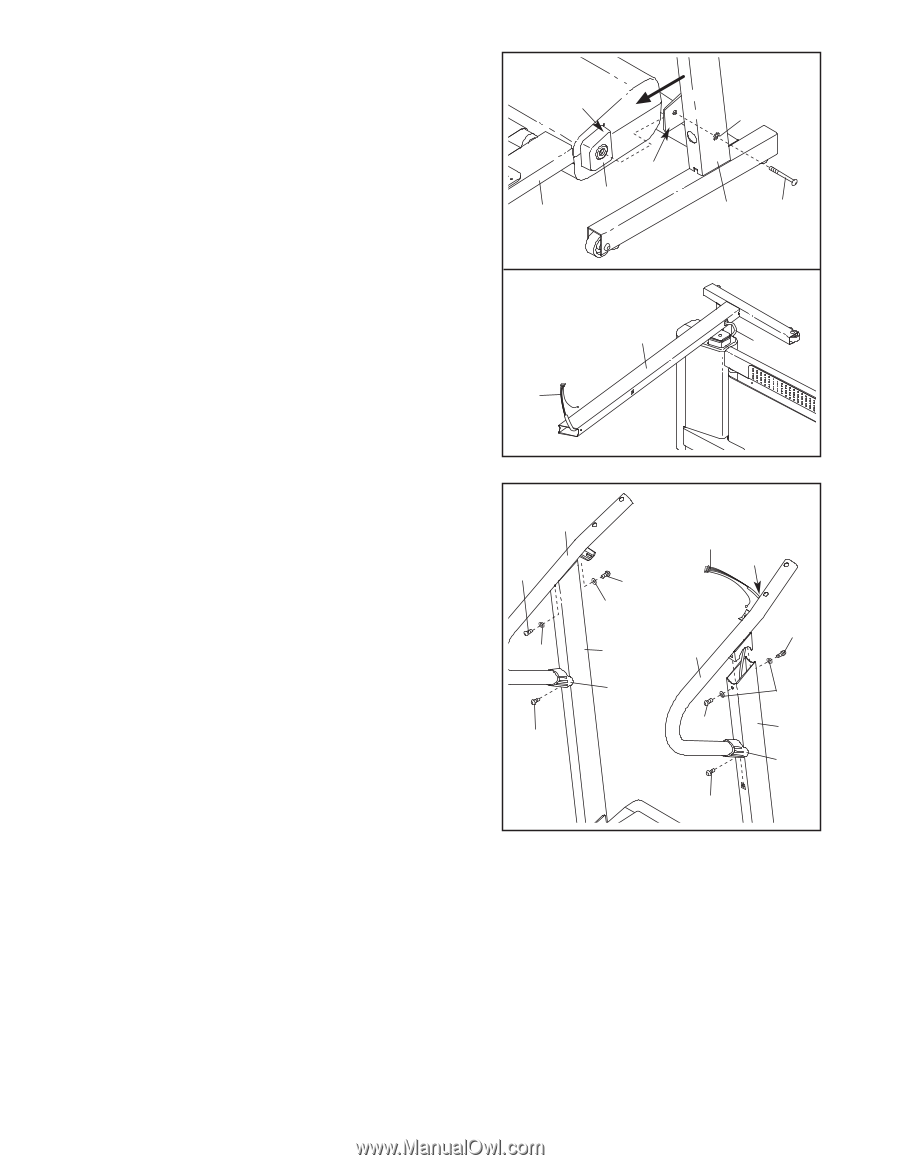
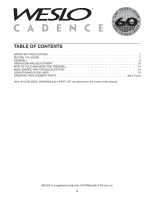
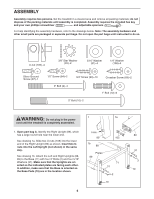
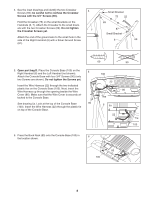
2. Open part bag B. Press the Right Frame Spacer (13) and the Left Frame Spacer (not shown) onto the sides of the Frame (55) as shown. Make sure that the high side of each Spacer is facing forward as shown. With the help of a second person, carefully lift the Frame (55) and hold the Spacers between the plates on the Uprights (89). Align the hole in the plate on the Right Upright (89) with the hole in the Right Frame Spacer (13). Loosely thread a 5" Bolt (10) and a 3/8" Star Washer (45) into the Spacer and the Frame (55). Repeat this step on the left side of the treadmill. See drawing 2a. With the help of a second person, carefully tip the treadmill onto its left side as shown. Feed the Wire Harness (22) into the large round hole near the lower end of the Right Upright (89), and then pull the Wire Harness out of the upper end as shown. 2 High side Plate 13 55 2a 89 22 45 89 10 22 3. Open part bag C. With the help of a second person, raise the Left and Right Uprights (88, 89) to the vertical position. Identify the Right Handrail (6), which has a large hole in the left side. Feed the Wire Harness (22) into the rectangular bracket on the Right Handrail and out of the large hole. (Note: It may be helpful to use needlenose pliers to pull the Wire Harness out of the hole.) Press a Handrail Cap (83) onto the lower end of the Right Handrail as shown. Insert the rectangular bracket on the Right Handrail (6) into the right Upright (89). Attach the Right Handrail and the Handrail Cap (83) with three 1" Bolts (12) and two 1/4" Washers (108) as shown. Do not tighten the Bolts yet. Attach the Left Handrail (7) as described above. Note: There is not a wire harness on the left side. 3 7 12 108 12 12 108 88 83 22 Hole 12 6 108 12 89 83 12 7
-
 1
1 -
 2
2 -
 3
3 -
 4
4 -
 5
5 -
 6
6 -
 7
7 -
 8
8 -
 9
9 -
 10
10 -
 11
11 -
 12
12 -
13
-
14
-
15
-
16
-
17
-
18
-
19
-
20
-
21
-
22
-
23
 |
 |