Weslo Daybreak 408 Spa English Manual - Page 9
Remove the Spa Cover 11 and Inflatable Cover 4
 |
View all Weslo Daybreak 408 Spa manuals
Add to My Manuals
Save this manual to your list of manuals |
Page 9 highlights
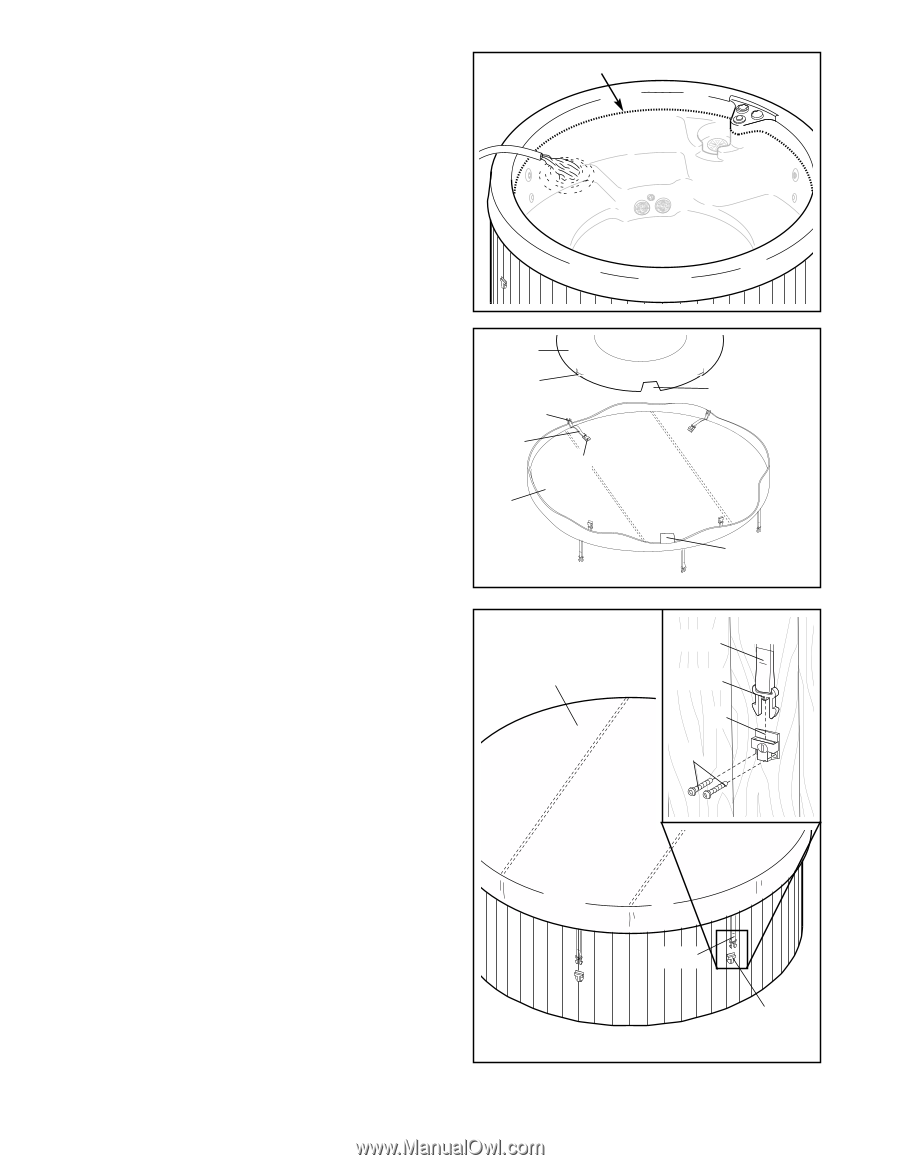
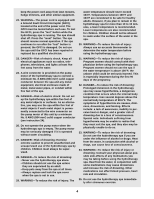
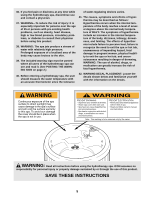
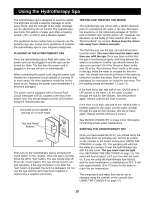
3. Remove the two warning decals (not shown) from the spa shell. Wipe the spa shell clean with a damp 3 cloth. Before filling the spa, make sure that it is in the desired position. In addition, make sure that the spa can be easily serviced. Once the spa is filled, it will have to be drained to be moved. Using a garden hose or other clean water source, fill the spa. Do not use soft water. The spa may be filled with cool water; however, if warm or hot water is used, the spa will be ready to use sooner. Fill the spa until the water is approximately one inch above the filter assembly. Do not overfill the spa. Fill to Here 4. Attach the nozzle of the included air pump to the valve on the Inflatable Cover (4). Fill the Inflatable Cover with air. Do not overfill the Inflatable Cover. Slide one of the straps on the inside of the Spa Cover (11) through one of the loops on the Inflatable Cover (4). Attach the latch on the strap to the buckle on the other end. Make sure the cutout on the Inflatable Cover is lined up with the warning label on the Spa Cover. Attach the other three straps on the inside of the Spa Cover through the loops on the Inflatable Cover in the same manner. Place the Spa Cover over the spa and line up the cutout in the Inflatable Cover with the console of the spa. 4 4 Loop Buckle Strap Latch 11 5. See the inset drawing. Pull down one of the straps on the Spa Cover (11) and hold the attached Buckle 5 (30) against the wood panels on the spa. (Note: It may be easier to position the Buckle if a second person holds the strap on the opposite side of the Spa 11 Cover tight.) The Spa Cover must be tight. Do not place the Buckle over one of the grooves in the wood panels. Remove the latch from the Buckle and attach the Buckle to the wood panels with two #4 x 3/4" Screws (31). Note: It may be helpful to use a drill with a 1/16" bit to make starter holes in the wood panels. It may also be helpful to apply soap or wax to the screw threads. Attach the other five Buckles (30) to the spa in the same manner. Remove the Spa Cover (11) and Inflatable Cover (4) from the spa. Cutout Warning Label Strap Latch 30 31 Strap 30 9
-
 1
1 -
2
-
3
-
 4
4 -
 5
5 -
 6
6 -
 7
7 -
 8
8 -
 9
9 -
 10
10 -
 11
11 -
 12
12 -
 13
13 -
 14
14 -
15
-
16
-
17
-
18
-
19
-
20
 |
 |