Weslo Momentum 850 Instruction Manual - Page 8
How To Use The Elliptical Crosstrainer
 |
View all Weslo Momentum 850 manuals
Add to My Manuals
Save this manual to your list of manuals |
Page 8 highlights
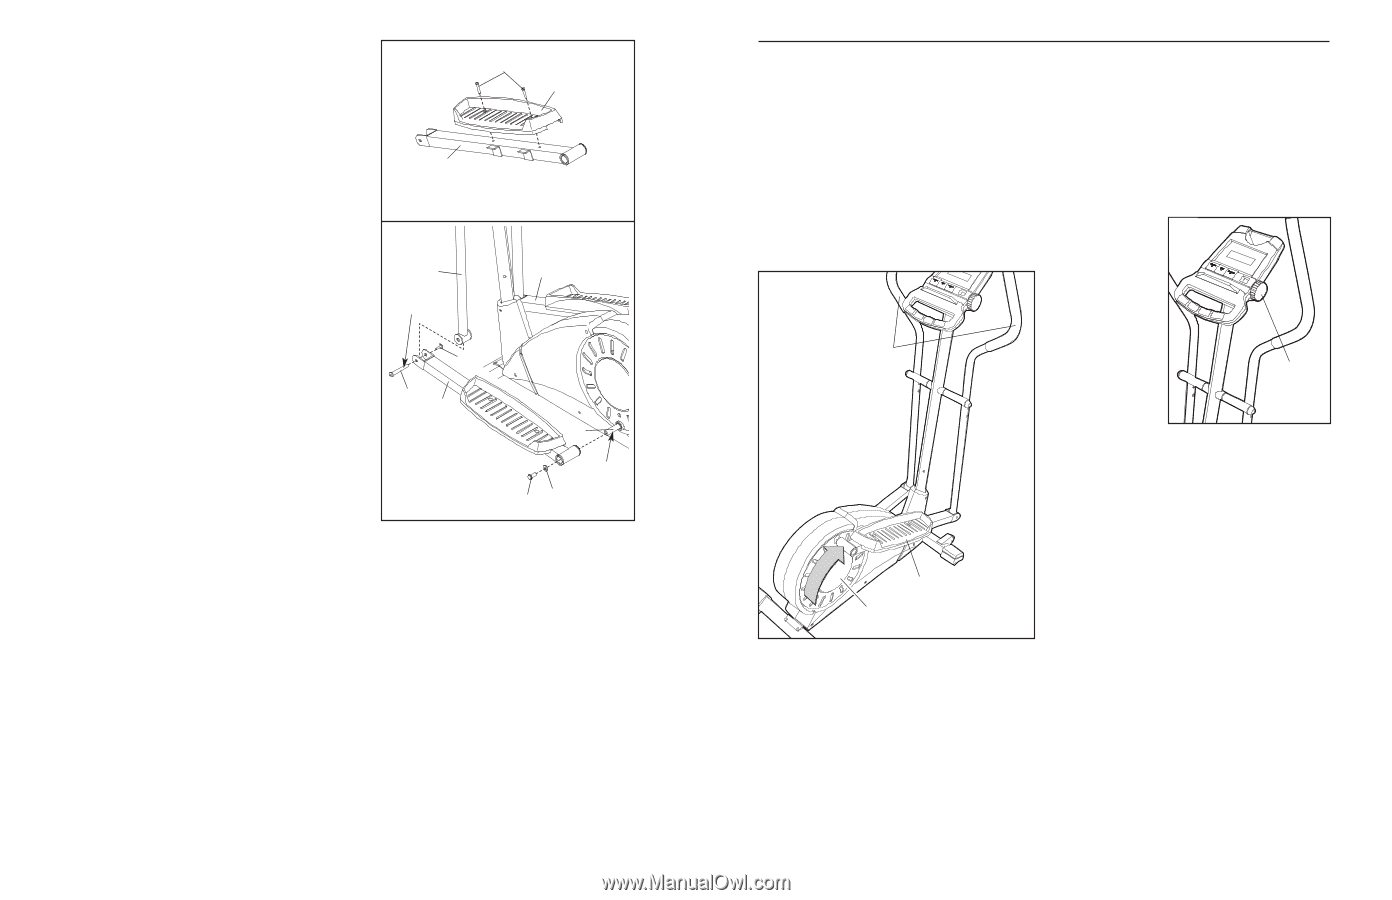
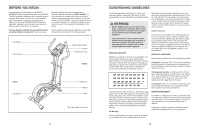
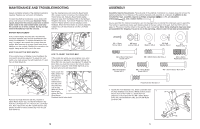
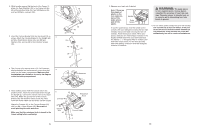
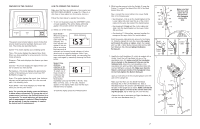
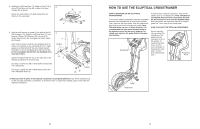
8. Identify the Left Pedal Arm (11). Attach a Pedal (13) to 8 the Left Pedal Arm with two M6 x 48mm Flat Head Screws (36) as shown. Attach the other Pedal to the Right Pedal Arm (not shown) in the same way. 11 36 13 9. Apply a small amount of grease to the axle on the left Disc Crossbar (16). Slide the Left Pedal Arm (11) onto the axle. Slide an M10 Washer (35) onto an M10 x 25mm Patch Screw (22), and tighten the Patch Screw into the axle. Next, hold the lower end of the left Handlebar Arm (5) inside of the bracket on the Left Pedal Arm (11). Apply grease to a Pedal Arm Bolt Set (40). Attach the Left Pedal Arm to the left Handlebar Arm with the Bolt Set. Do not overtighten the Bolt Set; the Handlebar Arm must pivot freely. Attach the Right Pedal Arm (12) to the right side of the elliptical crosstrainer in the same way. See step 5. Tighten the M8 x 19mm Button Screws (68) in the Upright (2). See step 6. Tighten the M8 x 38mm Button Bolts (50) in the Handlebar Arms (5). 9 5 Grease 40 40 11 12 16 22 35 Grease 10. Make sure that all parts of the elliptical crosstrainer are properly tightened. Note: Some hardware may be left over after assembly is completed. To protect the floor or carpet from damage, place a mat under the elliptical crosstrainer. HOW TO USE THE ELLIPTICAL CROSSTRAINER HOW TO EXERCISE ON THE ELLIPTICAL CROSSTRAINER To mount the elliptical crosstrainer, hold the handlebars and step onto the pedal that is in the lowest position. Then, step onto the other pedal. Push the pedals until they begin to move with a continuous motion. Note: The pedal disks can turn in either direction. It is recommended that you move the pedal disks in the direction shown by the arrow; however, for variety, you may turn the pedal disks in the opposite direction. Handlebars To dismount the elliptical crosstrainer, wait until the pedals come to a complete stop. Note: The elliptical crosstrainer does not have a free wheel; the pedals will continue to move until the flywheel stops. When the pedals are stationary, step off the highest pedal first. Then, step off the lowest pedal. HOW TO ADJUST THE PEDALING RESISTANCE As you exercise, you can adjust the resistance of the pedals with the resistance knob on the upright. To increase the resistance, turn the knob clockwise; to decrease the resistance, turn the knob counterclockwise. Resistance Knob Pedal Pedal Disk 8 9
-
 1
1 -
2
-
 3
3 -
 4
4 -
 5
5 -
 6
6 -
 7
7 -
 8
8
 |
 |