Weslo Pursuit 30 English Manual - Page 8
may become damaged.
 |
View all Weslo Pursuit 30 manuals
Add to My Manuals
Save this manual to your list of manuals |
Page 8 highlights
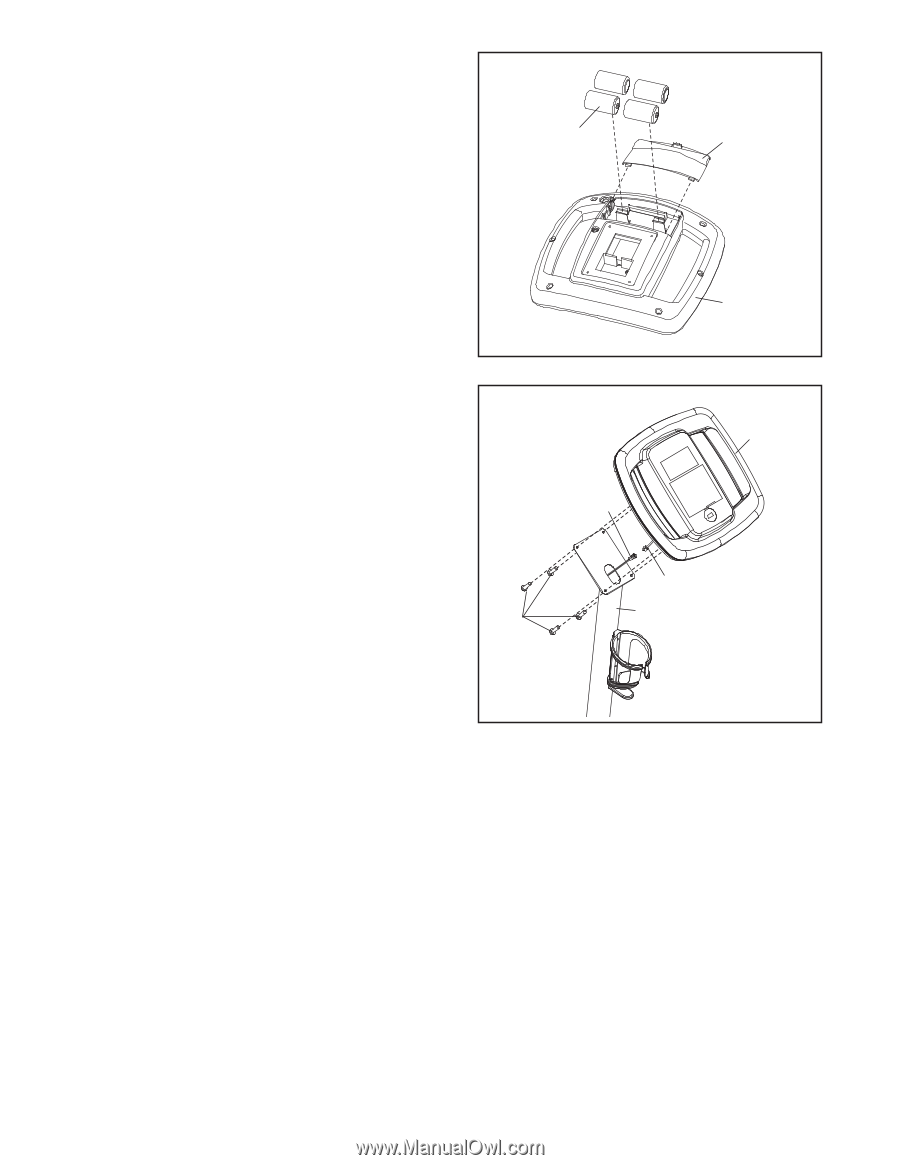
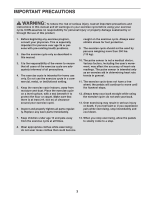
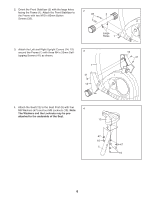
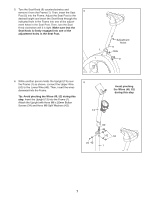
7. The Console (16) requires four 1.5V "D" batteries 7 (not included); alkaline batteries are recommended. IMPORTANT: If the exercise cycle has been exposed to cold temperatures, allow it to warm to room temperature before inserting batteries into the Console. If you do not do this, the con- sole displays or other electronic components may become damaged. Press the tab on the bat- tery cover and remove it. Insert four batteries into the Console as shown. Make sure that the batter- ies are oriented as shown by the diagram inside the battery compartment. Then, reattach the bat- tery cover. Batteries Battery Cover 16 8. While a second person holds the Console (16) near 8 the Upright (13), connect the console wire to the Upper Wire (52). Then, insert the wires downward into the Upright. Tip: Avoid pinching the wires during this step. Attach the Console (16) to the Upright (13) with four M4 x 15mm Screws (27). 27 16 52 Console Wire 13 Avoid pinching the wires during this step 8
-
 1
1 -
2
-
 3
3 -
 4
4 -
 5
5 -
 6
6 -
 7
7 -
 8
8 -
 9
9 -
 10
10 -
 11
11 -
 12
12 -
 13
13 -
14
-
15
-
16
-
17
-
18
-
19
-
20
 |
 |