WestBend 41063 Instruction Manual - Page 15
Troubleshooting Guide
 |
View all WestBend 41063 manuals
Add to My Manuals
Save this manual to your list of manuals |
Page 15 highlights
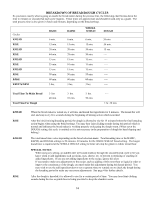
KNEAD RISE KNEAD RISE BAKE After the dough has risen, it is then stirred down briefly by the knead bar to remove excess carbon dioxide gas created by the yeast. SPECIAL NOTE: • If using the DOUGH setting, its cycle is complete at this time and ready for hand shaping , rising and baking in your own oven. An audible alert will sound and the bread maker will turn itself off after completion of the DOUGH cycle. The dough is then allowed to rise again, but for a shorter period of time. After the shorter rise time, the dough is again stirred down by the knead bar to remove excess gas and also to shape the dough into a ball for the final rise. This final knead ensures that the bread will have good texture. The dough then goes into the final rise to achieve its maximum height. Again, you may hear faint clicking sounds during the rise as gentle heat is provided to keep the chamber warm. The bread is then baked. An audible alert will sound when the bread is done and green Keep Warm light will glow. When the bread is removed, turn bread maker off by holding down the START/STOP button until Keep Warm light goes out, about 3 seconds. TROUBLESHOOTING GUIDE Following are some typical problems that can occur when making bread in your bread maker. Please review the problems, their possible causes and the corrective action that should be taken to ensure successful bread making. PROBLEM 1. Top inflated, mushroom-like in appearance 2. Top and sides cave in. POSSIBLE CAUSE Too much yeast. Too much sugar. Too much flour. Substituted bread machine/ fast-rising yeast for amount given for active dry yeast. Not enough salt. Warm, humid weather. May be caused from baking in high altitude. Too much liquid. Too much yeast. SOLUTION Reduce yeast by ¼ to ½ teaspoon. Reduce sugar by 1 teaspoon. Reduce flour by 2 to 3 tablespoons. Use correct amount of bread machine/fast machine/fast rising yeast. Use amount of salt recommended in recipe. Reduce liquid by 1 tablespoon and reduce yeast by ¼ to ½ teaspoon. Make recommended adjustment for high altitude baking by reducing yeast by ¼ teaspoon and reducing liquid by 2 to 3 teaspoons. Reduce liquid by 1 tablespoon. Use amount recommended in recipe. 3. Center of loaf is raw, not baked through. Too much liquid. Power outage during Forgot to put knead bar in pan. Reduce liquid by 1 tablespoon. If power goes out during operation bread maker will be turned off automatically. You will need to remove unbaked loaf from pan and start over with fresh ingredients. Always make sure knead bar is on shaft in bottom of pan before adding ingredients. 15
-
 1
1 -
2
-
3
-
4
-
5
-
6
-
7
-
8
-
9
-
 10
10 -
 11
11 -
 12
12 -
 13
13 -
 14
14 -
 15
15 -
 16
16 -
 17
17 -
 18
18 -
 19
19 -
 20
20 -
21
-
22
-
23
-
24
-
25
-
26
 |
 |