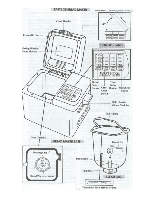
WestBend 41063 Instruction Manual - Page 9
Time to Complete in Hours and Minutes
 |
View all WestBend 41063 manuals
Add to My Manuals
Save this manual to your list of manuals |
Page 9 highlights
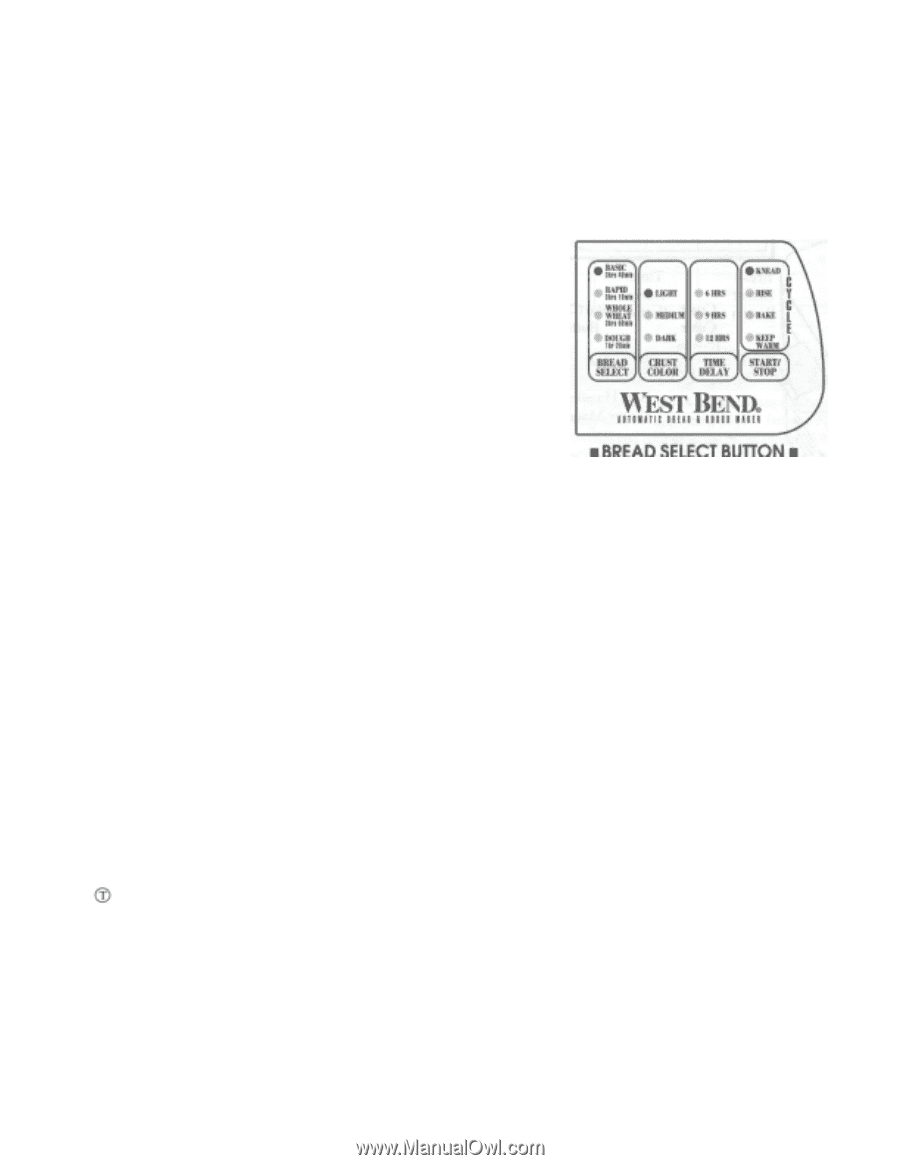
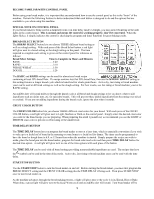
BECOME FAMILIAR WITH CONTROL PANEL Before using your bread maker, it is important that you understand how to use the control panel as this is the "brain" of the machine. Review the following features to better understand what each button is designed to do and the options that are available to you when using this machine. SPECIAL NOTE ON CONTROL PANEL If your bread maker is being used in a darkened room or in time delay mode overnight, you may notice flickering of the unlit lights in the control panel. This is normal and means the control is working properly; don't be concerned. When the lights flicker, it simply indicates the control is checking the program and timer functions for great baking results. BREAD SELECT BUTTON The BREAD SELECT button lets you choose THREE different bread setting as well as a dough setting. With each press of the Bread Select button, a red light will glow next to a bread setting or the dough setting on the panel. The time required to complete each setting is given on the control panel for reference as follows: Bread Select Settings Time to Complete in Hours and Minutes BASIC 3:40 RAPID 3:10 WHOLE WHEAT 3:50 DOUGH 1:20 The BASIC and RAPID settings can be used for almost any bread recipe containing at least 50% bread flour. If a recipe contains less that 50% bread flour, then use the WHOLE WHEAT setting as this setting features a longer knead cycle which is beneficial for whole grain flours. Active dry, fast rising or bread machine yeast can be used at all bread settings as well as the dough setting. For best results, use fast rising or bread machine yeast at the RAPID setting. An audible alert will sound midway through the knead cycle at all bread and dough settings to let you know when to add ingredients such as raisins nuts, etc. for specialty breads. This will prevent these added ingredients from becoming over mixed or crushed. If you are not adding ingredients during the knead cycle, ignore the alert when it sounds. CRUST COLOR BUTTON The CRUST COLOR button lets you choose THREE different crust colors for your bread. With each press of the CRUST COLOR button, a red light will glow next to Light, Medium or Dark on the control panel. Simply select the desired crust color you wish for the bread recipe you are preparing. When preparing the small 1 pound loaf, we recommend you use the LIGHT or MEDIUM crust color to prevent overbrowning of the smaller loaf. TIME DELAY BUTTON The TIME DELAY button lets you program the bread maker to start at a later time, which is especially convenient if you wish to wake up to a fresh loaf of bread in the morning or come home to a fresh loaf for dinner. The timer can be programmed to have the bread or dough done in 6,9, or 12 hours from when the machine is started. Simply prepare the recipe you wish to make, place the bread pan into the bread maker, program for bread select and color and then press TIME DELAY button for desired time option. A red light will glow next to one of the time options with each press of the button. The TIME DELAY can be used with all bread settings providing non-perishable ingredients are used. The recipes that have the symbol can be used in the time delay mode. Active dry, fast rising or bread machine yeast can be used with the time delay. START/STOP BUTTON Use the START/STOP button to turn the bread maker on and off. Before starting the bread maker, you must first program the BREAD SELECT setting and the CRUST COLOR setting plus the TIME DELAY if being used. Then press START/STOP once to turn bread maker on. As the machine advances through the bread making process, a light will glow next to the cycle it is in, Knead, Rise or Bake. When done, a green light will glow next to the Keep Warm cycle and an audible alert will sound. Turn bread maker off by 9
-
 1
1 -
2
-
3
-
 4
4 -
 5
5 -
 6
6 -
 7
7 -
 8
8 -
 9
9 -
 10
10 -
 11
11 -
 12
12 -
 13
13 -
 14
14 -
15
-
16
-
17
-
18
-
19
-
20
-
21
-
22
-
23
-
24
-
25
-
26
 |
 |