Western Digital My Passport User Manual - Page 15
Backing Up Files, Backup.swstore, .WD Hidden Items, WD SmartWare.swstor, [Windows]
 |
View all Western Digital My Passport manuals
Add to My Manuals
Save this manual to your list of manuals |
Page 15 highlights
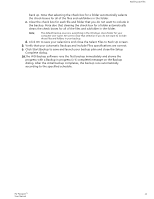
Backing Up Files [Root]\Drivers\, [Root]\Temp\, System Volume Information, WD Backup.swstore, .WD Hidden Items, WD SmartWare.swstor, [Windows] ▪ Extensions: .ds_store, .temp, .tmp, .wdsync ▪ Start value: ~ ▪ End values: desktop.ini, .dropbox, .dropbox.attr, hiberfil.sys, -journal, pagefile.sys, thumbs.db Backing Up Files 1. Open the Select your WD storage device or cloud service dialog by clicking either: ▪ Add Backup Plan on the WD Backup screen ▪ Configure backup on the WD Backup view menu from the Windows task bar 2. The Select your WD storage device or cloud service dialog shows all of the hardware devices and cloud service accounts that you can use for a backup target device: a. Select to highlight the device that you want to use. b. If you have more than three available devices, use the left- and right-scroll buttons to see them all. c. Click Next to display the Setup Complete dialog: Note that: IF you selected a . . . THEN the WD Backup software displays a . . . Cloud service account, Log in or connect dialog that you must complete to continue. (See Uninstalling the WD Software.) Password-protected device that is locked, No writable partition message. In this case, first use either the WD Security or the WD Drive Utilities software to unlock the drive. Then reselect it. 3. The initial/default configuration of the backup settings on the Setup Complete dialog is for hourly backups of everything in the Windows Users folder for your computer user name. On the Setup Complete dialog: IF you want to . . . THEN click . . . Accept the default settings, Specify a different backup schedule, Change the Include Files setting, Start Backup to save and launch your backup plan and close the Setup Complete dialog. Skip to Step 10. Edit Schedule to display the Automatic Backup Schedule screen and proceed to Step 4. Edit Files to display the Select Files to Back Up screen and skip to Step 7. My Passport™ 11 User Manual
-
 1
1 -
2
-
3
-
4
-
5
-
6
-
7
-
8
-
9
-
 10
10 -
 11
11 -
 12
12 -
 13
13 -
 14
14 -
 15
15 -
 16
16 -
 17
17 -
 18
18 -
 19
19 -
 20
20 -
21
-
22
-
23
-
24
-
25
-
26
-
27
-
28
-
29
-
30
-
31
-
32
-
33
-
34
-
35
-
36
-
37
-
38
-
39
-
40
-
41
 |
 |
