Western Digital Sentinel DS5100 Administrator and Maintenance Guide - Page 89
WARNING, Important, Restart the server.
 |
View all Western Digital Sentinel DS5100 manuals
Add to My Manuals
Save this manual to your list of manuals |
Page 89 highlights
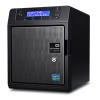
APPENDIX 5. Carefully lower the fan plate toward you then lift the fan plate out of the unit (Figure 5). Figure 5. Remove fan WARNING! Before removing the fan plate completely from the unit, detach the fan interface connector from the back plane PCBA. 6. Gently place the replacement fan into the unit, ensuring that the orientation of the fan is correct and that the fan interface connector is connected. 7. Replace and tighten the four (4) Fan Plate mounting screws. 8. Do not over-tighten the mounting screws. 9. Reconnect all of the cables for the device. 10. Restart the server. Important: Do not disassemble the fan. Return the entire assembly intact to WD, if instructed to do so. WD SENTINEL DS5100/DS6100 83 ADMINISTRATOR AND MAINTENANCE GUIDE
-
 1
1 -
2
-
3
-
4
-
5
-
6
-
7
-
8
-
9
-
10
-
11
-
12
-
13
-
14
-
15
-
16
-
17
-
18
-
19
-
20
-
21
-
22
-
23
-
24
-
25
-
26
-
27
-
28
-
29
-
30
-
31
-
32
-
33
-
34
-
35
-
36
-
37
-
38
-
39
-
40
-
41
-
42
-
43
-
44
-
45
-
46
-
47
-
48
-
49
-
50
-
51
-
52
-
53
-
54
-
55
-
56
-
57
-
58
-
59
-
60
-
61
-
62
-
63
-
64
-
65
-
66
-
67
-
68
-
69
-
70
-
71
-
72
-
73
-
74
-
75
-
76
-
77
-
78
-
79
-
80
-
81
-
82
-
83
-
 84
84 -
 85
85 -
 86
86 -
 87
87 -
 88
88 -
 89
89 -
 90
90 -
 91
91 -
 92
92 -
 93
93 -
 94
94 -
95
-
96
-
97
-
98
-
99
-
100
-
101
-
102
-
103
-
104
-
105
-
106
-
107
 |
 |
