Western Digital WDBABG0000NBK User Manual (pdf) - Page 17
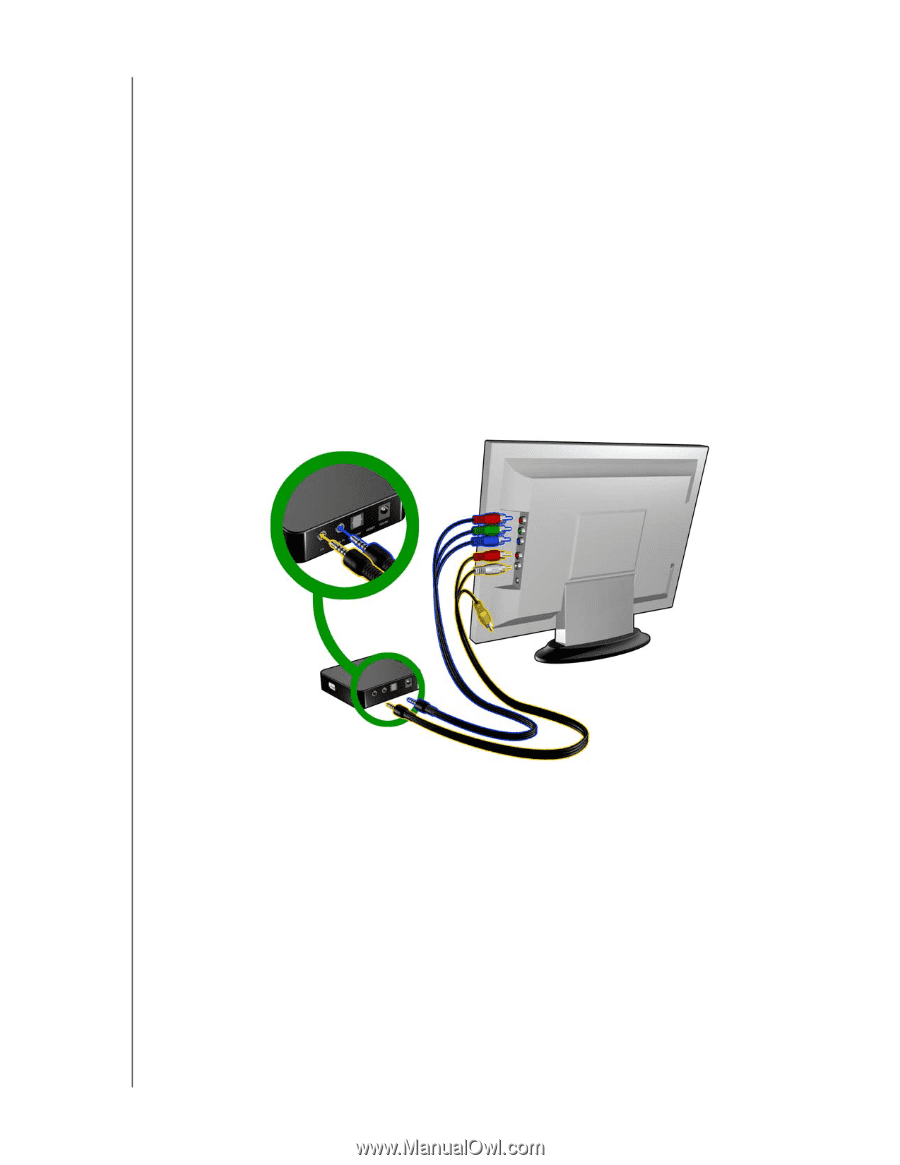
Component Video and Audio (High Definition), Media Player Menu
 |
UPC - 718037752501
View all Western Digital WDBABG0000NBK manuals
Add to My Manuals
Save this manual to your list of manuals |
Page 17 highlights
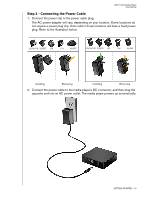
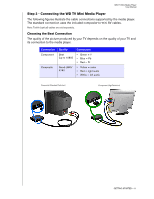
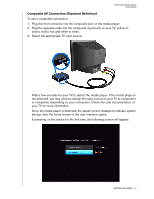
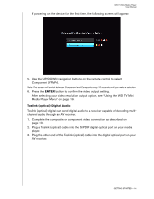
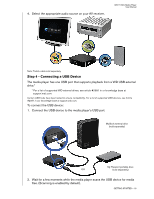
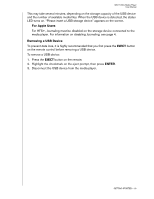
WD TV Mini Media Player User Manual 4. Use the UP/DOWN navigation buttons on the remote control to select Composite AV (CVBS) Note: This screen will switch between Component and Composite every 10 seconds until you make a selection. 5. Press the ENTER button to confirm the video output setting. After selecting your video resolution output option, see "Using the WD TV Mini Media Player Menu" on page 19. Component Video and Audio (High Definition) The component connection only provides video signals. You will also need to connect the composite audio cables to provide sound. This interface provides video quality resolution of up to 1080i. To connect your media player using a component-to-mini cable: 1. Plug mini cable into the component connector on the media player. 2. Plug the opposite ends into the component ports on your TV or audio/video system (if available), red to red, green to green, and blue to blue. 3. For audio, plug the composite-to-mini connector into the composite port on the media player. 4. Plug the audio connectors on the opposite end of the cable into the composite audio input ports on your TV, red to red and white to white. Wait a few seconds for your TV to detect the media player. If the media player is not detected, you may need to change the input source on your TV to component or composite, depending on your connection. Check the user documentation of your TV for more information. Once the media player is detected, the splash screen displays to indicate system bootup, then the home screen of the user interface opens. GETTING STARTED - 13
-
 1
1 -
2
-
3
-
4
-
5
-
6
-
7
-
8
-
9
-
10
-
11
-
 12
12 -
 13
13 -
 14
14 -
 15
15 -
 16
16 -
 17
17 -
 18
18 -
 19
19 -
 20
20 -
 21
21 -
 22
22 -
23
-
24
-
25
-
26
-
27
-
28
-
29
-
30
-
31
-
32
-
33
-
34
-
35
-
36
-
37
-
38
-
39
-
40
-
41
-
42
-
43
-
44
-
45
-
46
-
47
-
48
-
49
-
50
-
51
-
52
-
53
-
54
-
55
-
56
-
57
-
58
-
59
-
60
-
61
-
62
-
63
-
64
-
65
-
66
 |
 |