Whirlpool CGM2751KQ Installation Instructions - Page 12
If dryer does, operate
 |
View all Whirlpool CGM2751KQ manuals
Add to My Manuals
Save this manual to your list of manuals |
Page 12 highlights
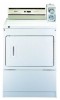
Recessed area and closet installation instructions This dryer may be installed in a recessed area or closet, For recessed area and closet installations, minimum clearances can be found on the serial tag on the dryer, The installation spacing is in inches and is minimum allowable, Additional spacing should be considered for ease of installation, servicing and compliance with local codes and ordinances, If closet door is installed, the minimum unobstructed air openings in top and bottom is required, Louvered doors with equivalent air openings are acceptable, Companion appliance spacing should be considered, The dryer must be exhausted outdoors. No other fuel-burning appliance may be installed in the same closet. Minimum Installation Clearances T 15" @8.1 cm)** [3S_ cm) max. 14" Claret door r- _' (ocm)* __ o"(ocm)* _0cm)" _ i. (2.5 cm) Recessed front view Closet side view b. 3" {7.6 cm) J 0 24"_17 * + 3" [7.6 cm) + Closet front view • Additional clearances for wall, door and floor rnoldin may be required or if exiemal exhau_lbow m used. ** Openinlg is minimum for cleset door. Louvered door with equivalent air opening is acceptable. Maintenance instructions • Clean lint screen after each cycle, • Keep dryer area clear and free from combustible materials, gasoline and other flammable vapors and liquids, • Do not obstruct the flow of combustion and ventilation air, Moving the d er to a new locatlon... Slide dryer onto cardboard or hardboard before moving across floor to avoid damaging floor covering. Gas dryer models: • Disconnect electrical cord, Tape securely to dryer, • Shut off the gas supply valves in the gas supply line, • Disconnect gas pipe and filtings from dryer and cap gas supply line, Tape end of dryer gas pipe, Electric dryer models: • Shut of electrical supply to dryer, • Disconnect the power supply cord or cable from the dryer terminal block, All models: • Make sure leveling legs are secure in dryer base, • Tape drum to front panel, • Tape dryer door, lint screen and end of gas pipe, Before the appliance is removed from service or discarded, remove the door to the dryer compartment. If dryer does not operate properly... Check the following to be sure that: 1, Electric supply isconnected, 2, Circuit breakers are not tripped or house fuses blown, 3, Door isclosed, 4, Controls are set in a running or "ON" position, 5, Staff button has been pushed firmly, 6, For gas dryers, check that gas supply shutoff valves are set in open position, If you need assistance... The Whirlpool Consumer Interaction Center will answer any questions about operating or maintaining your dryer not covered in the Installation Instructions, The Whirlpool Consumer Interaction Center is open 24 hours a day, 7 days a week, Just dial 1-800 NO BELTS(1-800-662-3587) -the call is free, When you call, you will need the dryer model number and serial number, Both numbers can be found on the serial-rating plate located on your appliance, Page 12
-
 1
1 -
2
-
3
-
4
-
5
-
6
-
 7
7 -
 8
8 -
 9
9 -
 10
10 -
 11
11 -
 12
12 -
 13
13 -
 14
14 -
 15
15 -
 16
16 -
 17
17 -
18
-
19
-
20
-
21
-
22
-
23
-
24
-
25
-
26
 |
 |
