Whirlpool W5CG3024XS Installation Instructions - Page 8
Installation Instructions - cutout
 |
UPC - 883049225630
View all Whirlpool W5CG3024XS manuals
Add to My Manuals
Save this manual to your list of manuals |
Page 8 highlights
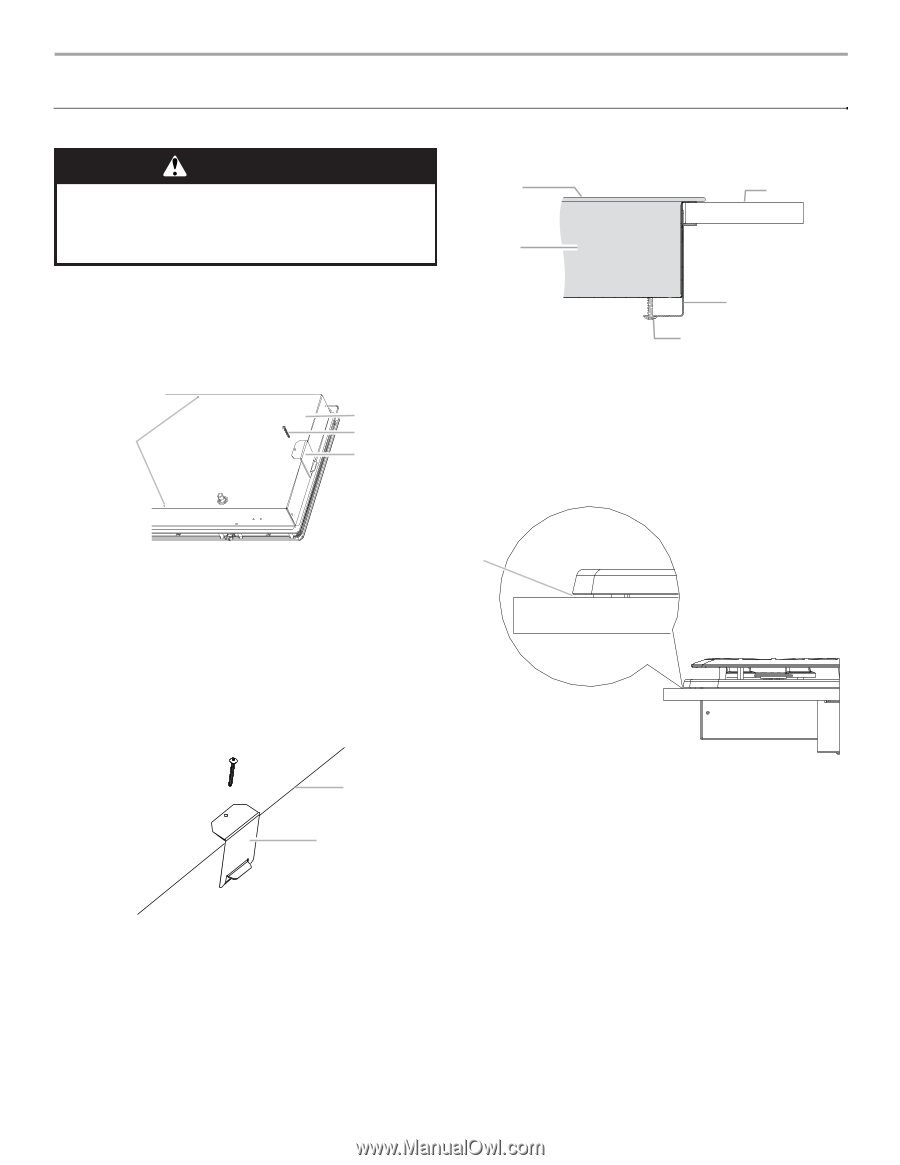
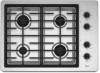
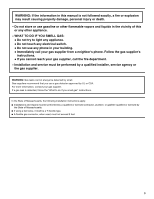
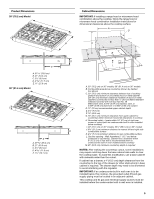
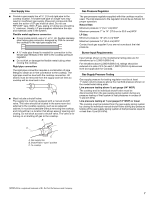
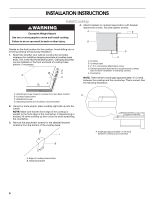
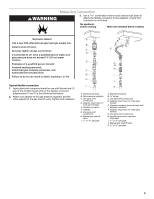
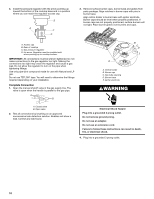
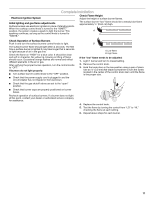
INSTALLATION INSTRUCTIONS Install Cooktop WARNING Excessive Weight Hazard 4. Attach brackets to cooktop base bottom with bracket attachment screws. Securely tighten screws. A E Use two or more people to move and install cooktop. Failure to do so can result in back or other injury. B Decide on the final location for the cooktop. Avoid drilling into or severing existing wiring during installation. 1. Determine whether your cabinet construction provides clearance for installing clamping brackets at cooktop base ends. This is the recommended location. Clamping brackets can be installed on the front and back of cooktop base bottom, if necessary. B A C D C D C A. Cooktop B. Cooktop base C. 2" (5.1 cm) bracket attachment screw D. Clamping bracket (extends far enough beyond cooktop base to allow installation of clamping screws) E. Countertop NOTE: There will be a small gap (approximately ¹⁄₈" [3 mm]) between the cooktop and the countertop. This is normal. See the following illustration. A. Attachment screw holes for optional front and back location A B. Cooktop base bottom C. Attachment screw D. Clamping bracket (end locations recommended) 2. Using 2 or more people, place cooktop right side up into the cutout. NOTE: Make sure that the front edge of the cooktop is parallel to the front edge of the countertop. If repositioning is needed, lift entire cooktop up from cutout to avoid scratching the countertop. 3. Remove the attachment screws for the selected bracket locations from the bottom of the cooktop base. A B A. Small gap (approximately ¹⁄₈" [3 mm]) between cooktop and countertop A. Edge of cooktop base bottom B. Clamping bracket 8
-
 1
1 -
2
-
 3
3 -
 4
4 -
 5
5 -
 6
6 -
 7
7 -
 8
8 -
 9
9 -
 10
10 -
 11
11 -
 12
12 -
 13
13 -
14
-
15
-
16
-
17
-
18
-
19
-
20
-
21
-
22
-
23
-
24
 |
 |