Whirlpool WFW9700VW Use and Care Guide - Page 6
Whirlpool WFW9700VW - Duet Steam -Front Load Washer Manual
 |
UPC - 883049134680
View all Whirlpool WFW9700VW manuals
Add to My Manuals
Save this manual to your list of manuals |
Page 6 highlights
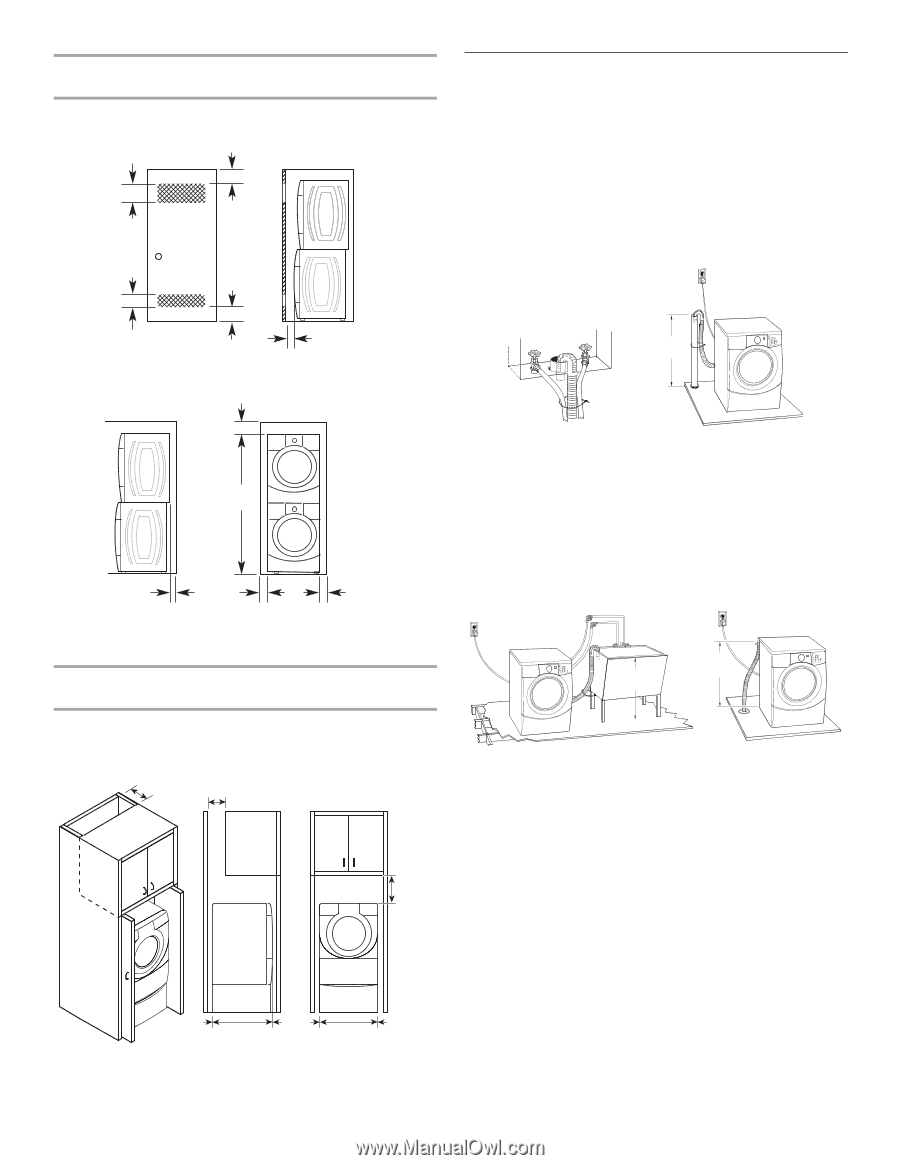
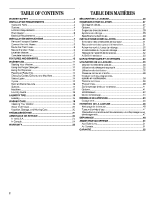
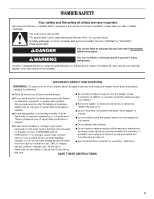
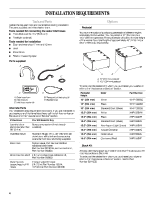
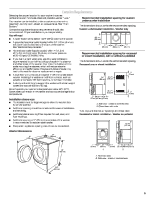
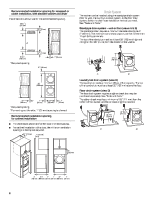
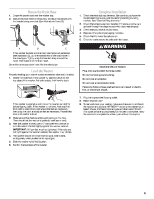
Recommended installation spacing for recessed or closet installation, with stacked washer and dryer The dimensions shown are for the recommended spacing. 48 in.2 * (310 cm2) 3"* (76 mm) Drain System The washer can be installed using the standpipe drain system (floor or wall), the laundry tub drain system, or the floor drain system. Select the drain hose installation method you need. See "Tools and Parts." Standpipe drain system - wall or floor (views A & B) The standpipe drain requires a minimum diameter standpipe of 2" (50 mm). The minimum carry-away capacity can be no less than 17 gal. (64 L) per minute. The top of the standpipe must be at least 30" (762 mm) high and no higher than 96" (2.4 m) from the bottom of the washer. 3"* (76 mm) 24 in.2 * (155 cm2) 1"* (25 mm) 30" min. (762 mm) *Required spacing 6"* (152 mm) A B Laundry tub drain system (view C) 76" (1930 mm) The laundry tub needs a minimum 20 gal. (76 L) capacity. The top of the laundry tub must be at least 30" (762 mm) above the floor. Floor drain system (view D) The floor drain system requires a siphon break that may be purchased separately. See "Tools and Parts." The siphon break must be a minimum of 28" (711 mm) from the bottom of the washer. Additional hoses might be needed. 5½"** (140 mm) 1" (25 mm) 27" (686 mm) 1" (25 mm) *Required spacing ** For venting out the side, 1" (25 mm) spacing is allowed. Recommended installation spacing for cabinet installation
-
 1
1 -
 2
2 -
 3
3 -
 4
4 -
 5
5 -
 6
6 -
 7
7 -
 8
8 -
 9
9 -
 10
10 -
 11
11 -
 12
12 -
13
-
14
-
15
-
16
-
17
-
18
-
19
-
20
-
21
-
22
-
23
-
24
-
25
-
26
-
27
-
28
-
29
-
30
-
31
-
32
-
33
-
34
-
35
-
36
-
37
-
38
-
39
-
40
-
41
-
42
-
43
-
44
-
45
-
46
-
47
-
48
-
49
-
50
-
51
-
52
 |
 |