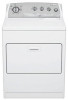
Whirlpool WGD5800S Installation Instructions
Whirlpool WGD5800S Manual
 |
View all Whirlpool WGD5800S manuals
Add to My Manuals
Save this manual to your list of manuals |
Whirlpool WGD5800S manual content summary:
- Whirlpool WGD5800S | Installation Instructions - Page 1
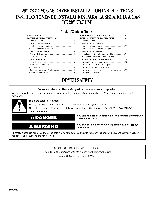
DRYER SAFETY 1 SEGURIDAD DE LA SECADORA 10 INSTALLATION INSTRUCTIONS 2 Tools and Par_s 2 Location Requirements 3 Electrical Requirements 4 Gas others are very important. many important safety messages in this manual and on your appliance. Always read and obey all safety This is the safety - Whirlpool WGD5800S | Installation Instructions - Page 2
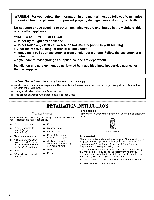
. • Immediately call your gas supplier from a neighbor's phone. Follow the gas supplier's instructions. • If you cannot reach your gas supplier, call the fire department. - Installation and service must be performed by a qualified installer, service agency, or the gas supplier. In the State - Whirlpool WGD5800S | Installation Instructions - Page 3
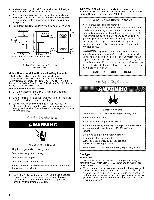
to support the dryer and a total weight (dryer and load) of 200 Ibs (90.7 kg). The combined weight of a companion appliance should also be considered. • A level floor with a maximum slope of 1" (2.5 cm) under entire dryer. (If slope is greater than 1" [2.5 cm], install Extended Dryer Feet kit, Part - Whirlpool WGD5800S | Installation Instructions - Page 4
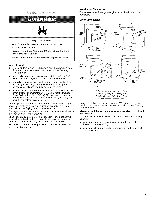
not exceed 13" (33 cm) water cm_umno Examples of a qualified person include: licensed heating personnel, authorized gas company personnel, and authorized service personnel. Failure to do so can result in death, explosion, or fire. Gas Type Natural Gas: This dryer is equipped for use with natural - Whirlpool WGD5800S | Installation Instructions - Page 5
can be purchased from your dealer or by calling Whirlpool Parts and Accessories. For more information, see the "Assistance or Service" section of your "Dryer User Instructions." • The dryer exhaust must not be connected into any gas vent, chimney, wall, ceiling, or a concealed space of a building - Whirlpool WGD5800S | Installation Instructions - Page 6
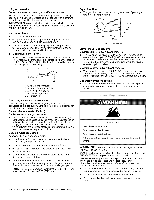
are available for purchase. Please reference the "Assistance or Service" section of your "Dryer User Instructions." • Over-The-Top Installation: Part Number 4396028 Periscope Installation (For use with dryer vent to wall vent mismatch): Part Number 4396037 - 0" (0 cm) to 18" (45.72 cm) mismatch - Whirlpool WGD5800S | Installation Instructions - Page 7
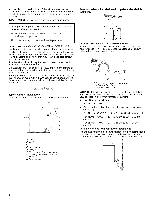
to finish turning the legs until the diamond marking is no longer visible. 5. Place a carton corner post under each of the 2 dryer back corners. Stand the dryer up. Slide the dryer on the corner posts until it is close to its final location. Leave enough room to connect the exhaust vent. 6. Once - Whirlpool WGD5800S | Installation Instructions - Page 8
gas pipe. Mobile home installations require a Mobile Home Installation Kit. For ordering information please reference your "Dryer User Instructions." top screws in cabinet are in large part of hinge slot. Pull door forward off screws. Set door on top of dryer. Remove top screws from cabinet. 4. - Whirlpool WGD5800S | Installation Instructions - Page 9
where hinges were just removed. 7= Attach door hinges to door so large part of hinge slot is at bottom of hinge. 10. Remove door strike on the dryer. 8. Read your "Dryer User Instructions." 9. Wipe the dryer drum interior thoroughly with a damp cloth to remove any dust. 10. Set the dryer on a full - Whirlpool WGD5800S | Installation Instructions - Page 10
P INSTRUCCIONEDSEINSTAIACIONPARALASECADORAA GAS DE 29"(73,7CM) SEGURIDADDE LASECADORA Su seguridad y la seguridad de los demas es muy importante. Hemos incluido muchos mensajes importantes de seguridad en este manual yen su electrodomestico. Lea y obedezca siempre todos los mensajes de seguridad. - Whirlpool WGD5800S | Installation Instructions - Page 11
estado de Massachusetts. _, Si se usa una vhiuIa de bola, debe ser un tipo de manigueta T. _, Si se usa un conector de gas flexible no debe exceder de 3 pies. # INSTRUCCIONESDE INSTAIACION Verifique si tiene todo Io necesario para una instalaci6n correcta. La instalaci6n adecuada es responsabilidad - Whirlpool WGD5800S | Installation Instructions - Page 12
reducir la transferencia de ruido. Para la instalaci6n en cl6set, con una puerta, se requieren aberturas de ventilaci6n minimas en la parte superior e inferior de la puerta. Se aceptan puertas tipo persianas con aberturas de ventilaci6n equivalentes. Tambien se debe considerar espacio adicional - Whirlpool WGD5800S | Installation Instructions - Page 13
apropiada. • Su secadora debe tenet el quemador adecuado para el tipo de gas que tiene en su casa. La informaci6n respecto al quemador esta ubicada en su secadora. Si esta informaci6n no esta de acuerdo con el tipo de gas disponible, p6ngase en contacto con su distribuidor o Ilame a los nQmeros de - Whirlpool WGD5800S | Installation Instructions - Page 14
manual a una distancia de unos seis (6) pies (1,8 m) de la secadora de acuerdo con el C6digo Nacional de Gas combustible (National Fuel Gas resistan la acci6n del gas L.R No use cinta de TEFLON% El tubo de gas de la secadora • El tubo de gas que sale por la parte posterior de su secadora - Whirlpool WGD5800S | Installation Instructions - Page 15
o Ilamando a Piezas y Accesorios Whirlpool. Para obtener mas informaci6n tome la secadora no debe conectarse en ningOn ducto de escape de gas, chimenea, pared, techo o el espacio oculto de un escape Las instalaciones tipicas tienen la ventilaci6n en la parte posterior de la secadora. S A A. Secadora - Whirlpool WGD5800S | Installation Instructions - Page 16
alternas en espacios limitados. Per favor vea los nOmeros de servicio ubicados en "lnstrucciones para el usuario de la secadora". • Instalacidn en la parte superior: Pieza nOmero 4396028 • Instalacidn de periscopio (Para usar si hay desacoplo entre el ducto de escape de la pared y el conducto de - Whirlpool WGD5800S | Installation Instructions - Page 17
roscas macho no abocinadas. Si se usa tuberfa flexible de metal, asegQrese que no hay partes retorcidas. NOTA: Para las conexiones de gas L.R, debe usar un pegamento de uni6n de tubos resistente a la acci6n del gas L.R No use cinta TEFLON% Se debe usar una combinaci6n de tubes de uni6n para conectar - Whirlpool WGD5800S | Installation Instructions - Page 18
torceduras en la linea de gas flexible. Si Io desea, puede cambiar la direcci6n del cierre de la puerta del lado derecho al lado izquierdo. Puerta grande de vaiv_n lateral de posicibn reversible Levante la puerta hasta que los tornillos superiores del gabinete esten en la parte grande de la ranura - Whirlpool WGD5800S | Installation Instructions - Page 19
. Deslice la puerta hacia arriba para que los tornillos esten en la parte de abajo de las ranuras. Apriete los tornillos. Introduzca y apriete los . • Siesta abierta la valvula de cierre de la linea de suministro de gas, contacte a un tecnico calificado. 10. Extraiga el tap6n del interruptor de la - Whirlpool WGD5800S | Installation Instructions - Page 20
8562582 ©) 2004. All rights reserved. Todos los derechos reservados. Benton Harbor, Michigan 49022 TM DURASAFE is a trademark of Whirlpool, U.S.A. TM DURASAFE es una marca de comercio de Whirlpool. EE.UU. 4/04 Printed in U.S.A. Impreso en EE.UU.
-
 1
1 -
 2
2 -
 3
3 -
 4
4 -
 5
5 -
 6
6 -
 7
7 -
8
-
9
-
10
-
11
-
12
-
13
-
14
-
15
-
16
-
17
-
18
-
19
-
20
 |
 |
29"
(73.7CM)
GASDRYER
INSTALLATION
INSTRUCTIONS
#
INSTRUCCIONESDEINSTALACIONPARALASECADORAAGAS
DE29"
(73,7
CM)
Table
of
Contents
/
Indice
DRYER SAFETY
.........................................................
1
INSTALLATION
INSTRUCTIONS
.............................
2
Tools and Par_s
.......................................................
2
Location
Requirements
..........................................
3
Electrical
Requirements
..........................................
4
Gas Supply Requirements
......................................
4
Venting
Requirements
.............................................
5
Plan Vent System
....................................................
6
Install Vent System
.................................................
7
Install Leveling Legs
................................................
7
Level Dryer
..............................................................
8
Make Gas Connection
............................................
8
Connect Vent
..........................................................
8
Reverse Door Swing (Optional)
...............................
8
Complete
Installation
..............................................
9
SEGURIDAD
DE LA SECADORA
...........................
10
INSTR UCCION ES DE INSTALACI(_N
....................
11
Herramientas
y piezas
..........................................
t1
Requisitos
de
Iocalizaci6n
...................................
t1
Requisitos
el6otricos
............................................
t3
Requisitos
del suministro
de gas
.........................
13
Requisitos
de ventilacion
......................................
t
5
Planificaci6n
del sistema de ventilacion
..............
15
Instalaci6n
del sistema
de ventilacion
..................
17
Instalaci6n
de las patas niveladoras
....................
17
Nivelacion
de la secadora
....................................
17
Conexi6n
del suministro
de gas
...........................
17
Conexi6n
del ducto
de escape
............................
18
Como
invertir el cierre de la puer_a (opcional)
.....
18
Complete
la instalacion
........................................
19
DRYERSAFETY
Your
safety
and
the safety
of others
are very
important.
We
have
provided
many
important
safety
messages
in this
manual
and
on your
appliance.
Always
read
and
obey
all safety
messages.
This is the safety alert symbol.
This symbol alerts you to potential
hazards that can kill or hurt you and others.
All safety messages
will follow the safety alert symbol and either the word "DANGER"
or
"WARNING."
These words mean:
You can be killed or seriously
injured if you don't immediately
follow
instructions.
You can be killed or seriously
injured
if you don't
follow
instructions.
All safety messages
will tell you what the potential
hazard is, tell you how to reduce the chance
of injury, and tell you what can
happen
if the instructions
are not followed.
iMPORTANT
SAFETY
iNSTRUCTiONS
When discarding or storing your old clothes dryer, remove the door.
SAVE THESE
iNSTRUCTiONS
8562582