Xerox M118i OmniPage SE User Guide - Page 62
Insert row dividers, Move dividers, Place/Remove all dividers
 |
UPC - 095205219265
View all Xerox M118i manuals
Add to My Manuals
Save this manual to your list of manuals |
Page 62 highlights
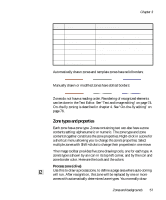
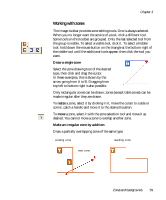
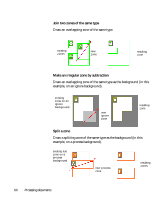
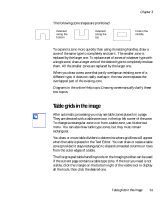
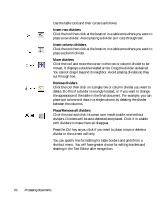
Use the table tools and their cursors as follows: Insert row dividers Click the tool then click at the location in a table zone where you want to place a row divider. Avoid placing a divider so it cuts through text. Insert column dividers Click the tool then click at the location in a table zone where you want to place a column divider. Move dividers Click the tool and move the cursor to the row or column divider to be moved. It displays a double-headed arrow. Drag the divider as desired. You cannot drag it beyond its neighbor. Avoid placing dividers so they cut through text. Remove dividers Click the tool then click on a single row or column divider you want to delete. Do this if a divider is wrongly located, or if you want to change the appearance of the table in the final document. For example, you can place two columns of data in a single column by deleting the divider between the columns. Place/Remove all dividers Click this tool and click its cursor icon inside a table zone without dividers. Dividers will be auto-detected and placed. Click it in a table with dividers to make them all disappear. Press the Ctrl key as you click if you want to place, move or delete a divider in the current cell only. You can specify line formatting for table borders and grids from a shortcut menu. You will have greater choice for editing borders and shading in the Text Editor after recognition. 62 Processing documents
-
 1
1 -
2
-
3
-
4
-
5
-
6
-
7
-
8
-
9
-
10
-
11
-
12
-
13
-
14
-
15
-
16
-
17
-
18
-
19
-
20
-
21
-
22
-
23
-
24
-
25
-
26
-
27
-
28
-
29
-
30
-
31
-
32
-
33
-
34
-
35
-
36
-
37
-
38
-
39
-
40
-
41
-
42
-
43
-
44
-
45
-
46
-
47
-
48
-
49
-
50
-
51
-
52
-
53
-
54
-
55
-
56
-
 57
57 -
 58
58 -
 59
59 -
 60
60 -
 61
61 -
 62
62 -
 63
63 -
 64
64 -
 65
65 -
 66
66 -
 67
67 -
68
-
69
-
70
-
71
-
72
-
73
-
74
-
75
-
76
-
77
-
78
-
79
-
80
-
81
-
82
-
83
-
84
-
85
-
86
-
87
-
88
-
89
-
90
-
91
-
92
-
93
-
94
-
95
-
96
-
97
-
98
-
99
-
100
-
101
-
102
 |
 |
