Xerox PE16 User Guide
Xerox PE16 - WorkCentre B/W Laser Manual
 |
View all Xerox PE16 manuals
Add to My Manuals
Save this manual to your list of manuals |
Xerox PE16 manual content summary:
- Xerox PE16 | User Guide - Page 1
LASER MULTIFUNCTION (4 IN 1) MFP User's Guide WorkCentre PE16 - Xerox PE16 | User Guide - Page 2
the supplied software. It also provides all of the detailed instructions for using your machine as a printer, a scanner and a copier and information for maintaining and troubleshooting the machine. The Laser Facsimile User's Guide provides information for using your machine as a fax machine. You can - Xerox PE16 | User Guide - Page 3
Machine On 1.16 Changing the Display Language and Country .......... 1.17 Setting Language 1.17 Setting Country 1.17 Setting the Paper Type and Size 1.18 Using the Save Modes 1.19 Toner Save Mode 1.19 Power Save Mode 1.19 CCD Power Save Mode 1.20 Chapter 2: INSTALLING SOFTWARE Printer Driver - Xerox PE16 | User Guide - Page 4
(Face down) .... 3.5 Printing to the Rear Output Slot (Face up 3.5 Loading Paper in the Paper Tray 3.6 Using the Bypass Tray 3.8 Setting the Paper Type and Size for the Bypass Tray 3.10 Chapter 4: COPYING Loading Paper for Copying 4.2 Making Copies on the Document Glass 4.2 Making Copies from - Xerox PE16 | User Guide - Page 5
Favorite Setting 5.6 Using Help 5.6 Setting Paper Properties 5.7 Printing Multiple Pages on One Sheet of Paper (N-Up Printing 5.8 Printing a Reduced the Locally Shared Printer 5.22 In Windows 9x/Me 5.22 In Windows NT 4.0/2000/XP 5.23 Chapter 6: SCANNING TWAIN Scanner Program 6.2 Scanning - Xerox PE16 | User Guide - Page 6
Consumables and Replacement Parts 7.11 Chapter 8: TROUBLESHOOTING Clearing Document Jams 8.2 Input Misfeed 8.2 Exit Misfeed 8.3 Roller Misfeed 8.3 Clearing Paper Jams 8.4 In the Paper Feed Area 8.4 In the Paper Exit Area 8.5 In the Fuser Area or Around the Toner Cartridge . 8.7 In the Bypass - Xerox PE16 | User Guide - Page 7
Specifications A.2 Scanner and Copier Specifications A.3 Printer Specifications A.4 Facsimile Specifications A.5 Paper Specifications A.6 Overview A.6 Supported Sizes of Paper A.6 Guidelines for Using Paper A.7 Paper Specifications A.8 Paper Output Capacity A.8 Printer and Paper Storage - Xerox PE16 | User Guide - Page 8
instruction. If you cannot resolve the conflict, contact your sales or service representative for assistance. 5. Unplug the machine from machine from the telephone jack, PC and AC wall outlet, and refer servicing to qualified service personnel under the following conditions: • When any part - Xerox PE16 | User Guide - Page 9
machine does not operate properly after instructions have been followed. • If the machine has been dropped, or the cabinet appears damaged. • If the machine or prescribed service condition. WARNING Never operate or service the printer with the protective cover removed from Laser/ Scanner assembly. - Xerox PE16 | User Guide - Page 10
Xerox dealer. Power Saver This machine contains advanced energy conservation technology that reduces power consumption when it is not in active use. When the machine star emblem does not represent EPA endorsement of any machine or service. Recycling Please recycle or dispose of the packaging - Xerox PE16 | User Guide - Page 11
a Class B digital device, pursuant to Part 15 of the FCC Rules. These limits and used in accordance with the instructions, may cause harmful interference to radio electronic device to send any message via a telephone facsimile machine unless such message clearly contains in a margin at the - Xerox PE16 | User Guide - Page 12
to the Facsimile User's Guide for instructions on how to enter this information into your machine's memory. The Telephone Company may temporarily cease service, providing that they: a) promptly notify the customer. b) give the customer an opportunity to correct the equipment problem. c) inform the - Xerox PE16 | User Guide - Page 13
or fax modem on the same phone line as your machine, you may experience transmission and reception problems with all the equipment. It is recommended that no other instructions on how to actually test the emergency number. • This machine may not be used on coin service or party lines. • This machine - Xerox PE16 | User Guide - Page 14
product has been designed to work with the national PSTNs and compatible PBXs of the European countries: In the event of problems, you should contact the Euro QA Lab of Xerox Electronics Co., Ltd. in the first instance. The product has been tested against TBR21. To assist in the use and application - Xerox PE16 | User Guide - Page 15
away. You cannot rewire the plug and you may receive an electric shock if you plug it into a socket. IMPORTANT WARNING: You must earth this machine. The wires in the mains lead have the following colour code: • Green and Yellow: Earth • Blue: Neutral • Brown: Live If the wires in the mains - Xerox PE16 | User Guide - Page 16
xv - Xerox PE16 | User Guide - Page 17
Differences Between British and American English British English (Re)dialling Colour Emphasise Recognise Organise Authorise Cancelling Customise American English (Re)dialing Color Emphasize Recognize Organize Authorize Canceling Customize xvi - Xerox PE16 | User Guide - Page 18
! This chapter gives you step-by-step instructions for setting up your machine. This chapter includes: • Unpacking • Understanding the Component Location • Installing the Toner Cartridge • Loading Paper • Making Connections • Turning the Machine On • Changing the Display Language and Country - Xerox PE16 | User Guide - Page 19
line cord may differ according to your country's specifications. • The CD-ROM contains software, the user's guides and the Adobe Acrobat Reader program. • You should use the telephone line cord which is supplied with your machine. If you are replacing it with another vendor's, it should be AWG #26 - Xerox PE16 | User Guide - Page 20
2 Remove the packing tape from the front, back and sides of the machine. Tape 1 GETTING STARTED 1.3 - Xerox PE16 | User Guide - Page 21
and away from direct sunlight or sources of heat, cold and humidity. Do not set the printer close to the edge of your desk or table. Clearance Space Front: 482.6 mm (enough space so that the paper tray can be removed) Back: 100 mm (enough space for ventilation) Right: 100 mm Left - Xerox PE16 | User Guide - Page 22
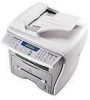
the Component Location 1 These are the main components of your machine: Front View Automatic Document Feeder Document Guides Document Input Tray Document Cover Paper Output Extension Paper Tray Bypass Tray Paper Level Indicator Document Glass Document Output Tray Control Panel (see page - Xerox PE16 | User Guide - Page 23
Rear View Rear Cover Rear Output Slot (Face up) Power Switch Parallel Connector AC Power Cord Connector USB Connector Telephone Connector 1.6 GETTING STARTED - Xerox PE16 | User Guide - Page 24
Control Panel Functions WorkCentre PE16 1 2 3 4 5 6 1 Adjusts the brightness of the documents for the Displays the current status and prompts 2 during an operation. Turns on when the toner cartridge is empty. Scrolls through the options available for the selected menu item. 3 Confirms - Xerox PE16 | User Guide - Page 25
last number in Standby Mode or inserts a pause into a fax number in edit mode. Engages the telephone line. Allows you to save on toner by using less 6 toner to print a document. S A Allows you to save on call costs by sending a V fax at a preset toll-saving time. Using this E feature, you - Xerox PE16 | User Guide - Page 26
1 Open the front cover. 1 2 Remove the starter toner cartridge from its bag. Gently roll the cartridge to distribute the toner. Thoroughly rolling the cartridge will assure the maximum copies per cartridge. 3 Slide the toner cartridge into the machine until it locks into place completely. GETTING - Xerox PE16 | User Guide - Page 27
4 Close the front cover. NOTE: When the toner cartridge needs to be replaced, the indicator turns on and the "Toner Empty" message appears on the display. To replace the toner cartridge, see page 7.8. 1.10 GETTING STARTED - Xerox PE16 | User Guide - Page 28
faxing, you can use A4-, Letter-, or Legal-sized paper only. For printing a PC file, you can use many different sizes of paper. The paper tray is preset for using Letter- sized paper. To load a stack of Letter-sized paper: 1 Pull open the paper tray. 2 Push down on the pressure plate until it - Xerox PE16 | User Guide - Page 29
you need to adjust the paper guides. For details, see page 1.13. 5 Pay attention to the paper limit mark on the left inside wall of the tray. Paper overloading may cause paper jams. 6 Slide the paper tray back in. After you load paper, you need to set up your machine for the paper type and size you - Xerox PE16 | User Guide - Page 30
Changing the Paper Size in the Paper Tray To load longer sizes of paper, such as A4 or Legal-sized paper, you need to adjust the paper guides to extend the paper tray. 1 1 Pressing and unlatching the guide lock, slide the paper length guide out completely to extend the paper tray to its full length. - Xerox PE16 | User Guide - Page 31
NOTES: • Do not push the paper width guide far enough to cause the materials to warp. • If you do not adjust the paper width guide, it may cause paper jams. Making Connections 1 Plug the supplied telephone line cord into the LINE jack and the other end into the wall jack. 1.14 GETTING STARTED - Xerox PE16 | User Guide - Page 32
machine. Push the metal clips down to fit inside the notches on the 1 cable plug. ➜ To the parallel port on your computer Connecting the printer using a USB cable, you must be running Windows 98/ Me/2000/XP. • When using the USB connection, your machine provides two USB modes; Fast and Slow. Fast - Xerox PE16 | User Guide - Page 33
text in another language, see below. CAUTIONS: • The fusing areas at the rear part of the inside of your machine is hot when powered. Be careful not to be burned when you access this area. • Do not disassemble the machine when it is powered. If you do, it may give you an electric - Xerox PE16 | User Guide - Page 34
you want appears on the display. 5 Press Enter to save the selection. 6 To return to Standby Mode, press Stop/Clear. Setting Country 1 Press Menu until "Machine Setup" appears on the top line of the display. 2 Press the scroll button (¦ or ‹) until "Select Country" appears on the bottom line of the - Xerox PE16 | User Guide - Page 35
will apply to copy mode. For PC-printing, you need to select the paper type and size in the application program you use. 1 Press Menu. The display shows "Paper Setting" on the top line and the first menu item, "Paper Type," on the bottom line. 2 Press Enter to access the menu item. 3 Use - Xerox PE16 | User Guide - Page 36
with the normal quality. NOTE: For PC-printing, you can also turn on or off the toner save mode in the printer properties. See page 5.20. Power Save Mode The power save mode allows your machine to reduce power consumption when it is not in actual use. You can turn this mode on - Xerox PE16 | User Guide - Page 37
length of time for which the scan lamp waits after a scan job is completed before it switches to the power save mode. 1 Press Menu until "Machine Setup" appears on top line of the display. 2 Press the scroll button (¦ or ‹) until "CCD Power Save" appears on the bottom line. Press Enter. 3 Press - Xerox PE16 | User Guide - Page 38
2 INSTALLING SOFTWARE This chapter gives you information for installing the supplied software. You must install the software to use your machine as a printer and a scanner. This chapter includes: • Printer Driver Features • System Requirements • Installing Software - Xerox PE16 | User Guide - Page 39
Printer Driver Features Your printer drivers will support the following standard features: • Paper source selection • Paper size, orientation and media type • number of copies Table below lists a general overview of features supported by your printer drivers. Feature Toner Save Print quality - Xerox PE16 | User Guide - Page 40
4 Workstation or Server with Service Pack 3 • Windows 2000 Professional or Advanced Server • Windows XP Home edition or Professional. Minimal Requirements • Disk space: 120 MB for installation • Memory: 64 MB • CPU: Pentium II 233 or higher • Required software: Internet Explorer 4.01 Recommended - Xerox PE16 | User Guide - Page 41
Installing Software Installing the drivers and other software will enable PC printing. Ensure the WorkCentre PE16 is plugged in and connected to the computer's parallel or USB port before installing software from the CD. NOTE: Windows 95 and Windows NT 4.0 do not support USB connection. 1 Switch on - Xerox PE16 | User Guide - Page 42
6 Select [OK]. 7 Follow the on-screen instructions to complete the software installation. NOTE: For more information about printing refer to the "Printing" chapter of this Guide. 8 For Windows 95/98 eject the CD after re-start. 2 9 After installing the software reboot the PC. INSTALLING - Xerox PE16 | User Guide - Page 43
NOTES: 2.6 INSTALLING SOFTWARE - Xerox PE16 | User Guide - Page 44
3 PAPER HANDLING This chapter introduces you to the basics of selecting print materials and loading them into your machine. This chapter includes: • Selecting Print Materials • Selecting an Output Location • Loading Paper in the Paper Tray • Using the Bypass Tray - Xerox PE16 | User Guide - Page 45
meet the guidelines for use with this machine. Using print materials that are not recommended may cause paper jams or print quality problems. Size, Input Sources and Capacities Size (mm/in.) Input Source/Capacity* Paper Tray Bypass Tray Plain paper Letter (215.9 x 279/8.5 x 11) A4 (210 x 297 - Xerox PE16 | User Guide - Page 46
materials, keep these guidelines in mind: • Attempting to print on damp, curled, wrinkled, or torn paper can cause paper jams and the poor print quality. • Use only high quality copier grade paper. Avoid paper with embossed lettering, perforations, or texture that is too smooth or too rough - Xerox PE16 | User Guide - Page 47
cover is closed. To use the rear output slot, open the cover. NOTES: • If paper coming out of the front output tray has problems, such as excessive curl, try printing to the rear output slot. • To avoid paper jams, do not open or close the rear cover while the machine is printing. 3.4 PAPER HANDLING - Xerox PE16 | User Guide - Page 48
jobs. 3 Printing to the Rear Output Slot (Face up) Using the rear output slot, paper comes out of the machine face up. Printing from the Bypass tray to the rear output slot provides the straight paper path. Using the rear output slot might improve the output quality with the following: • envelopes - Xerox PE16 | User Guide - Page 49
it upward. CAUTION: The fusing area at the rear part of the inside of your machine is hot when powered. Be careful not to be burned Paper in the Paper Tray The paper tray can hold a maximum of 250 sheets of 20 lb plain paper. For copying or faxing, you can use A4-, Letter- or Legal-sized paper - Xerox PE16 | User Guide - Page 50
in the tray. When the tray is empty, the indicator of the bar is lowered. Paper full ‹ ¦ Paper empty 3 To load paper, pull open the paper tray and load paper with the print side face down. You can load letterhead paper with the design side face down. The top edge of the sheet with the logo - Xerox PE16 | User Guide - Page 51
paper types or sizes that are not currently loaded in the paper tray. Postcards, 3.5 by 5.83 in.(index) cards and other custom-sized materials can be printed with this printer in the Specifications on page A.6 to avoid paper jams and print quality problems. • Flatten any curl on postcards, envelopes - Xerox PE16 | User Guide - Page 52
guide to the width of the print material. The machine picks up the material from the tray and begins printing. NOTE: When printing on previously printed paper from the Bypass tray, the printed side should be facing down with an uncurled edge to the machine. If you experience problems with paper - Xerox PE16 | User Guide - Page 53
cover to use the rear output slot. 4 After printing, close the rear cover. Setting the Paper Type and Size for the Bypass Tray After loading paper in the Bypass tray, you need to set the correct paper type and size using the control panel buttons. These settings will apply to copy mode. For - Xerox PE16 | User Guide - Page 54
4 COPYING This chapter gives you step-by-step instructions for copying documents. This chapter includes: • Loading Paper for Copying • Making Copies on the Document Glass • Making Copies from the Automatic Document Feeder • Setting Copy Options • Using Special Copy Features • Changing the Default - Xerox PE16 | User Guide - Page 55
Copying You can copy a document to A4-, Letter- or Legal-sized paper. The instructions for loading print materials are the same whether you are printing, faxing or copying. For further details, see page 1.11 for loading in the paper tray and page 3.8 for loading in the Bypass tray. Making Copies on - Xerox PE16 | User Guide - Page 56
over the document on the document glass. 3 Close the document cover. NOTES: • Leaving the cover open while copying may affect the copy quality and toner consumption. • If you are copying a page from a book or magazine, lift the cover until its hinges are caught by the stopper and then close - Xerox PE16 | User Guide - Page 57
or weights of paper. If you want to make copies from booklet, pamphlet, transparencies or documents having other unusual characteristics, use the document glass to load the document; see page 4.2. 1 Load the documents up to 30 pages face up into the ADF and adjust the document guides to the document - Xerox PE16 | User Guide - Page 58
2 Make sure that the bottom of the document stack matches the paper size marked on the document tray. 3 Customise the copy settings including number of copies, copy size, contrast and image type by using the control panel - Xerox PE16 | User Guide - Page 59
4.6 COPYING Setting Copy Options The buttons on the control panel let you make all the basic copy options; contrast, image type, copy size and number of copies. Set the following options for the current copy job before pressing Start Copy/Fax to make copies. NOTE: If you press Stop/Clear while you - Xerox PE16 | User Guide - Page 60
Reduced/Enlarged Copy Using the Reduce/Enlarge button, you can reduce or enlarge the size of a copied image, from 25% to 400% when you copy original documents from the document glass or from 25% to 100% from the ADF. Note that the zoom rate available is different depending on the document loading - Xerox PE16 | User Guide - Page 61
using the Special button on the control panel: • Auto Fit: Automatically reduces or enlarges the original image to fit on the paper currently loaded in the machine. See below. • Clone: Prints multiple image copies from the original document on a single page. The number of images is automatically - Xerox PE16 | User Guide - Page 62
Auto Fit Copying This special copy mode can be applied when you load document A only using the document glass. If a document is detected in the ADF, the Auto Fit does not work. 1 Load the document to be copied on the document glass, and close the cover. 2 Press Special. 3 Press Special or the - Xerox PE16 | User Guide - Page 63
NOTE: You cannot adjust the copy size using the Reduce/ Enlarge button while making a clone copy. 6 Press Start Copy or Start Copy/Fax to begin copying. 1 2 3 1 2 3 Collation Copying The Collation copying feature is available only when you load documents in the ADF. 1 Load the documents to be - Xerox PE16 | User Guide - Page 64
2-side Copying You can copy a 2-sided document on one page of A4, Letter or Legal-sized paper. When you copy using this feature, the machine prints one side on the upper half of the paper and the other side on the lower half without reducing the original. This feature is helpful for copying a small - Xerox PE16 | User Guide - Page 65
/Fax to begin copying. NOTE: 2-up copy reduces your original document by 50 %. 4-up copy reduces the document by the following rates depending on the paper loaded: 76 % for Letter, 81 % for A4 and 95 % for Legal. Poster Copying This special copy mode can be applied when you load document only - Xerox PE16 | User Guide - Page 66
5 If necessary, customise the copy settings including number of copies, contrast and image type by using the control panel buttons. See "Setting Copy Options" on page 4.6. NOTE: You cannot adjust the copy size using the Reduce/ Enlarge button for making a poster. 6 Press Start Copy/Fax to begin - Xerox PE16 | User Guide - Page 67
copy options, pressing Stop/Clear cancels the changed settings and restores their default status. Setting the Time Out Option You can set the time the machine waits before it restores the default copy settings, if you do not start copying after changing them on the control panel. 1 Press Menu on the - Xerox PE16 | User Guide - Page 68
5 PRINTING This chapter explains how to print your documents in Windows and how to use the print settings. This chapter includes: • Printing a Document • Setting Paper Properties • Printing Multiple Pages on One Sheet of Paper (N-Up Printing) • Printing a Reduced or Enlarged Document • Fitting Your - Xerox PE16 | User Guide - Page 69
of the printer features provided by your machine, click Properties in the application's print window and go to Step 4. If you see Setup, Printer or Options, click that button instead. Then click Properties on the next screen. 4 Now you see the Xerox WorkCentre PE16 Properties window, which allows - Xerox PE16 | User Guide - Page 70
tab, select the paper source, size and type. For further details, see page 5.7. 6 If necessary, you can set in what sequence the pages will be printed from the Extra tab. Select the required print order from the Print Order drop-down list. • Normal: Your machine prints in normal order. PRINTING - Xerox PE16 | User Guide - Page 71
of the Xerox WorkCentre PE16 Properties window to access other features, if needed. 8 When you finish setting the properties, click OK until the Print window displays. 9 Click OK to start printing. Notes: • Most Windows applications overrides settings you specified in the printer driver. Change all - Xerox PE16 | User Guide - Page 72
print job is in the machine's memory, you need to press the button once for each job. To stop a print job from the Printers folder: 1 From the Windows Start menu, select Settings. 2 Select Printers to open the Printers window and double-click the Xerox WorkCentre PE16 icon. 3 From the Document - Xerox PE16 | User Guide - Page 73
and click Delete. You can also restore the printer driver's default settings by selecting from the list. Using Help Your machine has a help screen that can be activated by the Help button in the printer's properties window. These help screens give detailed information about the - Xerox PE16 | User Guide - Page 74
paper handling needs when you access the printer properties. See page 5.2 for more information about accessing printer properties. Click the Paper tab to access many paper box, click Add Custom. When the Custom Page Size window appears, set the paper size and click Ok. The size setting appears on the - Xerox PE16 | User Guide - Page 75
a time into the Bypass Tray. See page 3.8. If the paper source is set to Auto Select, the machine automatically picks up print materials according to the following order: the Bypass tray and the paper tray. Make sure that Type is set to Printer Default. If you load a different type of print material - Xerox PE16 | User Guide - Page 76
to print a border around each page on the sheet. Print Page Border is enabled only, if the pages per sheet is 2, 4, 9 or 16. 5 Click the Paper tab and select the paper source, size and type. 6 Click OK and print the document. PRINTING 5.9 - Xerox PE16 | User Guide - Page 77
your software application, access the printer properties. See page 5.2. 2 From the Layout tab, select Reduce/Enlarge on the Type drop-down list. 3 Enter the scaling rate in the Persentage input box. You can also click the œ¤or ƒ button. 4 Click the Paper tab and select the paper - Xerox PE16 | User Guide - Page 78
the print settings from your software application, access the printer properties. See page 5.2. 2 From the Layout tab, select Fit to Page on the Type drop-down list. 3 Select the correct size from the Target Paper drop-down list. 5 4 Click the Paper tab and select the paper source, size and type - Xerox PE16 | User Guide - Page 79
can print a single-page document onto 4, 9 or 16 sheets of paper, for the purpose of pasting the sheets together to form one poster-size document. 1 When you change the print settings from your software application, access the printer properties. See page 5.2. 2 From the Layout tab, select Poster on - Xerox PE16 | User Guide - Page 80
poster. 0.1 inches 0.1 inches 4 Click the Paper tab and select the paper source, size and type. 5 Click OK machine, and they can be modified or you can add new ones to 5 the list. Using an Existing Watermark 1 When you change the print settings from your software application, access the printer - Xerox PE16 | User Guide - Page 81
Creating a Watermark 1 When you change the print settings from your software application, access the printer properties. See page 5.2. 2 Click the Extras tab and click the Edit button in the Watermark section. The Edit Watermarks window appears. 3 Enter the text message you want to print in the - Xerox PE16 | User Guide - Page 82
Editing a Watermark 1 When you change the print settings from your software application, access the printer properties. See page 5.2. 2 Click the Extras tab and click the Edit button in the Watermark section. The Edit Watermarks window appears. 3 Select the watermark you want to edit on the Current - Xerox PE16 | User Guide - Page 83
you do not need to load preprinted letterhead paper in the machine. You need only tell the machine to print the letterhead overlay on your document. 2 When you change the print settings from your software application, access the printer properties. See page 5.2. 3 Click the Extras tab and click - Xerox PE16 | User Guide - Page 84
, click Create Overlay. 5 In the Create Overlay window, type a name of up to eight characters in the File name box. Select the destination path, if necessary. (The default is C:\Formover). 5 6 Click Save. You - Xerox PE16 | User Guide - Page 85
you want to print. 2 When you change the print settings from your software application, access the printer properties. See page 5.2. 3 Click the Extras tab. 4 Select the , you can also load the file when you access this Load Overlay window. After you select the file, click Open. The file is now shown - Xerox PE16 | User Guide - Page 86
is downloaded with your print job and printed on your document. Note: The resolution of the overlay document must be the same as that of the document you will print with the overlay. Deleting a Page Overlay You can delete page overlays that are no longer used. 1 In the printer properties window - Xerox PE16 | User Guide - Page 87
time it takes to print a document. 2 Toner Save Selecting this option extends the life of your toner cartridge and reduces your cost per page without a significant reduction in the print quality. • Printer Setting: When you select this option, the Toner Save feature is determined by the setting - Xerox PE16 | User Guide - Page 88
Property 3 Advanced Options Description You can set advanced settings by clicking the Advanced Options button. Darkness Use this option to lighten or darken the image appearance in your print. • Normal: This setting is for normal documents. • Light: This setting is for bolder line widths or - Xerox PE16 | User Guide - Page 89
True Type Options This option determines what the driver tells the machine about how to image the text in your document. Select the appropriate setting according to the status of your document. • Download as Bit Image: When this option is selected, the driver downloads the font data as bitmap images - Xerox PE16 | User Guide - Page 90
log on box and then click OK. 5 From the Start menu, select Settings and then Printers. 6 Double-click your printer icon. 7 From the Printer menu, select Properties. 5 8 From the Details tab, select the printer port and click OK. In Windows NT 4.0/2000/XP Setting Up the Host Computer 1 Start - Xerox PE16 | User Guide - Page 91
in the left column. 3 Click the shared name. 4 For Windows NT 4.0/2000, from the Start menu, select Settings and Printers. For Windows XP, from the Start menu, select Printers and Faxes. 5 Double-click your printer icon. 6 From the Printer menu, select Properties. 7 Press the Ports tab and click Add - Xerox PE16 | User Guide - Page 92
6 SCANNING This chapter includes: • TWAIN Scanner Program • Scanning Procedure - Xerox PE16 | User Guide - Page 93
instructions, please refer to "Installing Software" on page 2.4.. The TWAIN Scanner settings are fully described in the TWAIN Driver Help program. An alternative method for color scanning is to use PaperPort. PaperPort is an advanced software program that is provided with the WorkCentre PE16 - Xerox PE16 | User Guide - Page 94
of the tray. Adjust the guides to just touch the edges of the originals. 6 Caution: Up to 30 sheets of 75g/m2 (20lb bond) paper can be loaded. Weight ranges from 45 - 105g/m2 (12.5 - 28lb). Sizes range from 7" x 10" to 8.5" x 14". Refer to "Scanner and Copier Specifications" on page A.3. for full - Xerox PE16 | User Guide - Page 95
corner. 2 Lower the ADF or cover. Run the Scan Application Program 1 Start the scan application program being used to acquire the scanned image. 2 Follow the instructions provided with the application program to scan the document and retrieve it at the PC. 6.4 SCANNING - Xerox PE16 | User Guide - Page 96
7 MAINTENANCE This chapter provides information for maintaining your machine and the toner cartridge. This chapter includes: • Clearing the Memory • Cleaning Your Machine • Maintaining the Toner Cartridge • Consumables and Replacement Parts - Xerox PE16 | User Guide - Page 97
all of the Paper Setting options to the factory default. • Copy Setup: Restores all of the Copy Setup options to the factory default. • Fax Setup: Restores all of the Fax Setup options to the factory default. • Fax Feature: Cancels all of the scheduled fax jobs in the machine's memory. • Advanced - Xerox PE16 | User Guide - Page 98
to Standby Mode, press Stop/Clear. Cleaning Your Machine To maintain the print quality, follow the cleaning procedures below each time the toner cartridge is replaced or if print quality problems occur. NOTE: While cleaning the inside of the printer, be careful not to touch the transfer roller - Xerox PE16 | User Guide - Page 99
toner from the toner cartridge area and the toner cartridge cavity. CAUTION: To prevent damage to the toner cartridge, do not expose it to light for more than a few minute. Cover it with a piece of paper, if necessary. Do not touch the black transfer roller inside the machine. 4 Reinsert the toner - Xerox PE16 | User Guide - Page 100
that you clean the scan unit at the start of each day and during the day, as needed. 1 Slightly dampen a soft lint-free cloth or paper towel with water. 2 Open the document cover. 3 Wipe the surface of the document glass and ADF glass until it is clean and dry. White sheet - Xerox PE16 | User Guide - Page 101
caused by using a refilled cartridge. • Store toner cartridges in the same environment as your machine. • To prevent damage to the toner cartridge, do not expose it to light for more than a few minute. Saving toner To save toner, press the Toner Save button on the printer control panel; see page - Xerox PE16 | User Guide - Page 102
can temporarily reestablish the print quality by redistributing the remaining toner in the cartridge. 1 Open the front cover. 2 Pull the toner cartridge out and gently roll the cartridge to distribute the toner evenly inside the cartridge. NOTE: If the toner gets on your clothing, wipe it off with - Xerox PE16 | User Guide - Page 103
runs out, only blank pages print when a print job is sent or when a fax is received. At this stage, the toner cartridge needs to be replaced. The display shows the warning message, "Toner Empty," and the indicator on the control panel turns on. 1 Open the front cover. 2 Lightly pushing the used - Xerox PE16 | User Guide - Page 104
3 Unpack the new toner cartridge and gently shake it horizontally four or five times to distribute the toner evenly inside the cartridge. Save the box and the cover for shipping. 4 Slide the new toner cartridge in until it locks into place. 5 Close the front cover. 7 MAINTENANCE 7.9 - Xerox PE16 | User Guide - Page 105
Option If you have set the Notify Toner menu option to "On", your machine automatically sends a fax to your service company or the dealer to notify them that your machine requires a new toner cartridge when the toner cartridge needs to be replaced. The fax number is preset by your dealer when you - Xerox PE16 | User Guide - Page 106
Fuser unit Yield (Average) 20,000 60,000 60,000 60,000 60,000 To purchase the consumables and replacement parts, contact your Xerox dealer or the retailer where you bought your machine. We strongly recommend that items be installed by a trained service professional, except for the toner cartridge - Xerox PE16 | User Guide - Page 107
MEMO 7.12 MAINTENANCE - Xerox PE16 | User Guide - Page 108
8 TROUBLESHOOTING This chapter gives helpful information for what to do if you encounter an error. This chapter includes: • Clearing Document Jams • Clearing Paper Jams • Clearing LCD Error Messages • Solving Problems - Xerox PE16 | User Guide - Page 109
while it passes through the ADF (Automatic Document Feeder), "Document Jam" appears on the display. Input Misfeed 1 Remove the remaining documents the documents back into the ADF. NOTE: To prevent document jams, use the document scanner glass for thick, thin or mixed documents. 8.2 TROUBLESHOOTING - Xerox PE16 | User Guide - Page 110
the feed area by carefully pulling it to the right using both hands. 8 4 Close the document cover. Then load the documents back into the ADF. TROUBLESHOOTING 8.3 - Xerox PE16 | User Guide - Page 111
the display. Refer to the table below to locate and clear the paper jam. Message Paper Jam 0 Paper Jam 1 Paper Jam 2 Location of Jam Go to In the paper feed area. below In the Bypass tray page 8.8 In the fuser area or around the toner cartridge. In the Bypass tray page 8.7 page 8.8 In the - Xerox PE16 | User Guide - Page 112
3 Remove the jammed paper by gently pulling it straight out. If there is any resistance and the paper does not move when you pull or if you cannot see the paper in this area, skip to the fuser area around the toner cartridge. See page 8.7. 4 Insert the paper tray into the machine until it snaps - Xerox PE16 | User Guide - Page 113
2 Gently pull the paper out of the front output tray. Skip to Step 6. 3 If there is any resistance and the paper does not move when you pull or if you cannot see the paper in the front output tray, open the rear cover. 4 Remove the jammed paper by gently pulling it straight out. 8.6 TROUBLESHOOTING - Xerox PE16 | User Guide - Page 114
printing. In the Fuser Area or Around the Toner Cartridge NOTE: The fuser area is hot. Take care when removing paper from the machine. 1 Open the front cover and pull the toner cartridge out, lightly pushing it down. 2 Remove the jammed paper by gently pulling it straight out. 8 TROUBLESHOOTING 8.7 - Xerox PE16 | User Guide - Page 115
toner cartridge and close the front cover. Printing automatically resumes. In the Bypass Tray "Paper Jam 0" , "Paper Jam 1" appears on the display when you try to print using the Bypass tray and the machine does not detect paper, due to no paper or improper paper loading. "Paper Jam 0" , "Paper Jam - Xerox PE16 | User Guide - Page 116
Tips for Avoiding Paper Jams When Printing on the A5-sized Paper If paper jams frequently occur when you print on the A5-sized paper: 1 Open the input tray and load paper into the tray as shown below. 2 Open the Xerox WorkCentre PE16 Properties window, set the paper size to A5(5.8x8.3 in.) from the - Xerox PE16 | User Guide - Page 117
Tips for Avoiding Paper Jams By selecting the correct paper types, most paper jams can be avoided. When a paper jam occurs, follow the steps outlined in "Clearing Paper Jams" on page 8.4. • Follow the procedures in "Loading Paper" on page 1.11. Ensure that the adjustable guides are positioned - Xerox PE16 | User Guide - Page 118
the remote machine's features. Incompatible It also occurs if the remote machine does not have enough memory 8 space to complete the operation you are attempting. Invalid Cartridge You have used unauthorised cartridge. You must use a Xerox approved cartridge. TROUBLESHOOTING 8.11 - Xerox PE16 | User Guide - Page 119
remote machine is operational. The toner cartridge is not installed. Install the toner cartridge. See page 1.9. The speed dial location you tried to use has no number assigned to it. Dial the number manually using the number keypad or assign the number. See the Facsimile User's Guide. The paper - Xerox PE16 | User Guide - Page 120
Display Paper Jam 0 Paper Jam 1 Paper Jam 2 Power Failure Retry Redial? Stop Pressed Toner Empty Toner Low Meaning Suggested solutions Paper has jammed in the feeding area of the paper tray. Your machine detects non feeding from the Bypass tray. Clear the jam. See page 8.4. Load paper in the - Xerox PE16 | User Guide - Page 121
until the problem is corrected. If the problem persists, please call for service. Paper Feeding Problems Condition Paper is jammed during printing. Paper sticks together. Multiple sheets of paper do not feed. Paper does not feed into the machine. The paper keeps jamming. Transparencies stick - Xerox PE16 | User Guide - Page 122
printer. Select Xerox WorkCentre PE16 as your default printer in your Windows. Check the machine for the following: • The front or rear cover is not closed. • Paper is jammed. • No paper is loaded. • The toner cartridge is not installed. If a printer system error occurs, contact your service - Xerox PE16 | User Guide - Page 123
speed of your machine is 17 PPM for Letter-sized paper. From the Start menu, choose Settings and Printers. Right-click the Xerox WorkCentre PE16 printer icon, choose Properties See page 5.3. Ensure that the paper size in the printer driver settings matches the paper in the tray. 8.16 TROUBLESHOOTING - Xerox PE16 | User Guide - Page 124
Some parts, such as the controller or the board, may be defective. Contact a service representative. The illustrations print incorrectly in Adobe Illustrator. The setting in the software application is wrong. Print the document with selecting Download as Bit Image in the Advanced Options window - Xerox PE16 | User Guide - Page 125
bad. The manufacturing processes can cause some areas to reject toner. Try a different kind or brand of paper. • The toner cartridge may be defective. Vertical repetitive defects on the next page. • If these steps do not correct the problems, contact a service representative. 8.18 TROUBLESHOOTING - Xerox PE16 | User Guide - Page 126
"Installing the Toner Cartridge" on page 1.9. • Parts of the machine may have toner on them. If the defects occur on the back of the page, the problem will likely correct itself after a few more pages. • The fusing assembly may be damaged. Contact a service representative. 8 TROUBLESHOOTING 8.19 - Xerox PE16 | User Guide - Page 127
Printing on seams can cause problems. • If background scatter covers the entire surface area of a printed page, adjust the print resolution through your software application or the printer properties. • If characters are improperly formed and producing hollow images, the paper stock may be too slick - Xerox PE16 | User Guide - Page 128
. See "Paper Specifications" on page A.6. • Install a new toner cartridge. See "Installing the Toner Cartridge" on page 1.9. • If the problem persists, the machine may require repair. Contact a service representative. Character Voids Character voids are white areas within the parts of characters - Xerox PE16 | User Guide - Page 129
toner cartridge may be defective. Install a new toner cartridge. See "Installing the Toner Cartridge" on page 1.9. • If the problem persists, the machine may require repair. Contact a service representative. Curl If the printed paper is curl or paper does not feed into the printer TROUBLESHOOTING - Xerox PE16 | User Guide - Page 130
cause line errors. • Check your machine by making a copy. • The toner cartridge may be empty. Replace the toner cartridge, referring to page 7.8. Some of the words on a incoming fax are stretched. The fax machine sending you the fax had a temporary document jam. There are lines on the documents - Xerox PE16 | User Guide - Page 131
Copying Problems Condition Suggested solutions paper guides, if necessary. • Ensure that the paper is the proper paper weight. 75 g/m2 (20 lb) bond paper is recommended. • Check for copy paper or pieces of copy paper remaining in the machine after a paper jam has been cleared. 8.24 TROUBLESHOOTING - Xerox PE16 | User Guide - Page 132
may be forms, newsletters, books or other documents that use more toner. • The machine may be turned frequently on and off. • The document cover may be left open while copies are being made. Scanning Problems Condition The scanner does not work. The unit scans very slowly. Suggested solutions - Xerox PE16 | User Guide - Page 133
and try again. • The printer cable may be improperly connected or the power may be off. You must use a parallel cable that supports IEEE-1284 bi-directional communications. • The scanner driver is not installed or an not use the parallel and the USB cables at the same time. 8.26 TROUBLESHOOTING - Xerox PE16 | User Guide - Page 134
A SPECIFICATIONS This chapter includes: • General Specifications • Scanner and Copier Specifications • Printer Specifications • Facsimile Specifications • Paper Specifications - Xerox PE16 | User Guide - Page 135
tray: 150 sheets (face down) Rear output slot: 1 sheet (face up) Paper tray: Plain paper (60 ~ 90 g/m2, 16 ~ 24 lb) Bypass tray: Plain paper, Transparencies, Labels, Card, Post card, Envelopes (60 ~ 120 g/m2, 16 ~ 32 lb) 1-piece toner cartridge system 100 ~ 127 VAC, 50/60 Hz, 4.5A 220 ~ 240 VAC - Xerox PE16 | User Guide - Page 136
, accessories and package) Paper: 2.7 Kg Plastic: 0.7 Kg Scanner and Copier Specifications Item Description Compatibility scanning width 8.2 inches (208 mm) colour bit depth Internal: 24 bit External: 24 bit Mono bit depth 1 bit for Text mode 8 bit for Gray mode Scan speed (Text mode) - Xerox PE16 | User Guide - Page 137
99 pages 256 levels Description Printer Specifications Item Printing method Printing speed Paper size Print resolution Emulation PC in.) 600 x 600 dpi SPL (GDI) IEEE 1284 (ECP Only), USB 1.1 Windows 95/98/2000/NT 4.0/Me/XP Standby mode: 12 seconds Power save mode: 54 seconds A.4 SPECIFICATIONS - Xerox PE16 | User Guide - Page 138
Facsimile Specifications Item Compatibility Applicable line Data coding Modem speed Transmission speed Scanning speed Maximum document length Paper size Resolution User Memory Halftone Auto dialer Description ITU-T Group 3, ECM Public Switched Telephone Network (PSTN) or behind PABX MH/MR/MMR (ECM - Xerox PE16 | User Guide - Page 139
the requirements specified in this user's guide. CAUTION: Using paper that does not meet these specifications may cause problems, requiring repairs. These repairs are not covered by the Xerox warranty or service agreements. Supported Sizes of Paper Paper Letter A4 Executive Legal Folio Dimensions - Xerox PE16 | User Guide - Page 140
or even damage to the printer: Symptom Poor print quality or toner adhesion, problems with feeding Dropout, jamming, curl Increased gray background shading/printer wear Excessive curl problems with feeding Jamming, damage to printer Problems with feeding Problem with Paper Too moist, too rough - Xerox PE16 | User Guide - Page 141
such as those used in some types of thermography. • Do not use raised or embossed letterhead. • The printer uses heat and pressure to fuse toner to the paper. Insure that any coloured paper or preprinted forms use inks that are compatible with this fusing temperature (200 °C or 392 °F for 0.1 second - Xerox PE16 | User Guide - Page 142
Printer and Paper Storage Environment Paper storage environmental conditions directly affect the feed operation. Ideally, the machine and paper storage environment should be at or near room temperature, and not too dry or humid. Remember that paper is hygroscopic; it absorbs and loses moisture - Xerox PE16 | User Guide - Page 143
4.8 time out, set 4.14 D display language and Country, change control panel 1.17 document jam, clear 8.2 load in ADF 4.4 load on document glass 4.2 document glass clean 7.5 load tray, use 3.5 G graphic properties, set 5.20 H help, use 5.6 I install toner cartridge 1.9 J jam, clear document 8.2 - Xerox PE16 | User Guide - Page 144
8.22 paper feeding 8.14 printing 8.15 printing quality 8.18 scanning 8.25 R rear output slot, use 3.5 reduced/enlarged copy 4.7 print 5.10 S specifications facsimile A.5 general A.2 paper A.6 printer A.4 scanner and copier A.3 system requirements Windows 2.3 T tel line, connect 1.14 toner cartridge - Xerox PE16 | User Guide - Page 145
redistribute 7.7 replace 7.8 toner save mode, use 1.19 U USB connect 1.15 mode, change 8.17 W watermarks, use 5.13 Z zoom rate, copy 4.7 - Xerox PE16 | User Guide - Page 146
LASER MULTIFUNCTION (4 IN 1) FAX User's Guide WorkCentre PE16 - Xerox PE16 | User Guide - Page 147
CONTENTS Chapter 1: GETTING STARTED Control Panel Functions 1.2 Setting the Machine ID 1.4 Entering Characters Using the Number Keypad ... 1.5 Fax Manually 2.6 Confirming Transmission 2.6 Automatic Redialling 2.7 Receiving a Fax 2.7 About Receiving Modes 2.7 Loading Paper for Receiving - Xerox PE16 | User Guide - Page 148
Chapter 3: AUTOMATIC DIALLING Speed Dialling 3.2 Storing a Number for Speed Dialling 3.2 Sending a Fax using a Speed Number 3.3 Group Dialling 3.4 Setting Group Dial 3.4 Editing Group Dial Numbers 3.5 Sending a Fax Using Group Dialling (Multi-address Transmission 3.6 Searching for a Number in - Xerox PE16 | User Guide - Page 149
1 GETTING STARTED The following topics are included: • Control Panel Functions • Setting the Machine ID • Setting the Date and Time • Setting Sounds • Setting the Dial Mode • Using the Toll Save Mode • Setting up the Fax System - Xerox PE16 | User Guide - Page 150
or larger than the original. Selects the number of copies. Displays the current status and prompts during an operation. Turns on when the toner cartridge is empty. Scrolls through the options available for the selected menu item. Confirms the selection on the display. Enters Menu Mode and scrolls - Xerox PE16 | User Guide - Page 151
6 toner to print a document. S A Allows you to save on call costs by sending a V fax at a preset toll-saving time. Using this E feature, you can take advantage of lower long distance rates at night, for example. *. For details about copy features, refer to the MFP User's Guide. GETTING - Xerox PE16 | User Guide - Page 152
and name (or company name), will be printed at the top of each page sent from your machine. 1 Press Menu until "Machine Setup" appears on the top line of the display. The first available menu item, "Machine Id" displays on the bottom line. 2 Press Enter. The display asks you to enter the fax - Xerox PE16 | User Guide - Page 153
. 1 Entering Characters Using the Number Keypad As you perform various tasks, you need to enter names and numbers. For example, when you set up your machine, you enter your name (or your company's name) and telephone number. When you store one or two digit speed dial or group dial numbers, you - Xerox PE16 | User Guide - Page 154
Keypad Letters and Numbers Key 1 Assigned numbers, letters or characters 1 Space 2 A B C 2 3 D E F 3 4 G H I 4 5 J K L 5 6 M N O 6 7 P Q R S 7 8 T U V 8 9 W X Y Z 9 0 + - ,. '/*#&0 Changing Numbers or Names If you make a mistake while entering a number or name, press the ¦ - Xerox PE16 | User Guide - Page 155
cut off, you need to reset the correct time and date once the power is restored. 1 Press Menu until "Machine Setup" appears on the top line of the display. 2 Press the scroll button (¦ or ‹) to display "Date & Time" on the bottom line and press Enter. 3 - Xerox PE16 | User Guide - Page 156
display. 2 Press the scroll button (¦ or ‹) until you see "Clock Mode" on the bottom line and press Enter. The clock mode currently set for the machine displays. 3 Press the scroll button (¦ or ‹) to select the other mode and then press Enter to save the selection. 4 To return to Standby Mode, press - Xerox PE16 | User Guide - Page 157
of the display. For the ringer volume, you can select from "Off", "Low", "Med" and "High". Setting "Off" means that the ringer turns off. The machine works normally even if the ringer is turned off. 4 Press Enter to save the selection. The next sound option appears. 5 If necessary, repeat steps - Xerox PE16 | User Guide - Page 158
to Standby Mode, press Stop/Clear. Using the Toll Save Mode Using the Toll Save button on the control panel, you can quickly set your machine to send the document(s) stored in the memory during the preset time slot, when the call charge is lowered. This Toll Save mode helps you - Xerox PE16 | User Guide - Page 159
"Start Time" displays on the bottom line. 1 3 Enter the time when your machine starts sending toll save faxes, using the number keypad. To select "Am" or " Mode, press Stop/Clear. Once the toll save mode is activated, your machine stores all of the documents to be faxed into the memory and sends - Xerox PE16 | User Guide - Page 160
, press Stop/Clear. Available Fax Setup Options Option Description Receive Mode You can select the default fax receiving mode. • In the Fax mode, the machine answers an incoming call and immediately goes into the fax reception mode. • In Tel mode, you can receive a fax by pressing On Hook Dial - Xerox PE16 | User Guide - Page 161
On or Off. Auto Reduction When receiving a document as long as or longer than the paper loaded in the paper tray, the machine can reduce the size of the document to fit the size of paper loaded in the machine. Select On if you want to automatically reduce an incoming page. With this feature set - Xerox PE16 | User Guide - Page 162
the actual size. When the document is within the margin and the Auto Reduction feature is turned on, the machine reduces the document to fit it onto the appropriate sized paper and discard does not occur. If the Auto Reduction feature is turned off or fails, the data within the margin will - Xerox PE16 | User Guide - Page 163
2 GENERAL FAX FUNCTIONS The following topics are included: • Sending a Fax • Receiving a Fax - Xerox PE16 | User Guide - Page 164
to load the following types of documents into the ADF: - carbon-paper or carbon-backed paper - coated paper - onion skin or thin paper - wrinkled or creased paper - curled or rolled paper - torn paper • Remove all staples and paper clips before loading documents in the ADF. • Make sure any glue - Xerox PE16 | User Guide - Page 165
fax a document from the document glass: 2 1 Open the document cover. 2 Place the document face down on the document glass and align it with the registration guide on the top left corner of the glass. 3 Close the document cover. GENERAL FAX FUNCTIONS 2.3 - Xerox PE16 | User Guide - Page 166
small characters or thin Fine lines or documents printed using a dot-matrix printer. Super Fine Documents containing extremely fine detail. The super fine mode is enabled only if the remote machine also supports the Super Fine resolution. See the notes below. Photo Documents containing shades - Xerox PE16 | User Guide - Page 167
Mode Color(Colour) Recommended for: Documents with colours. Sending a colour fax is enabled only if the remote machine supports colour fax reception and you send the fax manually. In this mode, the memory transmission is not available. NOTES: • For the memory transmission, the super fine mode is - Xerox PE16 | User Guide - Page 168
machine begins sending the fax when the remote fax machine is ready. NOTE: When you want to cancel the fax job, press Stop/Clear at any time while sending the fax. Sending a Fax Manually messages and their meanings, see the MFP User's Guide. If you receive an error message, press Stop/Clear to - Xerox PE16 | User Guide - Page 169
Receiving a Fax 2 About Receiving Modes • In the fax mode, the machine answers an incoming fax call and immediately goes into the fax reception mode. further details, see page 5.2. Loading Paper for Receiving Faxes The instructions for loading paper in the paper tray are the same whether you are - Xerox PE16 | User Guide - Page 170
paper and setting the paper size in the tray, refer to the MFP User's Guide. Receiving Automatically in the Fax Mode Your machine is preset to the fax mode at the factory. When you receive a fax, the machine 1.8. Receiving Manually in the Tel Mode When a fax comes in, your machine sounds the ringer - Xerox PE16 | User Guide - Page 171
2 GENERAL FAX FUNCTIONS 2.9 - Xerox PE16 | User Guide - Page 172
2.10 GENERAL FAX FUNCTIONS - Xerox PE16 | User Guide - Page 173
3 AUTOMATIC DIALLING The following topics are included: • Speed Dialling • Group Dialling • Searching for a Number in the Memory • Printing a Phonebook List - Xerox PE16 | User Guide - Page 174
Speed Dialling You can store up to 100 frequently dialed numbers in one or two-digit speed dial locations (0-99). Storing a Number for Speed Dialling 1 Press Phonebook on the control panel. 2 Press Phonebook or the scroll button (¦ or ‹) to display "Store/Edit" on the bottom line of the display. - Xerox PE16 | User Guide - Page 175
begin sending the fax immediately. 5 The fax number stored in the speed dial location is automatically dialed. The document is sent when the remote fax machine answers. AUTOMATIC DIALLING 3.3 - Xerox PE16 | User Guide - Page 176
Group Dialling If you frequently send the same document to several destinations, you can create a group of these destinations and set them under a one or two-digit group dial location. This enables you to use a group dial number setting to send the same document to all the destinations in the group. - Xerox PE16 | User Guide - Page 177
10 Press Enter when the name appears correctly or without entering a name. 11 If you want to assign another group, repeat from Step 4. OR To return to Standby Mode, press Stop/Clear. NOTE: You cannot include one group dial number in another group dial number. Editing Group Dial Numbers You can - Xerox PE16 | User Guide - Page 178
hold the last digit button. You can use only one group number for one operation. Then continue the procedure to complete the desired operation. Your machine automatically scans the document loaded in the Automatic Document Feeder or on the document glass into the memory. The - Xerox PE16 | User Guide - Page 179
you want to dial display. You can search upwards or downwards through the entire memory in alphabetical order, from A to Z. While searching through the machine's memory, you can see that each entry is preceded by one of two letters; "S" for speed dial or "G" for group dial number. These letters - Xerox PE16 | User Guide - Page 180
Printing a Phonebook List You can check your automatic dial setting by printing a Phonebook list. 1 Press Phonebook. 2 Press Phonebook or the scroll button (¦ or ‹) until "Print" appears on the bottom line and press Enter. A list showing your speed dial and group dial entries prints out. 3.8 - Xerox PE16 | User Guide - Page 181
4 OTHER WAYS TO FAX The following topics are included: • Redialling • Sending Broadcasting Faxes • Sending a Delayed Fax • Sending a Priority Fax • Adding Documents To a Scheduled Fax • Cancelling a Scheduled Fax - Xerox PE16 | User Guide - Page 182
(see page 2.4). If you need to change the contrast, see page 1.13. 3 Press Broadcasting on the control panel. 4 Enter the number of the remote machine using the number keypad. You can use one or two-digit speed dial or group dial numbers. For details, see Chapter 3, "Automatic Dialling." 4.2 OTHER - Xerox PE16 | User Guide - Page 183
5 Press Enter to confirm the number. The display asks you to enter another fax number to send the document. NOTE: Your machine can send one broadcasting fax to multiple destinations. The "Enter Number" prompt does not appear if a broadcast is set up and not completed. You must - Xerox PE16 | User Guide - Page 184
top line of the display. The first available menu item, "Delay Fax," displays on the bottom line. 4 Press Enter. 5 Enter the number of the remote machine using the number keypad. To enter the number, you can use one or two-digit speed dial or group dial numbers. For details, see Chapter - Xerox PE16 | User Guide - Page 185
12 The machine returns to Standby Mode. The display reminds you that you are in or ‹) to display "Priority Fax" on the bottom line and press Enter. 5 Enter the number of the remote machine using the number keypad. To enter the number, you can use one or two-digit speed dial or group dial numbers - Xerox PE16 | User Guide - Page 186
the document loaded on the document glass, the display asks if you want to load another page. Select "1.Yes" to add. Otherwise, select "2.No." 9 The machine shows the number being dialed and begins sending the document. 4.6 OTHER WAYS TO FAX - Xerox PE16 | User Guide - Page 187
in the memory. 6 Press the scroll button (¦ or ‹) until you see the fax job to which you want to add documents and press Enter. The machine automatically stores the documents in the memory, and the display shows the memory capacity and 4 the number of pages. For the document loaded on the - Xerox PE16 | User Guide - Page 188
. 4 Press the scroll button (¦ or ‹) until you see the fax job you want to cancel, and press Enter. The selected job is canceled and the machine returns to Standby Mode. 4.8 OTHER WAYS TO FAX - Xerox PE16 | User Guide - Page 189
5 ADDITIONAL FEATURES The following topics are included: • Using the Secure Receiving Mode • Printing Reports • Using Advanced Fax Settings • Using the ControlCentre - Xerox PE16 | User Guide - Page 190
option to restrict printing out all of the received faxes when the machine is unattended. In the secure fax mode, all incoming faxes will press Stop/Clear. When a fax is received in the secure receiving mode, your machine stores it into the memory and displays "Secure Receive" to let you know that - Xerox PE16 | User Guide - Page 191
print reports containing useful information. The following reports are available: Phonebook List This list shows all of the numbers currently stored in the machine's memory as speed dial and group dial numbers. You can print this Phonebook list using the Phonebook button; see page 3.8. Sent Fax - Xerox PE16 | User Guide - Page 192
mode, and the communication results. You can set up your machine to automatically print the message confirmation report after each fax job. to print out automatically don't print out when there is no paper loaded or a paper jam has occurred. Printing a Report 1 Press Menu until "Reports" - Xerox PE16 | User Guide - Page 193
Confirm: Message confirmation • Junk Fax List: Junk fax number list 3 Press Enter. The selected information prints out. Using Advanced Fax Settings Your machine has various user-selectable setting options for sending or receiving faxes. These options are preset at the factory, but you may need to - Xerox PE16 | User Guide - Page 194
Advanced Fax Setting Options Option Send Forward RCV Forward Toll Save Junk Fax Setup Secure Receive Description You can set the machine to always forward all of the outgoing faxes to the specified destination besides the fax numbers you entered. Select Off to turn this feature off. - Xerox PE16 | User Guide - Page 195
or view information of your machine on the desktop window of your computer. When you install the Xerox software, the ControlCentre program is automatically installed. For information about installing the Xerox software, please refer to the MFP User's Guide. To open the ControlCentre: 1 Start - Xerox PE16 | User Guide - Page 196
From Programs, select Xerox WorkCentre PE16 and then ControlCentre. Then the ControlCentre program opens. 4 The WorkCentre PE16 ControlCentre window provides five tabs your machine and refreshes the ControlCentre with them. 5.8 ADDITIONAL FEATURES Downloads the settings made in ControlCentre to - Xerox PE16 | User Guide - Page 197
Phonebook entries. Reads the Phonebook entries from the machine to the ControlCentre. Downloads the Phonebook entries from the ControlCentre to the machine. Allows you to edit a selected Phonebook entry in a separate Edit window. Phonebook entries Deletes a selected Phonebook entry. Deletes all - Xerox PE16 | User Guide - Page 198
The Information Tab Click the Information tab to view the software version information and many counters which allow you to check how many scanning, printing, and jamming are made in your machine. Reads the current information in your machine and refreshes the ControlCentre. The Firmware Update Tab - Xerox PE16 | User Guide - Page 199
options 1.12 G group dial dialling 3.6 editing 3.5 setting 3.4 M machine ID, set 1.4 P paper, load 2.7 print Phonebook list 3.8 reports 5.3 priority fax 4.5 R a number 3.7 secure receiving mode, use 5.2 send a fax automatically 2.5 manually 2.6 sounds, set 1.8 speed dial dialling 3.3 storing 3.2 - Xerox PE16 | User Guide - Page 200
T toll save mode 1.10 V volume, adjust ringer 1.9 - Xerox PE16 | User Guide - Page 201
www.Xerox.com
-
 1
1 -
 2
2 -
 3
3 -
 4
4 -
 5
5 -
 6
6 -
 7
7 -
8
-
9
-
10
-
11
-
12
-
13
-
14
-
15
-
16
-
17
-
18
-
19
-
20
-
21
-
22
-
23
-
24
-
25
-
26
-
27
-
28
-
29
-
30
-
31
-
32
-
33
-
34
-
35
-
36
-
37
-
38
-
39
-
40
-
41
-
42
-
43
-
44
-
45
-
46
-
47
-
48
-
49
-
50
-
51
-
52
-
53
-
54
-
55
-
56
-
57
-
58
-
59
-
60
-
61
-
62
-
63
-
64
-
65
-
66
-
67
-
68
-
69
-
70
-
71
-
72
-
73
-
74
-
75
-
76
-
77
-
78
-
79
-
80
-
81
-
82
-
83
-
84
-
85
-
86
-
87
-
88
-
89
-
90
-
91
-
92
-
93
-
94
-
95
-
96
-
97
-
98
-
99
-
100
-
101
-
102
-
103
-
104
-
105
-
106
-
107
-
108
-
109
-
110
-
111
-
112
-
113
-
114
-
115
-
116
-
117
-
118
-
119
-
120
-
121
-
122
-
123
-
124
-
125
-
126
-
127
-
128
-
129
-
130
-
131
-
132
-
133
-
134
-
135
-
136
-
137
-
138
-
139
-
140
-
141
-
142
-
143
-
144
-
145
-
146
-
147
-
148
-
149
-
150
-
151
-
152
-
153
-
154
-
155
-
156
-
157
-
158
-
159
-
160
-
161
-
162
-
163
-
164
-
165
-
166
-
167
-
168
-
169
-
170
-
171
-
172
-
173
-
174
-
175
-
176
-
177
-
178
-
179
-
180
-
181
-
182
-
183
-
184
-
185
-
186
-
187
-
188
-
189
-
190
-
191
-
192
-
193
-
194
-
195
-
196
-
197
-
198
-
199
-
200
-
201
 |
 |
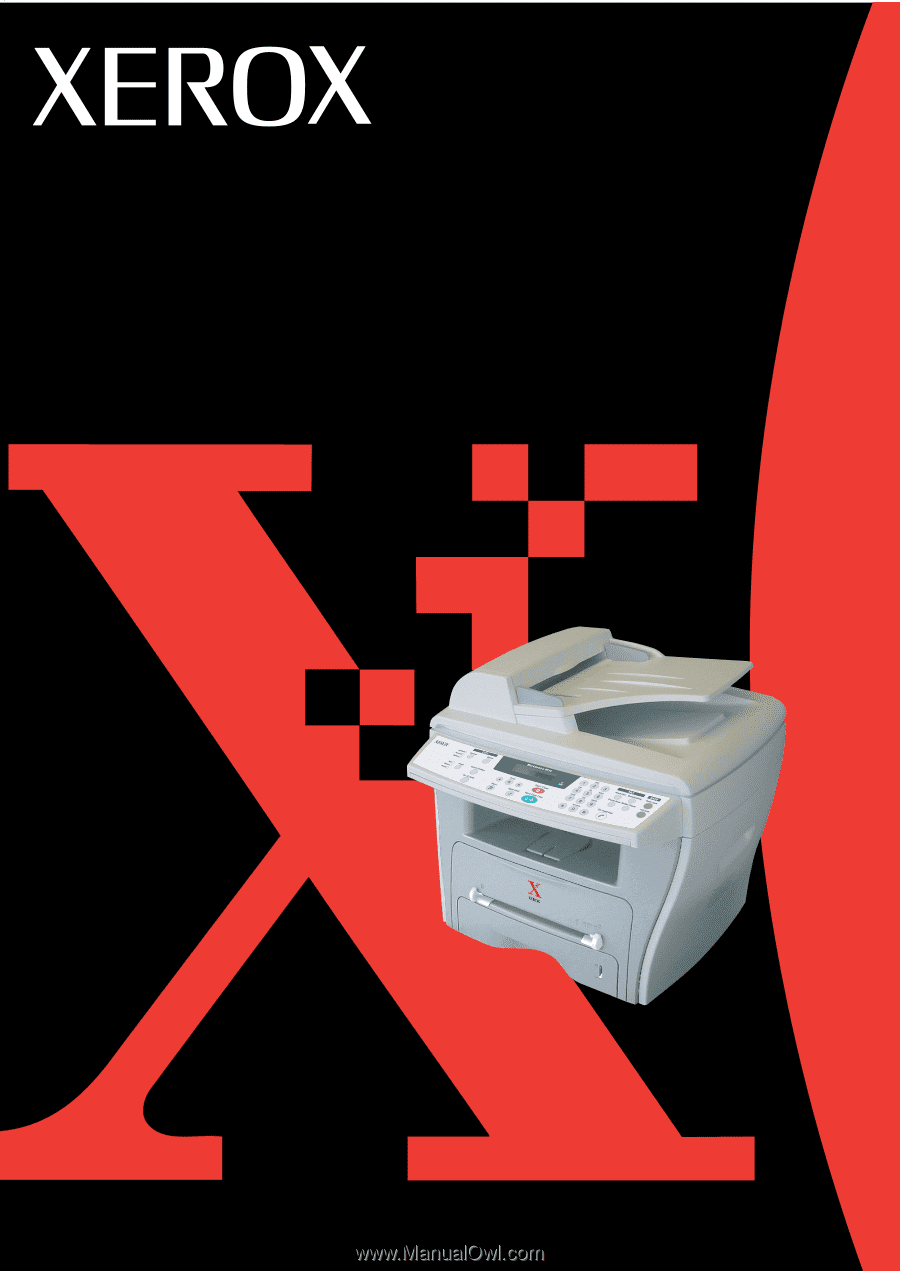
WorkCentre PE16
LASER MULTIFUNCTION (4 IN 1)
MFP User’s Guide