Yamaha 2100E Owners Manual - Page 16
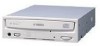
Rear Panel, The CRW2100S drive's rear panel features the following
 |
View all Yamaha 2100E manuals
Add to My Manuals
Save this manual to your list of manuals |
Page 16 highlights
Front and Rear of Unit Rear Panel The CRW2100S drive's rear panel features the following: AUDIO OUT connector Connect one end of the 4-pin audio cable to this and the other end to your computer's sound card or built-in audio. (P. 19, 27) SCSI INTERFACE connector Insert the connector of the SCSI ribbon cable here. Make sure you align the red line of the ribbon cable with pin 1 of the drive's connector, marked "SCSI INTERFACE CONNECTOR 1." (P. 18, 26) AUDIO OUT R G L 124 ID SELECT PARITY TERMINATOR BLOCK SIZE SCSI INTERFACE CONNECTOR DC INPUT 1 +5V G +12V 1 24 ID SELECT....... 1 PARITY 2 TERMINATOR.. 3 BLOCK SIZE.... 4 DC INPUT connector Insert the power connector from your computer's power supply in this socket to feed power to the drive. (P. 20, 28) 1 ID SELECT jumper switches Set these switches using black plastic shunts in order to manually assign a SCSI ID number for the drive. 2 PARITY jumper switch Set this switch using a black plastic shunt in order to enable parity checking. 3 TERMINATOR jumper switch Set this switch using a black plastic shunt in order to enable the drive's built-in SCSI termination. 4 BLOCK SIZE jumper switch Set this switch using a black plastic shunt in order to set the block size to 512 bytes per sector. 7
-
 1
1 -
2
-
3
-
4
-
5
-
6
-
7
-
8
-
9
-
10
-
 11
11 -
 12
12 -
 13
13 -
 14
14 -
 15
15 -
 16
16 -
 17
17 -
 18
18 -
 19
19 -
 20
20 -
 21
21 -
22
-
23
-
24
-
25
-
26
-
27
-
28
-
29
-
30
-
31
-
32
-
33
-
34
-
35
-
36
-
37
-
38
-
39
-
40
-
41
-
42
-
43
-
44
-
45
-
46
-
47
-
48
-
49
-
50
-
51
-
52
-
53
 |
 |
