Yamaha 2100E Owners Manual - Page 33
ROM drive, and also disconnect the audio cable from the sound card, or motherboard's audio connector.
 |
View all Yamaha 2100E manuals
Add to My Manuals
Save this manual to your list of manuals |
Page 33 highlights
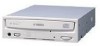
Setup Procedures 3 Touch a metal part of the computer's chassis or power supply unit to drain any static charge that may have built up inside your body. Drain any static charge You can permanently damage equipment if you touch it while there is any static charge in your body. 4 Disconnect all the cables connected to the rear of the existing CDROM drive, and also disconnect the audio cable from the sound card or motherboard's audio connector. Audio cable ARANUGADLGIOOGL CASBLLAEVESELECT MASTER 39 40 HOST INTERFACE 1 2 +5V POWER G G +12V IDE cable 4-pin power connector 24
-
 1
1 -
2
-
3
-
4
-
5
-
6
-
7
-
8
-
9
-
10
-
11
-
12
-
13
-
14
-
15
-
16
-
17
-
18
-
19
-
20
-
21
-
22
-
23
-
24
-
25
-
26
-
27
-
 28
28 -
 29
29 -
 30
30 -
 31
31 -
 32
32 -
 33
33 -
 34
34 -
 35
35 -
 36
36 -
 37
37 -
 38
38 -
39
-
40
-
41
-
42
-
43
-
44
-
45
-
46
-
47
-
48
-
49
-
50
-
51
-
52
-
53
 |
 |

Setup Procedures
24
3
Touch a metal part of the computer’s chassis or power supply unit to
drain any static charge that may have built up inside your body.
Drain any static charge
You can permanently damage equipment if you touch it while there is
any static charge in your body.
4
Disconnect all the cables connected to the rear of the existing CD-
ROM drive, and also disconnect the audio cable from the sound card
or motherboard’s audio connector.
ANALOG
AUDIO
CABLE SELECT
SLAVE
MASTER
POWER
HOST INTERFACE
1
2
39
40
+5V
G
G
+
12V
R
L
GG
Audio cable
IDE cable
4-pin power connector