Yamaha AR-100 Owner's Manual - Page 137
Set up recording for the desired part in the RECORD To do
 |
View all Yamaha AR-100 manuals
Add to My Manuals
Save this manual to your list of manuals |
Page 137 highlights
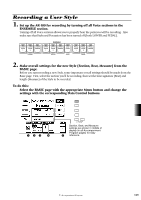
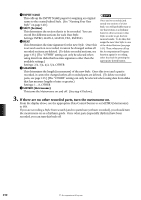
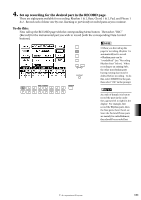
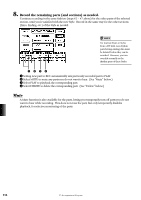
4. Set up recording for the desired part in the RECORD page. There are eight parts available for recording: Rhythm 1 & 2, Bass, Chord 1 & 2, Pad, and Phrase 1 & 2. Record each of these one by one, listening to previously recorded parts as you continue. To do this: First, call up the RECORD page with the corresponding Menu button. Then select "REC" (Record) for the instrumental part you wish to record (with the corresponding Data Control buttons). DATA CONTROL PAGE CONTRAST COARSE • When you first call up the page for recording, Rhythm 1 is automatically set to record. • Rhythm parts can be "overdubbed" (see "Recording Rhythm Parts" below). When recording to an existing Style, the other non-rhythm parts having existing data must be deleted before recording. To do this, select DELETE for the part, then select "OK" in the prompt. As a rule of thumb, it is best to record the parts in the order they appear (left to right) in the display. For example, first record the Rhythm parts, then the Bass parts, then Chord, etc. Since the Pad and Phrase parts are mainly for embellishment, they should be recorded last. 9. Accompaniment Program 131
-
 1
1 -
2
-
3
-
4
-
5
-
6
-
7
-
8
-
9
-
10
-
11
-
12
-
13
-
14
-
15
-
16
-
17
-
18
-
19
-
20
-
21
-
22
-
23
-
24
-
25
-
26
-
27
-
28
-
29
-
30
-
31
-
32
-
33
-
34
-
35
-
36
-
37
-
38
-
39
-
40
-
41
-
42
-
43
-
44
-
45
-
46
-
47
-
48
-
49
-
50
-
51
-
52
-
53
-
54
-
55
-
56
-
57
-
58
-
59
-
60
-
61
-
62
-
63
-
64
-
65
-
66
-
67
-
68
-
69
-
70
-
71
-
72
-
73
-
74
-
75
-
76
-
77
-
78
-
79
-
80
-
81
-
82
-
83
-
84
-
85
-
86
-
87
-
88
-
89
-
90
-
91
-
92
-
93
-
94
-
95
-
96
-
97
-
98
-
99
-
100
-
101
-
102
-
103
-
104
-
105
-
106
-
107
-
108
-
109
-
110
-
111
-
112
-
113
-
114
-
115
-
116
-
117
-
118
-
119
-
120
-
121
-
122
-
123
-
124
-
125
-
126
-
127
-
128
-
129
-
130
-
131
-
 132
132 -
 133
133 -
 134
134 -
 135
135 -
 136
136 -
 137
137 -
 138
138 -
 139
139 -
 140
140 -
 141
141 -
 142
142 -
143
-
144
-
145
-
146
-
147
-
148
-
149
-
150
-
151
-
152
-
153
-
154
-
155
-
156
-
157
-
158
-
159
-
160
-
161
-
162
-
163
-
164
-
165
-
166
-
167
-
168
-
169
-
170
-
171
-
172
-
173
-
174
-
175
-
176
-
177
-
178
-
179
-
180
 |
 |
