Yamaha AR-100 Owner's Manual - Page 99
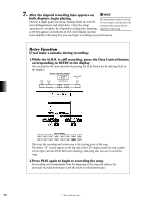
Press the PLAY button, and start playing after numbers appear in
 |
View all Yamaha AR-100 manuals
Add to My Manuals
Save this manual to your list of manuals |
Page 99 highlights
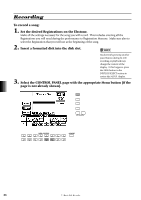
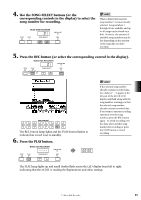
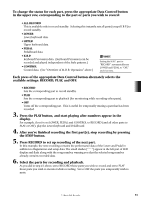
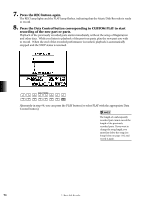
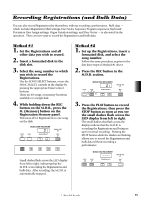
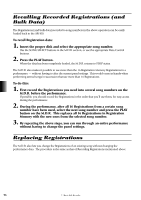
To change the status for each part, press the appropriate Data Control button in the upper row, corresponding to the part or parts you wish to record: • ALL RECORD This is available only in record standby. Selecting this instantly sets all parts (except K.B.P.) to record standby. • LOWER Lower keyboard data. • UPPER Upper keyboard data. • PEDAL Pedalboard data. • K.B.P. Keyboard Percussion data. (Keyboard Percussion can be recorded and played independent of the Style patterns.) • CONTROL Control data. (See "Overview of M.D.R. Operation" above.) Setting the K.B.P. part to "RECORD" automatically sets LOWER and PEDAL to "OFF," and vice versa. Each press of the appropriate Data Control button alternately selects the available settings: RECORD, PLAY, and OFF. • RECORD Sets the corresponding part to record standby. • PLAY Sets the corresponding part to playback (for monitoring while recording other parts). • OFF Turns off the corresponding part. This is useful for temporarily muting a part that has been recorded. 3. Press the PLAY button, and start playing after numbers appear in the display. For example, if you've set LOWER, PEDAL and CONTROL to RECORD (and all other parts to PLAY or OFF), play the Lower keyboard and Pedalboard. 4. After you've finished recording the first part(s), stop recording by pressing the STOP button. 5. Press RECORD to set up recording of the next part. In this example, the new recording contains the performance data of the Lower and Pedal in addition to Registration and setup data. The small dashes ("--") appear at the left part of LED display and flash along with the song number, warning you that the selected song number already contains recorded data. 6. Select the parts for recording and playback. As you did in step #2 above, set to RECORD those parts you wish to record and set to PLAY those parts you wish to monitor while recording. Set to OFF the parts you temporarily wish to mute. 7. Music Disk Recorder 93
-
 1
1 -
2
-
3
-
4
-
5
-
6
-
7
-
8
-
9
-
10
-
11
-
12
-
13
-
14
-
15
-
16
-
17
-
18
-
19
-
20
-
21
-
22
-
23
-
24
-
25
-
26
-
27
-
28
-
29
-
30
-
31
-
32
-
33
-
34
-
35
-
36
-
37
-
38
-
39
-
40
-
41
-
42
-
43
-
44
-
45
-
46
-
47
-
48
-
49
-
50
-
51
-
52
-
53
-
54
-
55
-
56
-
57
-
58
-
59
-
60
-
61
-
62
-
63
-
64
-
65
-
66
-
67
-
68
-
69
-
70
-
71
-
72
-
73
-
74
-
75
-
76
-
77
-
78
-
79
-
80
-
81
-
82
-
83
-
84
-
85
-
86
-
87
-
88
-
89
-
90
-
91
-
92
-
93
-
 94
94 -
 95
95 -
 96
96 -
 97
97 -
 98
98 -
 99
99 -
 100
100 -
 101
101 -
 102
102 -
 103
103 -
 104
104 -
105
-
106
-
107
-
108
-
109
-
110
-
111
-
112
-
113
-
114
-
115
-
116
-
117
-
118
-
119
-
120
-
121
-
122
-
123
-
124
-
125
-
126
-
127
-
128
-
129
-
130
-
131
-
132
-
133
-
134
-
135
-
136
-
137
-
138
-
139
-
140
-
141
-
142
-
143
-
144
-
145
-
146
-
147
-
148
-
149
-
150
-
151
-
152
-
153
-
154
-
155
-
156
-
157
-
158
-
159
-
160
-
161
-
162
-
163
-
164
-
165
-
166
-
167
-
168
-
169
-
170
-
171
-
172
-
173
-
174
-
175
-
176
-
177
-
178
-
179
-
180
 |
 |