Yamaha CLP-320 Owner's Manual - Page 25
Recording your Performance
 |
View all Yamaha CLP-320 manuals
Add to My Manuals
Save this manual to your list of manuals |
Page 25 highlights
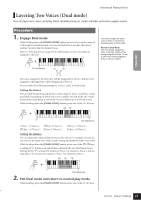
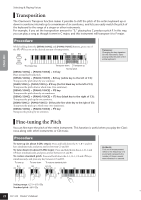
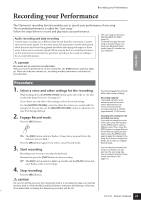
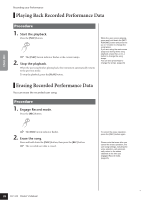
Recording your Performance Recording your Performance The Clavinova's recording function enables you to record your performance of one song. The recorded performance is called the "user song." Follow the steps below to record and play back your performance. Audio recording and data recording Cassette tape recordings use a different data format than this instrument. Cassette tapes record audio signals. On the other hand, this instrument records information about the notes and voices being played and about the timing and tempo of those notes. It does not record audio signals. When you play back a recorded performance on this instrument, its internal tone generator reproduces the sound according to the recorded information. The user song is saved as a Standard MIDI file (SMF). (page 31) To transfer and play the user song on another device, you must have Musicsoft Downloader (page 31) installed on your computer. CAUTION Be careful not to erase the recorded data: After you record a performance on this instrument, the [PLAY] button indicator lights up. When this indicator remains on, recording another performance will erase the recorded data. 23 ENGLISH Procedure 1. Select a voice and other settings for the recording. While holding down the [PIANO/VOICE] button, press one of the C1-A1 keys to select the desired voice(s). (See page 18.) If you desire, you can select other settings, such as the reverb setting. Use the [MASTER VOLUME] control to adjust the volume to a comfortable listening level. You can also use the [MASTER VOLUME] control to adjust the volume level during playback. 2. Engage Record mode. Press the [REC] button. The [REC] button indicator flashes. (It may take a moment before the indicator starts to flash.) Press the [REC] button again if you wish to cancel Record mode. 3. Start recording. Recording starts as soon as you play the keyboard. Alternatively, press the [PLAY] button to start recording. The [REC] button indicator lights up steadily, and the [PLAY] button indicator flashes at the current tempo. 4. Stop recording. Press the [REC] button. CAUTION Do not turn off the power to this instrument while it is recording the data in its internal memory (that is, while the [REC] and [PLAY] button indicators are flashing). Otherwise, all recorded data, including the data being recorded, will be lost. You cannot engage Record mode while a demo song is playing. Recording capacity "Recording capacity" is the maximum amount of performance data that you can record. This instrument's recording capacity is 100 KB (approximately 11,000 notes). Changing the settings for the recorded user song If you wish to change the voice of the user song, before pressing the [REC] button, select a different voice. Then, press the [REC] button to engage Record mode. Without playing the keyboard, press the [REC] button again to apply the change to the song. If you wish to change the tempo, do so after you engage Record mode. You can save the recorded user song to a computer. You can also load the user song data from a computer and play it back on this instrument. (See page 31.) CLP-320 Owner's Manual 25
-
 1
1 -
2
-
3
-
4
-
5
-
6
-
7
-
8
-
9
-
10
-
11
-
12
-
13
-
14
-
15
-
16
-
17
-
18
-
19
-
 20
20 -
 21
21 -
 22
22 -
 23
23 -
 24
24 -
 25
25 -
 26
26 -
 27
27 -
 28
28 -
 29
29 -
 30
30 -
31
-
32
-
33
-
34
-
35
-
36
-
37
-
38
-
39
-
40
-
41
-
42
-
43
-
44
 |
 |