Yamaha HTR-5560 Owners Manual - Page 26
Yamaha HTR-5560 Manual
 |
View all Yamaha HTR-5560 manuals
Add to My Manuals
Save this manual to your list of manuals |
Page 26 highlights
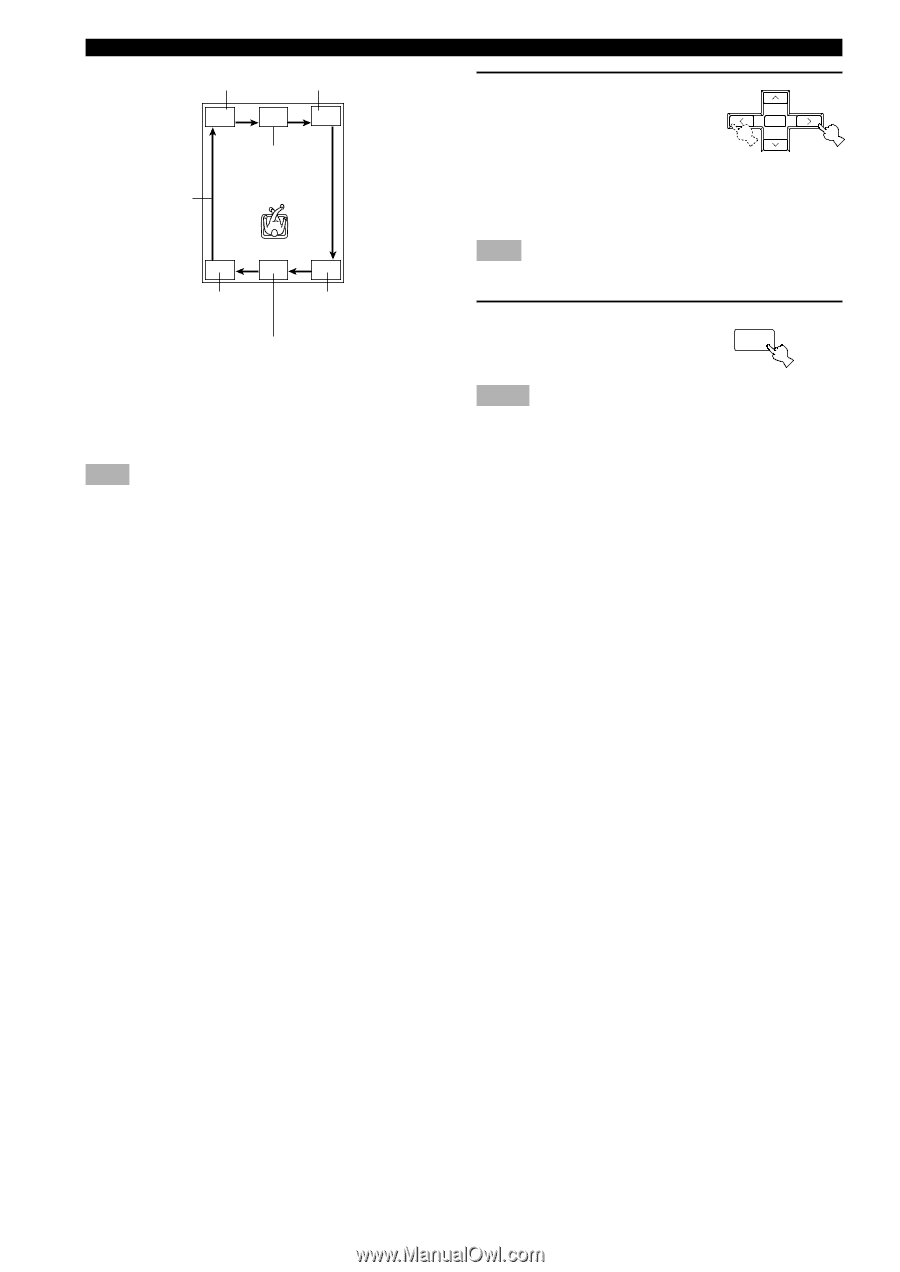
ADJUSTING SPEAKER OUTPUT LEVELS LEFT RIGHT 4 CENTER *SUBWOOFER Adjust the level of the effect speakers using j / i so that it matches the level of the main speakers. While adjusting, the test tone is heard from the selected speaker. PRESET/CH - SELECT + Note LEFT SURROUND RIGHT SURROUND • To adjust the level of the main speakers, use VOLUME knob (or VOLUME +/- on the remote control). 5 REAR CENTER When adjustment is complete, press TEST to stop the test tone. TEST RETURN * Subwoofer test tone is output after the rear left speaker (LEFT SURROUND). The front panel display shows which speaker is outputting the test tone. Notes • If "1A CENTER" on the SET MENU is set to NON, the center channel sound is automatically output from the main left and right speakers. • If "1C REAR LR" on the SET MENU is set to NON, the output level of the rear left, right and center speakers cannot be adjusted in step 4. The test tone will be circulated skipping the rear left and right speakers and the rear center speaker. • If "1D REAR CT" on the SET MENU is set to NON, the output level of the rear center speaker cannot be adjusted in step 4. The test tone will be circulated skipping the rear center speaker. • If "1E BASS" on the SET MENU is set to MAIN, the test tone will be circulated skipping the subwoofer. Note • If the test tone cannot be heard, turn down the volume, set this unit to standby mode and check the speaker connections. y • It is not necessary to readjust the speaker levels once they are set (as long as you do not change the speakers). You can enjoy listening to or watching the input source at the desired volume simply by adjusting the VOLUME knob (or VOLUME +/- on the remote control). • If the output level of the effect speakers (center, rear left, rear right, and rear center) cannot be increased enough to match the level of the main speakers, set "1F MAIN Lv" on SET MENU to -10 dB (see page 43). This setting decreases the main speaker output level to about one-third of the normal level. After you have set "1F MAIN Lv" on the SET MENU to -10 dB, adjust the levels for the center and rear speakers again. 22
-
 1
1 -
2
-
3
-
4
-
5
-
6
-
7
-
8
-
9
-
10
-
11
-
12
-
13
-
14
-
15
-
16
-
17
-
18
-
19
-
20
-
 21
21 -
 22
22 -
 23
23 -
 24
24 -
 25
25 -
 26
26 -
 27
27 -
 28
28 -
 29
29 -
 30
30 -
 31
31 -
32
-
33
-
34
-
35
-
36
-
37
-
38
-
39
-
40
-
41
-
42
-
43
-
44
-
45
-
46
-
47
-
48
-
49
-
50
-
51
-
52
-
53
-
54
-
55
-
56
-
57
-
58
-
59
-
60
-
61
-
62
-
63
-
64
-
65
-
66
-
67
 |
 |