Yamaha HTR-5630 Owner's Manual - Page 45
SOUND 5 CENTER GEQ (center graphic equalizer), SOUND 6 HP TONE CTRL (headphone tone control)
 |
View all Yamaha HTR-5630 manuals
Add to My Manuals
Save this manual to your list of manuals |
Page 45 highlights
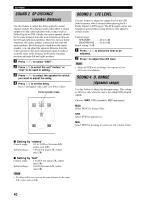
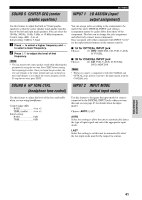
SOUND 5 CENTER GEQ (center graphic equalizer) SET MENU INPUT 1 I/O ASSIGN (input/ output assignment) Use this feature to adjust the built-in 5-band graphic equalizer so that the center speaker tonal quality matches that of the left and right main speakers. You can select the 100 Hz, 300 Hz, 1 kHz, 3 kHz, or 10 kHz frequencies. Control range (dB): -6 to +6 Initial setting: 0 dB for 5-band 1 Press d to select a higher frequency and u to select a lower frequency. 2 Press j / i to adjust the level of that frequency. Note • You can monitor the center speaker sound while adjusting this parameter by using the test tone. Press TEST before starting the foregoing procedure. Once you begin this procedure, the test tone remains at the center speaker and you can hear how the sound changes as you adjust the various frequency levels. To stop the test tone, press TEST. You can assign jacks according to the component to be used if this unit's DIGITAL INPUT jack settings (component names for jacks) differ from those of the component. This lets you to change the jack assignment and effectively connect more components. Once assigned, select that component with INPUT l / h (or the input selector buttons on the remote control). I 1A for OPTICAL INPUT jack Choices: (1) DVD, MD/CD-R, CD, VCR, V-AUX, D-TV/CBL I 1B for COAXIAL INPUT jack Choices: (2) CD, VCR, V-AUX, D-TV/CBL, DVD, MD/CD-R Note • When you connect a component to both the COAXIAL and OPTICAL jacks, priority is given to the input signals from the COAXIAL jack. SOUND 6 HP TONE CTRL INPUT 2 INPUT MODE (headphone tone control) (initial input mode) Use this feature to adjust the level of the bass and treble when you are using headphones. Control range (dB): BASS 6 to +3 TRBL (treble) ....... -6 to +3 Initial setting: BASS 0 dB TRBL 0 dB Use this feature to designate the input mode for sources connected to the DIGITAL INPUT jacks when you turn this unit on (see page 23 for details about the input mode). Choices: AUTO, LAST AUTO Select this setting to allow the unit to automatically detect the type of input signal and select the appropriate input mode. LAST Select this setting to set this unit to automatically select the last input mode used for the respective sources. ADVANCED OPERATION English 41
-
 1
1 -
2
-
3
-
4
-
5
-
6
-
7
-
8
-
9
-
10
-
11
-
12
-
13
-
14
-
15
-
16
-
17
-
18
-
19
-
20
-
21
-
22
-
23
-
24
-
25
-
26
-
27
-
28
-
29
-
30
-
31
-
32
-
33
-
34
-
35
-
36
-
37
-
38
-
39
-
 40
40 -
 41
41 -
 42
42 -
 43
43 -
 44
44 -
 45
45 -
 46
46 -
 47
47 -
 48
48 -
 49
49 -
 50
50 -
51
-
52
-
53
-
54
-
55
-
56
-
57
-
58
-
59
-
60
 |
 |