Yamaha HTR-5660 Owners Manual - Page 22
Connecting the power supply cords, Turning on the power, Connecting the AC power cord - av
 |
View all Yamaha HTR-5660 manuals
Add to My Manuals
Save this manual to your list of manuals |
Page 22 highlights
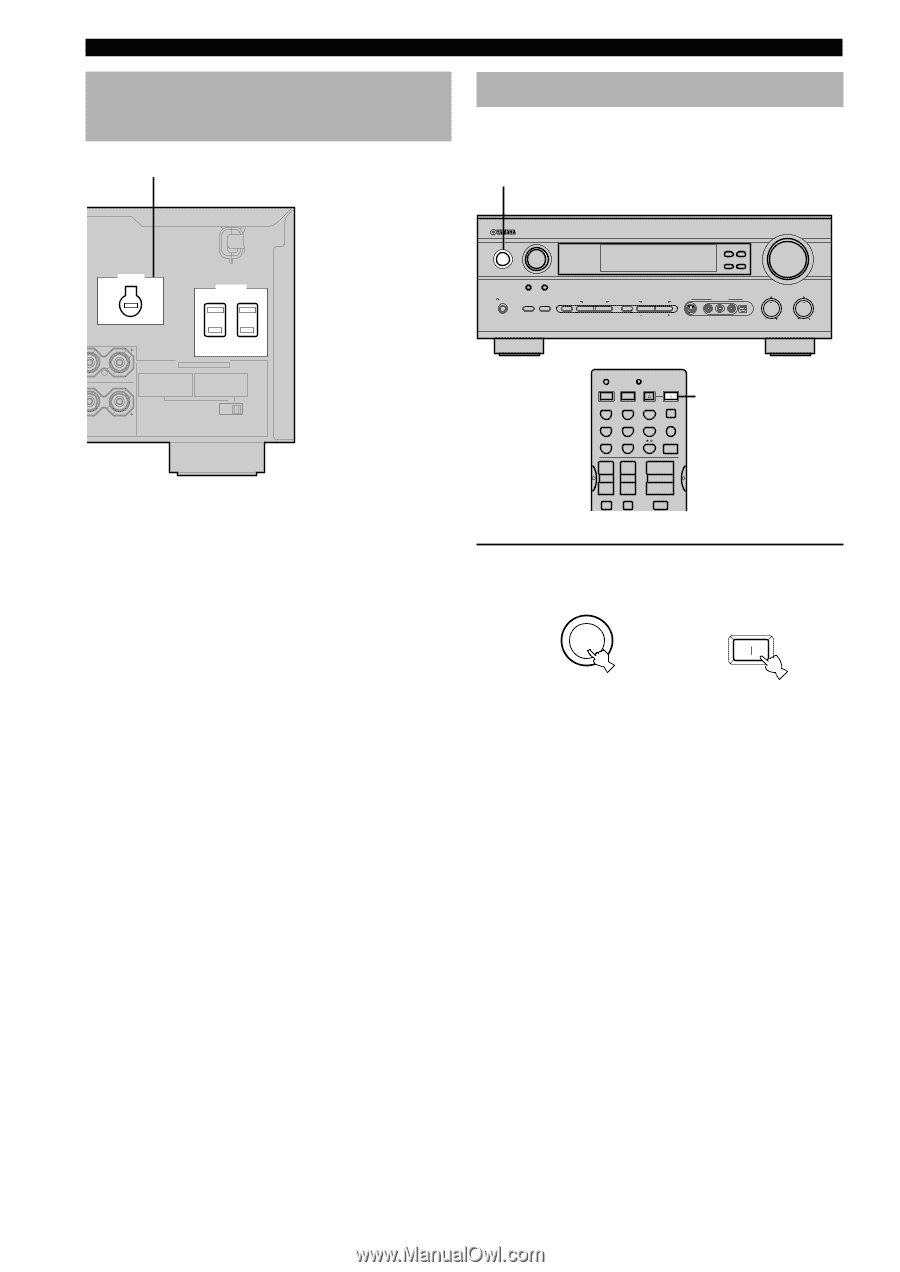
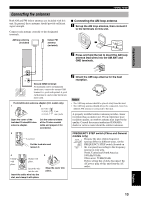
CONNECTIONS Connecting the power supply cords VOLTAGE SELECTOR Turning on the power When all connections are complete, turn on the power of this unit. 1 VOLTAGE SELECTOR AC OUTLETS SWITCHED STANDBY /ON INPUT INPUT MODE 6CH INPUT SILENT PHONES SPEAKERS A B STEREO EFFECT PROGRAM A/B/C/D/E PRESET/TUNING NEXT SET MENU PRESET/TUNING FM/AM EDIT TUNING MODE MEMORY AUTO/MANUAL MONO MAN`L/AUTO FM VOLUME VIDEO AUX S VIDEO VIDEO L AUDIO R OPTICAL BASS TREBLE L REAR CENTER IMPEDANCE SELECTOR SET BEFORE POWER ON MAIN A OR B : 4ΩMIN. /SPEAKER A+B : 8ΩMIN. /SPEAKER CENTER : 6ΩMIN. /SPEAKER REAR CENTER: 6ΩMIN. /SPEAKER REAR : 6ΩMIN. /SPEAKER MAIN A OR B : 8ΩMIN. /SPEAKER A+B : 16ΩMIN. /SPEAKER CENTER : 8ΩMIN. /SPEAKER REAR CENTER: 8ΩMIN. /SPEAKER REAR : 8ΩMIN. /SPEAKER (General model) I Connecting the AC power cord Plug in this unit to a wall outlet. I AC OUTLETS (SWITCHED) U.S.A., Canada, China, Europe, Singapore and General models 2 OUTLETS U.K. and Australia model 1 OUTLET Use these outlets to connect the power cords from your components to this unit. The power to the AC OUTLETS is controlled by this unit's STANDBY/ON (or SYSTEM POWER and STANDBY). These outlets will supply power to any source component connected to this unit whenever this unit is turned on. The maximum power (total power consumption of components) that can be connected to the AC OUTLETS varies depending on the area which it was purchasing. China and General models 50 W Other models 100 W I VOLTAGE SELECTOR (China and General models only) The VOLTAGE SELECTOR on the rear panel of this unit must be set for your local main voltage BEFORE plugging into the AC main supply. Voltages are 110/120/ 220/240 V AC, 50/60 Hz. CODE SET TRANSMIT POWER TV POWER AV STANDBY SYSTEM POWER CD MD/CD-R TUNER SLEEP DVD D-TV/CBL V-AUX 6CH INPUT VCR 1 VCR2/DVR AMP 1 + TV VOL - TV MUTE + TV CH - TV INPUT + VOLUME - MUTE 1 Press STANDBY/ON (SYSTEM POWER on the remote control) to turn on the power of this unit. STANDBY /ON or SYSTEM POWER Front panel Remote control The level of the main volume, and then the current DSP program name appear on the front panel display. 18
-
 1
1 -
2
-
3
-
4
-
5
-
6
-
7
-
8
-
9
-
10
-
11
-
12
-
13
-
14
-
15
-
16
-
 17
17 -
 18
18 -
 19
19 -
 20
20 -
 21
21 -
 22
22 -
 23
23 -
 24
24 -
 25
25 -
 26
26 -
 27
27 -
28
-
29
-
30
-
31
-
32
-
33
-
34
-
35
-
36
-
37
-
38
-
39
-
40
-
41
-
42
-
43
-
44
-
45
-
46
-
47
-
48
-
49
-
50
-
51
-
52
-
53
-
54
-
55
-
56
-
57
-
58
-
59
-
60
-
61
-
62
-
63
-
64
-
65
-
66
-
67
-
68
 |
 |