Yamaha MLC-200 MLC-200 Installation Guide - Page 14
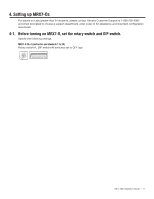
Check that Succeed appears, and then click the Apply button.
 |
View all Yamaha MLC-200 manuals
Add to My Manuals
Save this manual to your list of manuals |
Page 14 highlights
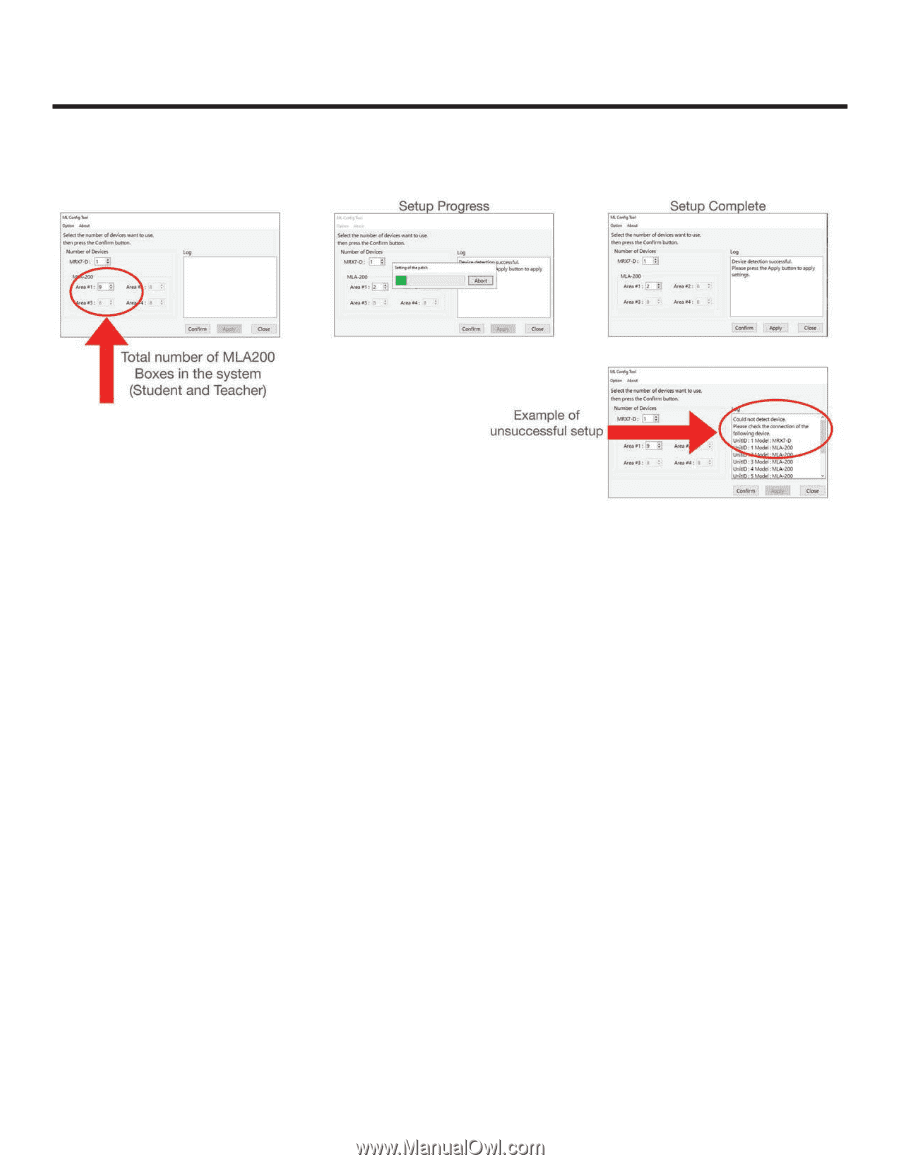
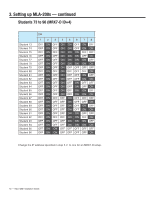
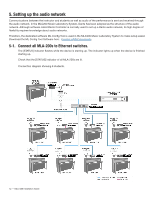
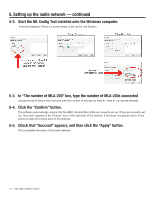
5. Setting up the audio network - continued 5-2. Start the ML Config Tool installed onto the Windows computer. A window appears. Follow on screen steps to set up the Lab System. 5-3. In "The number of MLA-200" box, type the number of MLA-200s connected Include the MLA-200 for the instructor with the number of devices for Area #1. Area #1 can be set between 5-4. Click the "Confirm" button. The software automatically checks that the MRX7-Ds and MLA-200s are correctly set up. If they are correctly set up, "Succeed" appears in the "Output" box on the right side of the window. If this does not appear, return to the previous steps and check each of the settings. 5-5. Check that "Succeed" appears, and then click the "Apply" button. This completes the setup of the audio network. 14 - MLC-200 Installation Guide
-
 1
1 -
2
-
3
-
4
-
5
-
6
-
7
-
8
-
 9
9 -
 10
10 -
 11
11 -
 12
12 -
 13
13 -
 14
14 -
 15
15 -
 16
16 -
 17
17 -
 18
18 -
 19
19 -
20
-
21
-
22
-
23
-
24
 |
 |