Yamaha MLC-200 MLC-200 Installation Guide - Page 5
Trial setup, Setting up the wireless access point DHCP server
 |
View all Yamaha MLC-200 manuals
Add to My Manuals
Save this manual to your list of manuals |
Page 5 highlights
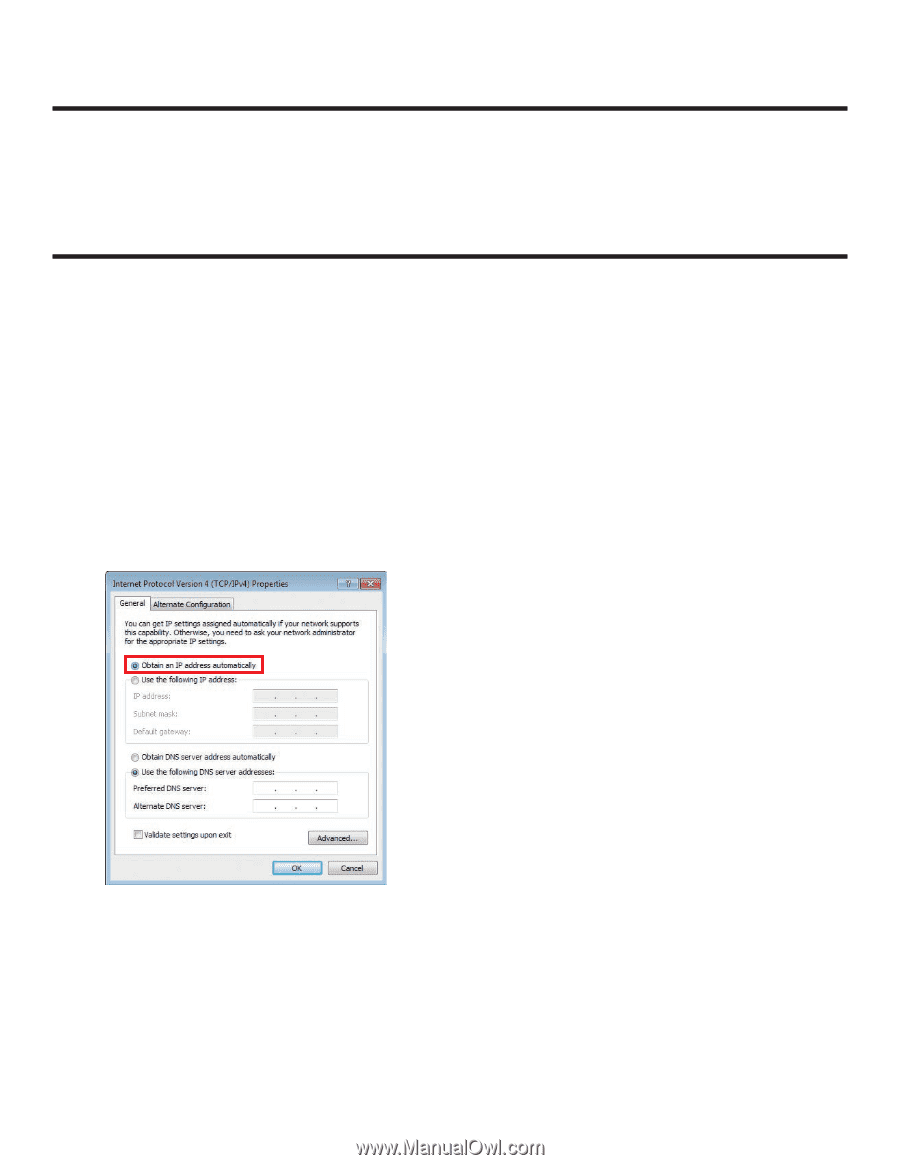
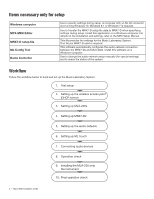
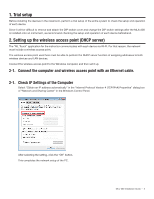
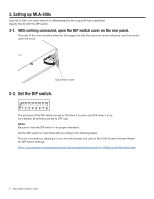
1. Trial setup Before installing the devices in the classroom, perform a trial setup of the entire system to check the setup and operation of each device. Since it will be difficult to remove and attach the DIP switch cover and change the DIP switch settings after the MLA-200 is installed onto an instrument, we recommend checking the setup and operation of each device beforehand. 2. Setting up the wireless access point (DHCP server) The "ML Touch" application for the instructor communicates with each device via Wi-Fi. For that reason, the network must include a wireless access point. The wireless access point used here must be able to perform the DHCP server function of assigning addresses to both wireless devices and LAN devices. Connect the wireless access point to the Windows computer, and then set it up. 2-1. Connect the computer and wireless access point with an Ethernet cable. 2-1. Check IP Settings of the Computer Select "Obtain an IP address automatically" in the "Internet Protocol Version 4 (TCP/IPv4) Properties" dialog box of "Network and Sharing Center" in the Windows Control Panel. After selecting the setting, click the "OK" button. This completes the network setup of the PC. MLC-200 Installation Guide - 5
-
 1
1 -
 2
2 -
 3
3 -
 4
4 -
 5
5 -
 6
6 -
 7
7 -
 8
8 -
 9
9 -
 10
10 -
 11
11 -
12
-
13
-
14
-
15
-
16
-
17
-
18
-
19
-
20
-
21
-
22
-
23
-
24
 |
 |