Yamaha MOXF8 Reference Manual - Page 97
Supplementary Information, Song Playback Types, Song Mode, Playback from the middle of the Song
 |
View all Yamaha MOXF8 manuals
Add to My Manuals
Save this manual to your list of manuals |
Page 97 highlights
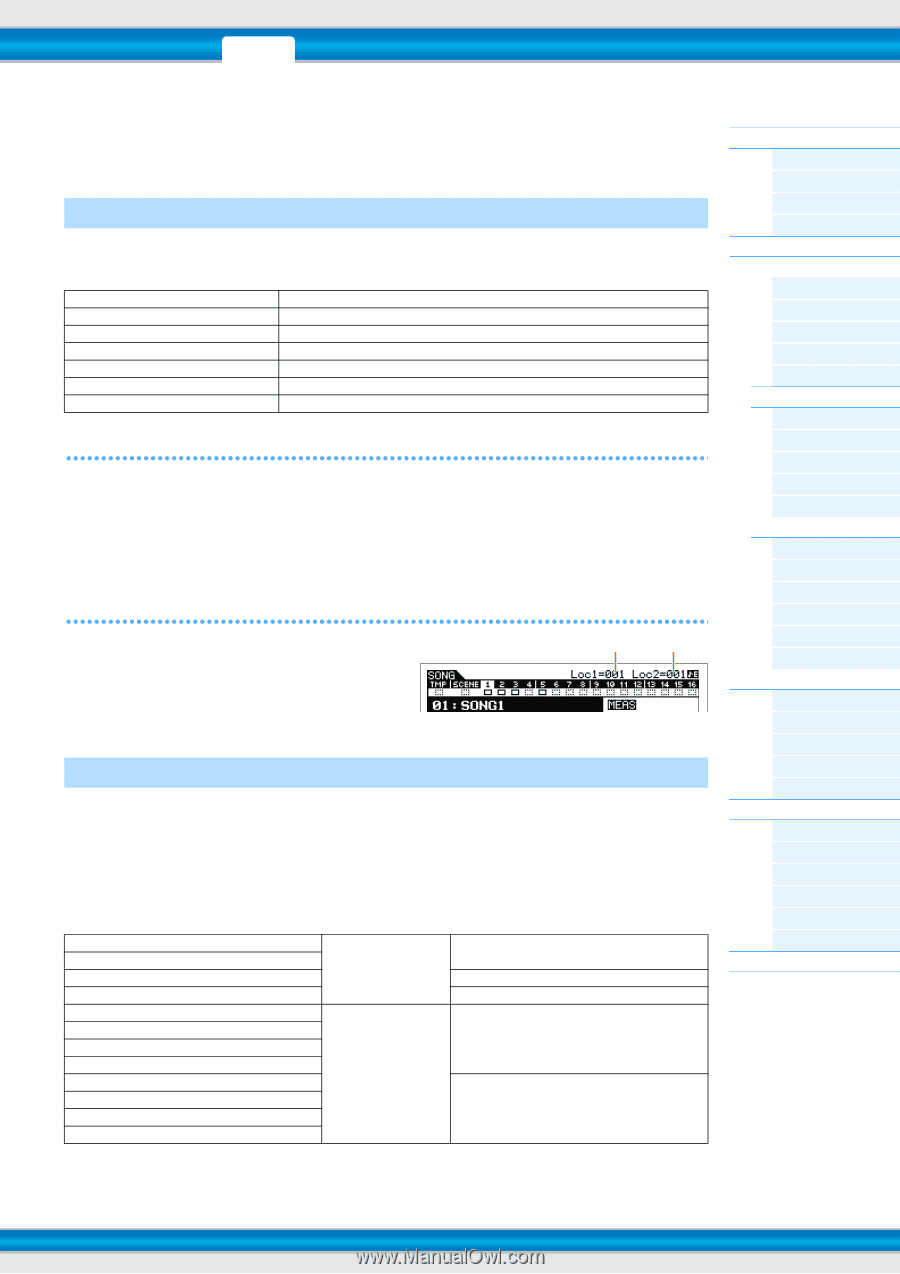
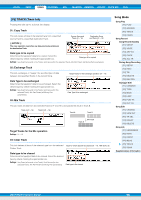
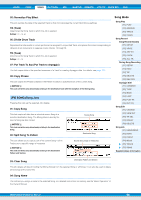
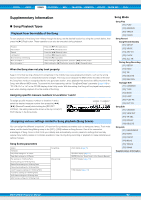
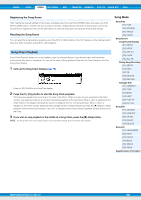
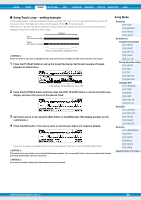
VOICE PERF SONG PATTERN MIX MASTER REMOTE UTILITY QUICK SET FILE Supplementary Information Song Playback Types Playback from the middle of the Song To start playback of the Song from midway through the Song, set the desired location by using the controls below, then press the [3] (Play) button. These operations can also be executed during playback. Forward Fast forward Rewind Fast Rewind Move to the top of the Song Move to location 1 Move to location 2 Press the [33] (Forward) button. Hold the [33] (Forward) button. Press the [--] (Rewind) button. Hold the [--] (Rewind) button. Press the [5] (Top) button. While holding the [5] (Top) button, press the [--] (Rewind) button. While holding the [5] (Top) button, press the [33] (Forward) button. When the Song does not play back properly: Keep in mind that starting a Song from somewhere in the middle may cause playback problems, such as the wrong sound, incorrect pitch or unexpected volume changes. This may occur because the MIDI events recorded at the start the Song have not been recognized by the tone generator section, since playback has started at a different point in the Song, with different MIDI events. To prevent this from happening, set the "SongEventChase" parameter (page 144) to "PC+PB+Ctrl" or "all" in the OTHER display of the Utility mode. With this setting, the Song will be played back properly even when starting playback from the middle of the Song. Assigning specific measure numbers to Locations 1 and 2 To assign specific measure numbers to locations 1 and 2, select the desired measure number then press the [--]/ [33] (Rewind/Forward) while holding the [REC/SET LOCATE]. The setting here will be shown at the top of the [F1] PLAY display in the Song mode. Location 1 Location 2 Assigning various settings related to Song playback (Song Scene) You can assign five different "snapshots" of important Song-related parameters such as transpose, tempo, Track mute status, and the basic Song Mixing setup to the [SF1] - [SF6] buttons as Song Scenes. One of the convenient advantages of Song. Scene is that it lets you instantly and automatically execute parameter settings that normally require many button presses or controller operations. Use it during Song recording or playback to make instantaneous setting changes. Song Scene parameters Tempo Transpose Play Effect settings for 16 Tracks Track Mute settings for 16 Tracks Pan settings for 16 Mixing Parts Volume settings for 16 Mixing Parts Reverb Send settings for 16 Mixing Parts Chorus Send settings for 16 Mixing Parts Cutoff Frequency settings for 16 Mixing Parts Resonance settings for 16 Mixing Parts AEG Attack settings for 16 Mixing Parts AEG Release settings for 16 Mixing Parts Song Mode Mixing mode PLAY display (page 76) GROOVE display (page 77) [MUTE] (See the "Quick Guide" of the Owner's Manual) OUTPUT display (page 118) TONE display (page 118) Song Mode Song Play [F1] PLAY [F2] GROOVE [F3] TRACK [F6] CHAIN Song Record Song Record Standby [F1] SETUP [F2] VOICE [F3] ARP ED [F5] CLICK [F6] ALL TR During Song Recording [F1] SETUP [F3] REST [F4] TIE [F5] DELETE [F6] BAK DEL Arpeggio Edit [F1] COMMON [F2] TYPE [F3] MAIN [F4] LIMIT [F5] PLAY FX [F6] OUT CH Song Edit [F1] CHANGE [F2] VIEW FLT [F4] TR SEL [F5] INSERT [F6] DELETE Song Job [F1] UNDO/REDO [F2] NOTE [F3] EVENT [F4] MEAS [F5] TRACK [F6] SONG Supplementary Information MOXF6/MOXF8 Reference Manual 97
-
 1
1 -
2
-
3
-
4
-
5
-
6
-
7
-
8
-
9
-
10
-
11
-
12
-
13
-
14
-
15
-
16
-
17
-
18
-
19
-
20
-
21
-
22
-
23
-
24
-
25
-
26
-
27
-
28
-
29
-
30
-
31
-
32
-
33
-
34
-
35
-
36
-
37
-
38
-
39
-
40
-
41
-
42
-
43
-
44
-
45
-
46
-
47
-
48
-
49
-
50
-
51
-
52
-
53
-
54
-
55
-
56
-
57
-
58
-
59
-
60
-
61
-
62
-
63
-
64
-
65
-
66
-
67
-
68
-
69
-
70
-
71
-
72
-
73
-
74
-
75
-
76
-
77
-
78
-
79
-
80
-
81
-
82
-
83
-
84
-
85
-
86
-
87
-
88
-
89
-
90
-
91
-
 92
92 -
 93
93 -
 94
94 -
 95
95 -
 96
96 -
 97
97 -
 98
98 -
 99
99 -
 100
100 -
 101
101 -
 102
102 -
103
-
104
-
105
-
106
-
107
-
108
-
109
-
110
-
111
-
112
-
113
-
114
-
115
-
116
-
117
-
118
-
119
-
120
-
121
-
122
-
123
-
124
-
125
-
126
-
127
-
128
-
129
-
130
-
131
-
132
-
133
-
134
-
135
-
136
-
137
-
138
-
139
-
140
-
141
-
142
-
143
-
144
-
145
-
146
-
147
-
148
-
149
-
150
-
151
-
152
-
153
-
154
-
155
-
156
-
157
-
158
-
159
-
160
-
161
-
162
-
163
 |
 |