Yamaha PSR-5700 Owner's Manual (getting Started) - Page 33
The PERC Mode
 |
View all Yamaha PSR-5700 manuals
Add to My Manuals
Save this manual to your list of manuals |
Page 33 highlights
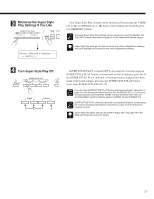
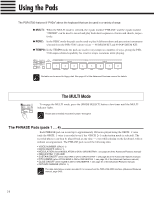
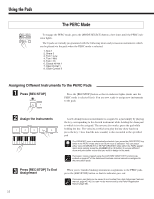
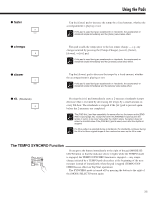
Using the Pads MULTI REPEAT PERC. BREAK TEMPO SYNCHRO MODE SELECT The PERC Mode To engage the PERC mode, press the [MODE SELECT] button a few times until the PERC indicator lights. The 8 pads are initially programmed with the following drum and percussion instruments which can be played via the pads when the PERC mode is selected: 1. Kick 1 2. Snare 3 3. Tom 1 Low 4. Tom 1 Mid 5. Tom 1 Hi 6. Closed Hi-Hat 1 7. Open Hi-Hat 1 8. Clash Cymbal 2 Assigning Different Instruments To the PERC Pads Z Press [REC/STOP] REC/STOP 1 Tempo Ch Press the [REC/STOP] button so that its indicator lights (make sure the PERC mode is selected first). You are now ready to assign new instruments to the pads. X Assign the Instruments A new drum/percussion instrument is assigned to a pad simply by playing the key corresponding to the desired instrument while holding the drum pad PHRASE to which it is to be assigned. The reverse also works: press the pad while 1 Tempo Change 2 Tap Start 3 Tempo l 4 accel. holding the key. The velocity at which you play the key (how hard you 5 press the key = how loud the note sounds) is also recorded to the specified faster a pad. The DRUM KIT voice is automatically selected if you press the [REC/STOP] key while in the PERC mode and a non-drum voice is selected. You can select HINT either voice 98 DRUM KIT or 99 POP DRUM KIT while still in the PERC assignment mode (simply press the NUMBER [8] or [9] button) to access different drum and percussion voices that you want to assign to the pads. Percussion voices created using the CUSTOM VOICE EDIT functions described on page 27 of the Advanced Features manual cannot be assigned to DETAIL the percussion pads. C Press [REC/STOP] To End Assignment 32 When you're finished making instrument assignments to the PERC pads, press the [REC/STOP] button so that its indicator goes out. Percussion pad data can be saved to and loaded from disk (Advanced Features manual, page 45, 46), but can not be memorized by the Panel Registration DETAIL feature (page 38).
-
 1
1 -
2
-
3
-
4
-
5
-
6
-
7
-
8
-
9
-
10
-
11
-
12
-
13
-
14
-
15
-
16
-
17
-
18
-
19
-
20
-
21
-
22
-
23
-
24
-
25
-
26
-
27
-
 28
28 -
 29
29 -
 30
30 -
 31
31 -
 32
32 -
 33
33 -
 34
34 -
 35
35 -
 36
36 -
 37
37 -
 38
38 -
39
-
40
-
41
-
42
-
43
-
44
-
45
-
46
-
47
-
48
-
49
-
50
-
51
-
52
-
53
-
54
-
55
-
56
 |
 |
