Yamaha RX-V363 Owner's Manual - Page 44
Using iPod™, Controls and functions for iPod™ - troubleshooting
 |
UPC - 027108929781
View all Yamaha RX-V363 manuals
Add to My Manuals
Save this manual to your list of manuals |
Page 44 highlights
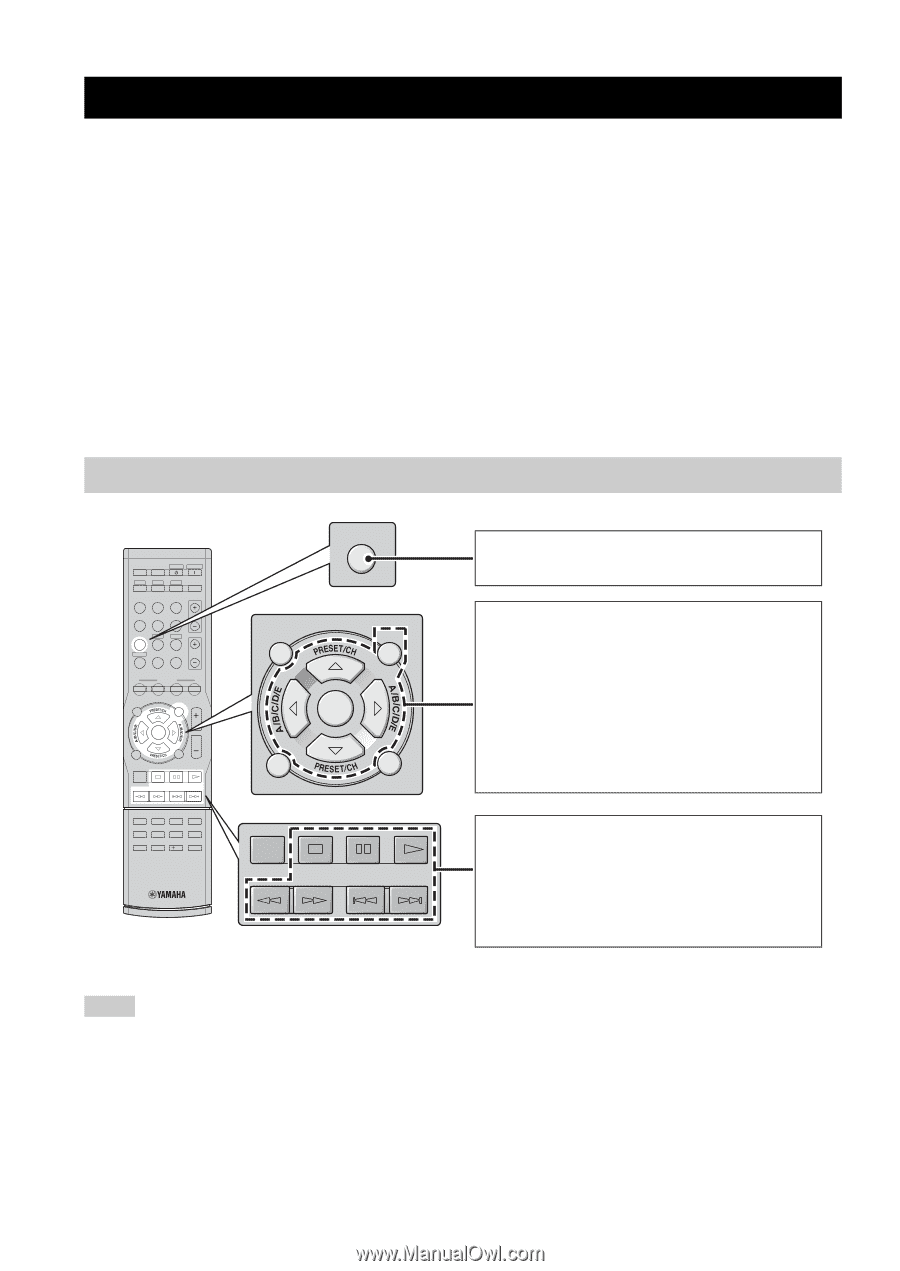
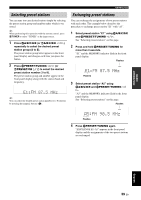
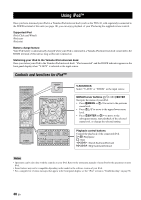
USING IPOD™ Using iPod™ Once you have stationed your iPod in a Yamaha iPod universal dock (such as the YDS-10, sold separately) connected to the DOCK terminal of this unit (see page 18), you can enjoy playback of your iPod using the supplied remote control. Supported iPod iPod (Click and Wheel) iPod nano iPod mini Battery charge feature Your iPod battery is automatically charged when your iPod is stationed in a Yamaha iPod universal dock connected to the DOCK terminal of this unit as long as this unit is turned on. Stationing your iPod to the Yamaha iPod universal dock Once you station your iPod to the Yamaha iPod universal dock, "iPod connected" and the DOCK indicator appears in the front panel display when "V-AUX" is selected as the input source. Controls and functions for iPod™ POWER POWER STANDBY POWER TV AV A B C MUTE CD MD/CD-R TUNER DVD DTV/CBL DVR TV CH V-AUX/DOCK D E AMP TV INPUT TV MUTE TV VOL SCENE 1 2 3 4 BAND LEVEL TITLE MENU VOLUME ENTER RETURN REC DISPLAY l PROG h 1 2 ENHANCER SUR. DECODE 3 4 STRAIGHT NIGHT 5 6 7 8 MULTI CH IN AUDIO SEL 9 0 SLEEP 10 ENT V-AUX/DOCK BAND LEVEL TITLE MENU ENTER RETURN REC DISPLAY V-AUX/DOCK Select "V-AUX" or "DOCK" as the input source. MENU/Cursor buttons (k/n/l/h)/ENTER Navigate the menu of your iPod. • Press HMENU or 7l to move to the previous menu level. • Press 7k/n to move to the upper/lower menu level. • Press 7ENTER or 7h to move to the subsequent menu, start playback of the selected menu level, or change the selected setting. Playback control buttons Control the playback of the connected iPod. p/e: Play/pause s: Stop w/f: Search backward/forward b/a: Skip backward/forward Notes • Operations can be also done with the controls on your iPod. Refer to the instruction manuals of your iPod for the operations on your iPod. • Some features may not be compatible depending on the model or the software version of your iPod. • For a complete list of status messages that appear in the front panel display, see the "iPod" section in "Troubleshooting" on page 58. 40 En
-
 1
1 -
2
-
3
-
4
-
5
-
6
-
7
-
8
-
9
-
10
-
11
-
12
-
13
-
14
-
15
-
16
-
17
-
18
-
19
-
20
-
21
-
22
-
23
-
24
-
25
-
26
-
27
-
28
-
29
-
30
-
31
-
32
-
33
-
34
-
35
-
36
-
37
-
38
-
 39
39 -
 40
40 -
 41
41 -
 42
42 -
 43
43 -
 44
44 -
 45
45 -
 46
46 -
 47
47 -
 48
48 -
 49
49 -
50
-
51
-
52
-
53
-
54
-
55
-
56
-
57
-
58
-
59
-
60
-
61
-
62
-
63
-
64
-
65
-
66
-
67
-
68
-
69
-
70
-
71
-
72
-
73
-
74
-
75
-
76
-
77
-
78
 |
 |