Yamaha RX-V363 Owner's Manual - Page 48
Using set menu, BASIC SETUP, MANUAL SETUP, SOUND MENU
 |
UPC - 027108929781
View all Yamaha RX-V363 manuals
Add to My Manuals
Save this manual to your list of manuals |
Page 48 highlights
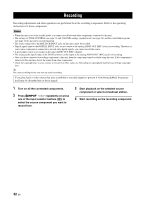
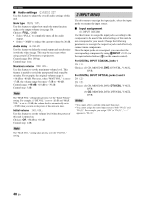
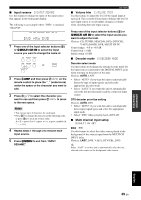
Set menu Option menu 3 OPTION MENU Use this menu to manually adjust the optional system parameters. Parameter A)DISPLAY SET B)MEMORY GUARD C)AUDIO SELECT D)PARAM. INI E)BLUETOOTH Features Adjusts the brightness of the front panel display. Locks sound field program parameters and other set menu settings. Designates the default audio input jack select setting mode for the input sources connected to the DIGITAL INPUT jacks when you turn on the power of this unit. Sets all the parameters of the sound field programs to the initial factory settings. Pairs the connected Yamaha Bluetooth adapter (such as YBA-10, sold separately) with a Bluetooth component (see page 41). Page 50 50 50 50 50 ■ Signal information SIGNAL INFO Use this feature to check audio signal information (see page 32). Using set menu Use the remote control to access and adjust each parameter. y You can change the set menu parameters while this unit is reproducing sound. 1 Press 4AMP and then press HMENU on the remote control. "BASIC SETUP" appears in the front panel display. .BASIC SETUP 4 Press 7k / n repeatedly and then press 7ENTER to select and enter the desired menu. The following menus appear in the front panel display as you press 7k / n repeatedly. 1 SOUND MENU 2 INPUT MENU 3 OPTION MENU 2 Press 7 k / n to select "MANUAL SETUP". .MANUAL SETUP 3 Press 7ENTER to enter "MANUAL SETUP". "1 SOUND MENU" appears in the front panel display. 1 SOUND MENU 5 Press 7k / n repeatedly and then press 7ENTER to select and enter the desired submenu. • Repeat this step to navigate to and enter the items you want to adjust. • To return to the previous menu level, press 8 RETURN. 6 Press 7k / n to select the desired parameter and then 7l / h to change the parameter value. • Press 7h to increase the value. • Press 7l to decrease the value. 7 Press HMENU to exit from set menu. 44 En
-
 1
1 -
2
-
3
-
4
-
5
-
6
-
7
-
8
-
9
-
10
-
11
-
12
-
13
-
14
-
15
-
16
-
17
-
18
-
19
-
20
-
21
-
22
-
23
-
24
-
25
-
26
-
27
-
28
-
29
-
30
-
31
-
32
-
33
-
34
-
35
-
36
-
37
-
38
-
39
-
40
-
41
-
42
-
 43
43 -
 44
44 -
 45
45 -
 46
46 -
 47
47 -
 48
48 -
 49
49 -
 50
50 -
 51
51 -
 52
52 -
 53
53 -
54
-
55
-
56
-
57
-
58
-
59
-
60
-
61
-
62
-
63
-
64
-
65
-
66
-
67
-
68
-
69
-
70
-
71
-
72
-
73
-
74
-
75
-
76
-
77
-
78
 |
 |