Yamaha SY85 Owner's Manual (getting Started) (image) - Page 20
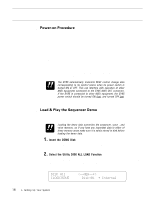
Power-on Procedure, Load & Play the Sequencer Demo - disk drive
 |
View all Yamaha SY85 manuals
Add to My Manuals
Save this manual to your list of manuals |
Page 20 highlights
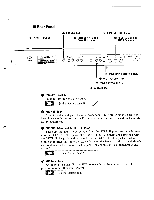
s Power-on Procedure Believe it or not, there's actually a "right" way to turn on a sound system that will minimize the possibility of damage to the equipment (and your ears!). 1. Make sure your sound system's volume control and the SY85 volume controls are turned all the way down prior to turning power on. 2. Turn on the SY85. 3. Turn on the sound system. 4. Raise the sound system volume to a reasonable level. 5. Gradually raise the SY85 OUTPUT1 and OUTPUT2 controls while playing the keyboard to set the desired listening level. IMPORTANT The SY85 automatically transmits MIDI control change data corresponding to its control status when its power switch is turned ON or OFF. This can interfere with operation of other MIDI equipment connected to the SY85 MIDI OUT connector. If the SY85 is connected to other MIDI equipment, the SY85 power switch should be turned ON first, and turned OFF last. s Load & Play the Sequencer Demo Once you've set up your SY85 system, you might like to load and play the demo sequence provided on the "DEMO" disk. IMPORTANT Loading the demo data overwrites the sequencer, wave , and voice memory, so if you have any important data in either of these memory areas make sure it is safely stored to disk before loading the demo data. 1. Insert the DEMO Disk Insert the DEMO disk into the disk drive. The sliding disk shutter should go in first, and the label side of the disk should face upward. 2. Select the Utility DISK ALL LOAD Function Press the [UTILITY] button so that its indicator lights, then press the SUB MODE [DISK] key (the lowest SUB MODE key). A display with the word "DISK" in the upper left corner should appear. DISK`All```````
-
 1
1 -
2
-
3
-
4
-
5
-
6
-
7
-
8
-
9
-
10
-
11
-
12
-
13
-
14
-
 15
15 -
 16
16 -
 17
17 -
 18
18 -
 19
19 -
 20
20 -
 21
21 -
 22
22 -
 23
23 -
 24
24 -
 25
25 -
26
-
27
-
28
-
29
-
30
-
31
-
32
-
33
-
34
-
35
-
36
-
37
-
38
-
39
-
40
-
41
-
42
-
43
-
44
-
45
-
46
-
47
-
48
-
49
-
50
-
51
-
52
-
53
-
54
-
55
-
56
-
57
-
58
-
59
-
60
-
61
-
62
-
63
-
64
-
65
-
66
-
67
-
68
-
69
-
70
-
71
 |
 |