Yamaha YDP-101 Owner's Manual - Page 22
Start Recording, Stop Recording, Erasing a Single Track, Changing the Initial Settings - ydp101s
 |
View all Yamaha YDP-101 manuals
Add to My Manuals
Save this manual to your list of manuals |
Page 22 highlights
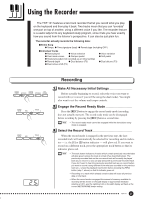
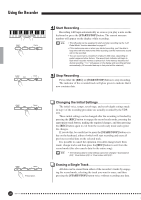
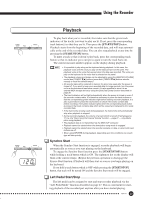
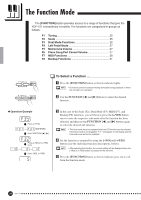
Using the Recorder START/ STOP REC TRACK 1 2 START/ STOP REC TRACK 1 2 START/ STOP REC TRACK 1 2 START/ STOP REC TRACK 1 2 Press twice. Start Recording Recording will begin automatically as soon as you play a note on the keyboard or press the [START/STOP] button. The current measure number will appear on the display while recording. • The left pedal can be assigned to start and stop recording via the "Left Pedal Mode" function described on page 27. • If the metronome was on when you started recording, you'll be able to keep time with the metronome while recording, but the metronome sound will not be recorded. • You can record up to a maximum of about 5,000 notes, depending on pedal usage and other factors. The record track indicator will begin to flash when recorder memory is almost full. If the memory becomes full during recording, " FUL" will appear on the display and recording will stop automatically. (All recorded data up to that point will be retained.) Stop Recording Press either the [REC] or [START/STOP] button to stop recording. The indicator of the recorded track will glow green to indicate that it now contains data. Changing the Initial Settings The initial voice, tempo, reverb type, and reverb depth settings made in step 1 of the recording procedure are actually recorded by the YDP101. These initial settings can be changed after the recording is finished by pressing the [REC] button to engage the record ready mode, pressing the appropriate track button, making the required changes, and then pressing the [REC] button again to exit from the record ready mode and register the changes. If you do this, be careful not to press the [START/STOP] button or a key on the keyboard, either of which will start recording and erase all previous recorded data on the selected track. It is possible to cancel the operation even after changes have been made: change tracks and then press the [REC] button to exit from the record mode (this also cancels data for the entire song). • The following data for initial settings cannot be changed: "Dual balance (F3)", "Dual detune (F3)" or "Dual octave shift (F3)". Erasing a Single Track All data can be erased from either of the recorder's tracks by engaging the record mode, selecting the track you want to erase, and then pressing the [START/STOP] button twice without recording any data. 22 YDP-101 20
-
 1
1 -
2
-
3
-
4
-
5
-
6
-
7
-
8
-
9
-
10
-
11
-
12
-
13
-
14
-
15
-
16
-
 17
17 -
 18
18 -
 19
19 -
 20
20 -
 21
21 -
 22
22 -
 23
23 -
 24
24 -
 25
25 -
 26
26 -
 27
27 -
28
-
29
-
30
-
31
-
32
-
33
-
34
-
35
-
36
-
37
-
38
-
39
-
40
-
41
-
42
-
43
-
44
-
45
-
46
-
47
-
48
 |
 |
