Zanussi ZBG26542XA Product Manaul - Page 8
Appliance Overview & Before First Use
 |
View all Zanussi ZBG26542XA manuals
Add to My Manuals
Save this manual to your list of manuals |
Page 8 highlights
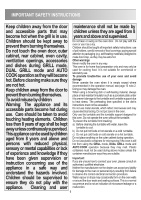
APPLIANCE OVERVIEW & BEFORE FIRST USE CONTROL PANEL 1. DIGITAL DISPLAY indicators Grill Plus/Minus 1 Microwave Auto defrost bread 2 Dual Auto defrost 3 4 Clock Weight 5 6 Cooking stages 7 2. AUTO COOK indicators 3. AUTO COOK button 4. AUTO DEFROST button 8 5. POWER LEVEL button 9 6. GRILL button 7. TIMER/WEIGHT knob 8. START/+30 button 10 9. STOP button 10. DOOR OPENING button BEFORE FIRST USE SETTING THE CLOCK The oven has a 12 and 24 hour clock. Example: To set the clock to 11:30 (12 hour clock). 1. Plug in the oven. 2. The display will show: 3. Rotate the TIMER/WEIGHT knob to adjust the hour. 4. Press the START/+30 button once then rotate the TIMER/WEIGHT knob to adjust the minutes. 5. Press the START/+30 button. 6. Check the display: Important: 1. You can rotate the TIMER/WEIGHT knob clockwise or anti-clockwise. 2. If you press the STOP button the time will be automatically set to: Example: To set the clock to 23:30 (24 hour clock). 1. Plug in the oven. 2. The display will show: 3. Press the START/+30 button. The display will show: 4. Rotate the TIMER/WEIGHT knob to adjust the hour. 5. Press the START/+30 button once then rotate the TIMER/WEIGHT knob to adjust the minutes. 6. Press the START/+30 button. 7. Check the display: Important: 1. You can rotate the TIMER/WEIGHT knob clockwise or anti-clockwise. 2. If you press the STOP button the time will be automatically set to: 8
-
 1
1 -
2
-
 3
3 -
 4
4 -
 5
5 -
 6
6 -
 7
7 -
 8
8 -
 9
9 -
 10
10 -
 11
11 -
 12
12 -
 13
13 -
14
-
15
-
16
-
17
-
18
-
19
-
20
-
21
-
22
-
23
-
24
-
25
-
26
-
27
-
28
-
29
-
30
-
31
-
32
-
33
-
34
-
35
-
36
 |
 |
